
Planting
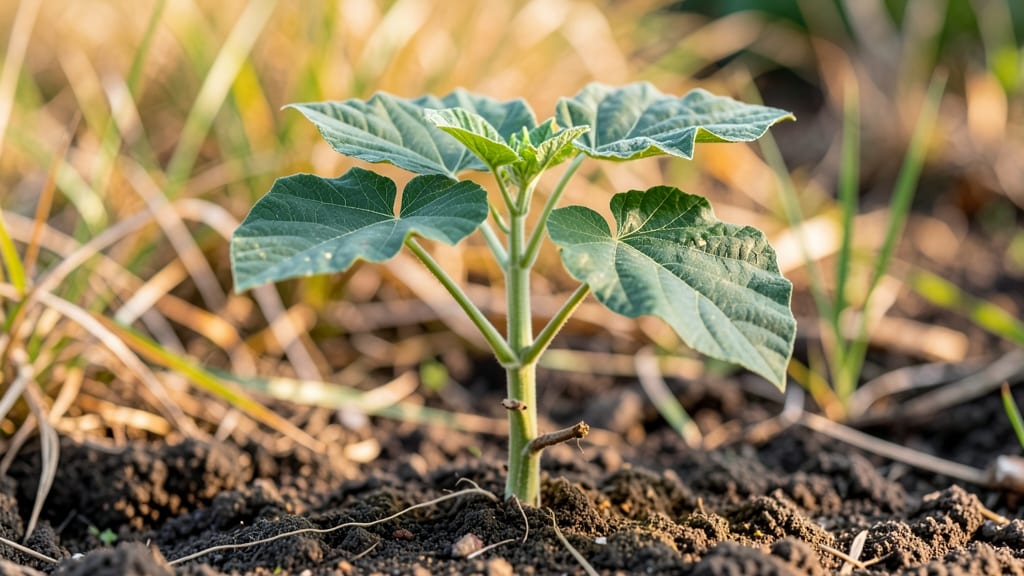
Your 1-week-old okra plant is at the make-or-break stage—this is where strong starts happen or seedlings flop. 🌱 I’ve watched dozens of these little green sticks turn into towering producers (or sad, leggy casualties), and the difference always comes down to three things: light, water, and confidence.
Right now, your seedling needs bright, direct light (at least 6-8 hours daily) to prevent that classic "stretched-out" look. Water just enough to keep the soil damp—not soggy—because okra hates wet feet.
If you spot yellowing leaves or black stems, you’re either overwatering or dealing with damping-off fungus, and both can be fixed with better airflow. Next up: transplanting prep. Wait until your seedling has 2-3 true leaves and nights stay above 55°F.
Harden it off for 3-5 days by moving it outside during the day, then back in at night. The goal is a plant that’s bold and sturdy, not a floppy twig waiting to snap. Once planted, give it space—okra needs 18-24 inches between plants to stretch its legs.
A light fertilizer (like 5-5-5) at transplant time gives it a boost, but don’t overdo it. Now’s the time to set it up for 6-foot-tall success—not a sad little bush.
📚 In This Guide
- What you need
- Instructions
- Tips and common mistakes
- Wrapping up and next steps
What you need
- ● Okra seeds or seedlings: 1 healthy, 1-week-old seedling (ensure it’s sturdy with 2-3 true leaves).
- ● Transplanting pot or garden bed: Option 1: 6-inch diameter biodegradable pots (2-3 for multiple seedlings).
- ● Option 2: Outdoor garden bed (6+ inches deep, well-draining soil).
- ● High-quality potting mix: 2-3 gallons of well-draining, nutrient-rich soil (e.g., 60% garden soil + 30% compost + 10% perlite).
- ● Fertilizer: Required: Balanced liquid fertilizer (10-10-10 NPK, diluted to half-strength).
- ○ Optional: Slow-release granular fertilizer (e.g., 5 lbs for 10 sq ft of bed).
- ● Watering can or hose: With a gentle spray nozzle (to avoid damaging delicate roots).
- ● Pruning shears or small knife: For trimming any damaged leaves or roots.
- ○ Mulch (optional but recommended): 1-2 inches of straw or shredded leaves to retain moisture.
- ● Weather check: Transplant on a cloudy day or evening to avoid stress from direct sun.
- ● Soil temperature: Ensure soil is at least 60°F (15°C)—okra hates cold!
- ● Sunlight access: Confirm your location gets 6+ hours of full sun daily.
- ● Drainage test: If using pots, ensure they have drainage holes to prevent root rot.
Key transplanting tips for your 1-Week-old okra plant
Your okra seedlings are now ready to transition from seed trays to permanent homes. Here's how to ensure they thrive after transplanting.
🪴 Step 1: Prepare the Transplant Site
Choose a location with full sun exposure—okra demands at least 8 hours of direct sunlight daily. Work the soil to a depth of 12 inches, removing any rocks or debris that could impede root growth. Okra prefers well-draining soil with a pH between 6.0 and 6.8, so amend with compost if your soil feels heavy or compacted.
Dig individual holes slightly larger than the root ball of each seedling—about 3 inches wider and 2 inches deeper than the current container. Space holes 18-24 inches apart in rows, with 3 feet between rows to allow for robust growth. The extra space prevents overcrowding, which leads to weak stems and poor yields.
💧 Step 2: Acclimate Seedlings Before Transplanting
Start hardening off your okra seedlings 3-5 days before transplanting by placing them outside in a sheltered spot for 1-2 hours daily. Gradually increase their outdoor time over the week, exposing them to direct sunlight and wind. You'll notice the seedlings develop a deeper green color and thicker stems as they adapt.
On the day of transplanting, avoid moving seedlings if temperatures exceed 90°F or drop below 55°F. Transplant in the early morning or late afternoon to minimize stress. Water the seedlings thoroughly in their trays the night before—this keeps roots flexible and reduces shock during transplanting.
☀️ Step 3: Transplant with Care
Gently remove each seedling from its container, supporting the stem with one hand while loosening the root ball with the other. Okra roots are delicate at this stage, so avoid breaking them. Place the seedling in its prepared hole, ensuring the top of the root ball sits ½ inch below soil level. This prevents stem rot while encouraging strong root development.
Fill the hole with soil, pressing lightly around the base to eliminate air pockets. Water immediately after transplanting to settle the soil and encourage root contact. Use a 1-inch layer of mulch around each plant to retain moisture and suppress weeds—just keep it 2 inches away from the stem to prevent rot.
🌿 Step 4: Monitor and Support Early Growth
Keep the soil consistently moist for the first 2 weeks after transplanting, watering deeply when the top 1-2 inches feel dry. Okra is drought-tolerant once established, but young plants need steady moisture to develop strong roots. Avoid overhead watering to prevent fungal diseases like powdery mildew.
As seedlings grow, install sturdy stakes or cages (if not already in place) to support their tall, slender stems. Okra plants can reach 6-10 feet tall, so secure supports early. Watch for the first true leaves to develop—this signals successful root establishment and readiness for fertilizer. Apply a balanced 10-10-10 fertilizer lightly around the base after 3-4 weeks.
Tips & tricks for transplanting your 1-Week-old okra plant
Confession: I transplanted my first okra seedlings without these tricks, and half of them struggled to take root. Here's what I learned the hard way to ensure your plants thrive.
Soil Preparation Secret: Before digging those holes, mix in a handful of compost directly into the soil at the bottom of each planting spot. Okra loves nutrients, and this gives roots an instant boost right where they need it most. I also add a sprinkle of bone meal for phosphorus—it encourages strong root development during that critical first week after transplanting.
Hardening Off Hack: During those 3-5 days of hardening off, I place my seedlings on a small tray filled with pebbles and water underneath. This creates a self-watering system that keeps roots hydrated while they adjust to outdoor conditions. The pebbles also help regulate temperature fluctuations at the roots, which is especially helpful if you're dealing with those 90°F+ days.
Transplanting Technique: When removing seedlings from their containers, I run a butter knife around the edges first to loosen the root ball. This prevents roots from breaking when you gently tug them free. After planting, I make sure to water deeply again after 24 hours—this second watering helps settle the soil around the roots and prevents air pockets that could cause stress.
Sunlight Strategy: If your okra plants start looking pale or leggy after transplanting, they're probably not getting enough of those critical 8 hours of sunlight. I've found that moving plants slightly closer to the sun's path during the hottest part of the day (around noon) can make a huge difference. Just be mindful of the 55°F minimum—if nights are chilly, consider using row covers for the first few nights after transplanting.
Pro Tips for 1 Week Old Okra Plant
- Confession: I transplanted my first okra seedlings without these tricks, and half of them struggled to take root.
- Soil Preparation Secret: Before digging those holes, mix in a handful of compost directly into the soil at the bottom of each planting spot.
- Hardening Off Hack: During those 3-5 days of hardening off, I place my seedlings on a small tray filled with pebbles and water underneath.
Frequently asked questions
Got questions about your 1-week-old okra plant? You’re not alone! Here are answers to the most common concerns—from transplanting tips to troubleshooting—so you can keep your little seedlings thriving.
How do I know if my 1-week-old okra plant is ready for transplanting?
Your okra seedling is ready when it has 2-3 true leaves (not just the initial seed leaves) and is about 2-3 inches tall. Hardening off (acclimating to outdoor conditions) for 3-5 days beforehand is key. Avoid transplanting if the weather is too hot or cold—okra loves warm soil (70°F+)!
How long does it take for okra to grow after transplanting?
After transplanting, expect 50-60 days to harvest, depending on your climate and variety. Your 1-week-old plant will focus on root establishment first, then shoot up quickly in warm conditions. With proper care, you’ll see pods in 6-8 weeks—patience pays off!
What if my okra seedlings look wilted or weak after transplanting?
Wilting can mean underwatering, shock, or poor drainage. Water gently at the base (not overhead) and mulch to retain moisture. If the soil feels dry, give it a deep drink. If leaves turn yellow, check for overwatering or nutrient deficiency—okra prefers well-draining, fertile soil.
Can I transplant okra in cool weather, or should I wait?
Okra hates cold—it thrives in 75-90°F soil temps. If night temps dip below 50°F, wait until after the last frost or use row covers for young plants. Starting seeds indoors (6-8 weeks before last frost) helps you beat the heat race!
What can I do if my okra seedlings are leggy or stretching?
Leggy seedlings need more light! Move them to a sunny window or grow lights immediately. If transplanting soon, bury them deeper (up to the first true leaves) to encourage stronger roots. Avoid overcrowding—okra needs 12-18 inches of space to grow tall and healthy.
Wrapping up and next steps
Caring for a 1-week-old okra plant sets the foundation for a thriving harvest! Remember, gentle handling, proper spacing, and a nutrient-rich soil mix are key to helping your seedlings establish strong roots. With patience and consistency, your okra will reward you with lush growth and delicious pods in no time.
Now that you’re ready to transplant, take the next step by monitoring soil moisture and providing adequate sunlight. Happy gardening! 🌱✨