
Planting
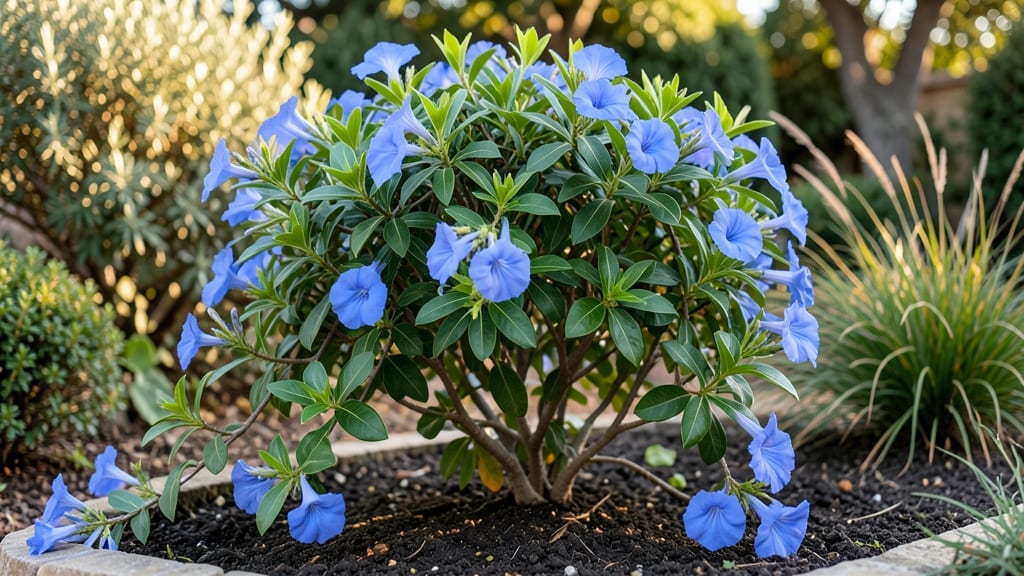
The plumbago blue plant transforms any space with its sky-blue cascades and drought-defying resilience. 🌿 I’ve grown it in everything from window boxes to large pots, and its ability to bloom nonstop—even in heat waves—makes it my go-to for low-maintenance color.
The secret lies in its adaptability: it handles full sun, poor soil, and even neglect better than most plants.
Start with well-draining soil and a pot with drainage holes—this plant hates soggy roots. In containers, mix in perlite or sand to keep moisture in check, and place it where it gets at least 6 hours of sun daily.
Feed it lightly with a balanced fertilizer every 4-6 weeks during blooming season, but skip heavy feeding—it thrives on less. Pruning after each flush of flowers keeps it bushy and encourages more blooms.
By summer’s end, you’ll have a trailing masterpiece with vibrant blue flowers that attract butterflies. It’s perfect for hanging baskets, trellises, or as a spiller in mixed containers. The best part? It rarely gets pests or diseases—just occasional yellow leaves, which usually means overwatering. Fix that, and you’re golden.
Whether you’re a container gardener or just love effortless beauty, blue plumbago delivers. Try it in a 10-12 inch pot this season—your balcony or patio will thank you. The blooms start in early summer and keep coming until frost, with minimal effort from you.
📚 In This Guide
- What you need
- Instructions
- Tips and common mistakes
- Wrapping up and next steps
What you need
- ● Plumbago plant: 1–3 nursery-grown Plumbago auriculata (choose mature plants for quicker blooms).
- ● Well-draining potting mix: 2–3 bags (look for a blend labeled for succulents or Mediterranean plants).
- ● Containers (if needed): 1–2 12–18 inch pots with drainage holes (terracotta or fabric pots work best).
- ● Gravel or pebbles (1–2 lbs) for drainage layer.
- ● Slow-release fertilizer: 1–2 tablets or granules (e.g., Osmocote for 3–4 month release).
- ● Pruning shears: 1 pair (sterilized with rubbing alcohol).
- ● Gloves: 1 pair (to protect from thorns).
- ● Trowel: 1 small garden trowel (for transplanting).
- ● Mulch: 1 bag (e.g., gravel or bark chips to retain moisture).
- ● Stakes or trellis: 1–2 (if training vines vertically).
- ● Watering can or hose: With a gentle spray nozzle.
- ○ Plant support: Optional coco fiber or mesh for containers.
Step-by-step guide to growing plumbago in containers
This hardy, drought-tolerant beauty thrives with minimal fuss—here's how to coax those signature blue blooms into containers.
🪴 Step 1: Select the Perfect Container and Drainage
Plumbago roots need room to spread, so choose a container at least 12 inches wide and deep for each plant. I prefer terracotta because it breathes and prevents root rot, but any pot with drainage holes works. If your container lacks holes, drill 3-4 ¼-inch holes in the bottom to prevent soggy soil.
Add a 2-inch layer of gravel or broken pottery at the bottom before soil. This creates an air pocket that mimics the plant's natural, well-draining Mediterranean habitat. Without this layer, water pools at the roots and causes rot—especially in humid climates.
🌱 Step 2: Prepare Well-Draining Soil Mix
Plumbago hates soggy feet, so blend 60% potting mix with 30% perlite and 10% coarse sand for perfect drainage. I like to add a handful of orchid bark for extra aeration. Fill the container to 1 inch below the rim, leaving room for watering.
Tap the container gently to settle the mix, then water thoroughly until it drains freely from the bottom. The soil should feel moist but not wet—think of a wrung-out sponge. This ensures roots get oxygen while retaining just enough moisture for drought resistance.
☀️ Step 3: Plant and Position for Sunlight
Dig a hole slightly deeper than the plant's root ball, then place the plumbago in the center. Backfill with soil, pressing lightly to eliminate air pockets. Water again to settle everything. For 4 plants, space them 12-18 inches apart in the container.
Position your container where it gets 6-8 hours of direct sunlight daily. A south-facing patio or balcony works best, but plumbago tolerates partial shade—though blooms will be less vibrant. If growing indoors, place near a bright window with supplemental grow lights for 14 hours daily.
💧 Step 4: Water and Fertilize for Continuous Blooms
Let the top 1-2 inches of soil dry out between waterings—this drought tolerance is why plumbago thrives in containers. Water deeply until it runs out the drainage holes, then empty the saucer to prevent root rot. Overwatering is the fastest way to kill this plant.
Feed every 4-6 weeks with a balanced, water-soluble fertilizer diluted to half strength. I switch to a bloom booster in spring to encourage those signature blue flowers. Stop fertilizing in fall to let the plant rest.
✂️ Step 5: Prune and Maintain for Year-Round Growth
After the first flush of blooms, trim back leggy stems by ⅓ their length to encourage bushier growth. I deadhead spent flowers regularly—this trick keeps blooms coming all season. Use clean, sharp pruners to avoid damaging stems.
In late fall, cut back stems to 6 inches tall before winter. Move containers to a sheltered spot if temperatures drop below 20°F. With proper care, your plumbago will bounce back in spring with even more vigor.
Tips & tricks for perfect plumbago blue plant growth
Between us, these simple tricks will help your plumbago thrive and keep those stunning blue blooms coming all season long.
Container Depth Matters: While the instructions specify 12-inch containers, I've found that deeper pots (up to 14 inches) give roots more room to establish—especially if you're growing multiple plants. The extra depth helps prevent root binding, which can stunt growth and reduce blooming. For smaller containers, consider growing just 2-3 plants instead of 4 to avoid crowding.
Soil Mix Upgrade: The 60-30-10 soil mix is perfect, but I add a handful of coconut coir to the potting mix for better moisture retention during dry spells. This helps maintain that "wrung-out sponge" texture without risking soggy soil. For extra insurance, mix in a tablespoon of mycorrhizal fungi at planting time—it boosts root health and drought resistance naturally.
Sunlight Strategy: The 6-8 hours of direct sunlight is ideal, but if you're in a hot climate, provide afternoon shade during peak summer months (especially when temps exceed 90°F). For indoor growers, supplement with a full-spectrum LED grow light 12-14 hours daily—just keep it 12-18 inches above the plants to prevent leaf burn. I've seen dramatic differences in bloom quantity when using this extra light in lower-light conditions.
Winter Survival Hack: When cutting back to 6 inches in fall, don't toss those trimmings! Dry the stems and use them as cuttings for next year's plants. Simply root them in water for 2-3 weeks before transplanting. This free propagation method lets you expand your collection without buying new plants. Just be sure to harden off the new cuttings before planting them out in spring.
Pro Tips for Plumbago Blue Plant
- Between us, these simple tricks will help your plumbago thrive and keep those stunning blue blooms coming all season ...
- Container Depth Matters: While the instructions specify 12-inch containers, I've found that deeper pots (up to 14 inc...
- Soil Mix Upgrade: The 60-30-10 soil mix is perfect, but I add a handful of coconut coir to the potting mix for better...
Frequently asked questions
Got questions about growing and caring for your plumbago blue plant? You’re not alone! Here are some of the most common queries—plus quick, practical answers to keep your drought-resistant beauty thriving.
How often should I water my plumbago blue plant?
Water your plumbago deeply but infrequently—about once a week during dry spells (or when the top 1–2 inches of soil feel dry). Since it’s drought-tolerant, overwatering is a bigger risk than underwatering. Pro tip: Use well-draining soil and containers with drainage holes to prevent root rot.
Can plumbago survive winter in cold climates?
Plumbago is tender to frost and thrives in USDA zones 9–11. If you live in colder areas, dig up potted plants before temperatures drop below 30°F and store them in a cool, dry spot (like a garage). Alternatively, mulch heavily in-ground plants and wrap them in burlap for protection.
What’s the best container size for plumbago blue?
Aim for a 5–7 gallon container with at least 12–18 inches of depth to support its sprawling roots. Smaller pots may restrict growth, while oversized ones can lead to soggy soil. Bonus: Add a trellis or obelisk to encourage vertical growth and save space!
Why aren’t my plumbago leaves turning blue?
Plumbago’s true blue flowers (not leaves!) may fade or turn purple in low light or poor soil. Ensure it gets 6+ hours of sun daily and use a balanced fertilizer (like 10-10-10) every 4–6 weeks during blooming season. Yellowing leaves? Check for overwatering or pests like aphids.
What are some drought-resistant alternatives to plumbago?
If you love plumbago’s low-maintenance charm, try these drought-tolerant picks:
- Lantana – Vibrant clusters, attracts pollinators
- Salvia – Spikes of blue/purple blooms, deer-resistant
- Portulaca (Moss Rose) – Succulent-like, thrives in heat
- Agave – Striking foliage, zero-fuss texture
Wrapping up and next steps
The Plumbago blue plant is a stunning, low-maintenance choice for adding vibrant color to your space—whether in pots, hanging baskets, or garden beds. Its drought tolerance and ability to thrive in containers make it perfect for busy gardeners or small spaces.
With just a little care, you’ll enjoy its cascading blooms for years!
Ready to grow your own? Pick a sunny spot, grab a pot, and get planting! 🌱✨