
Planting
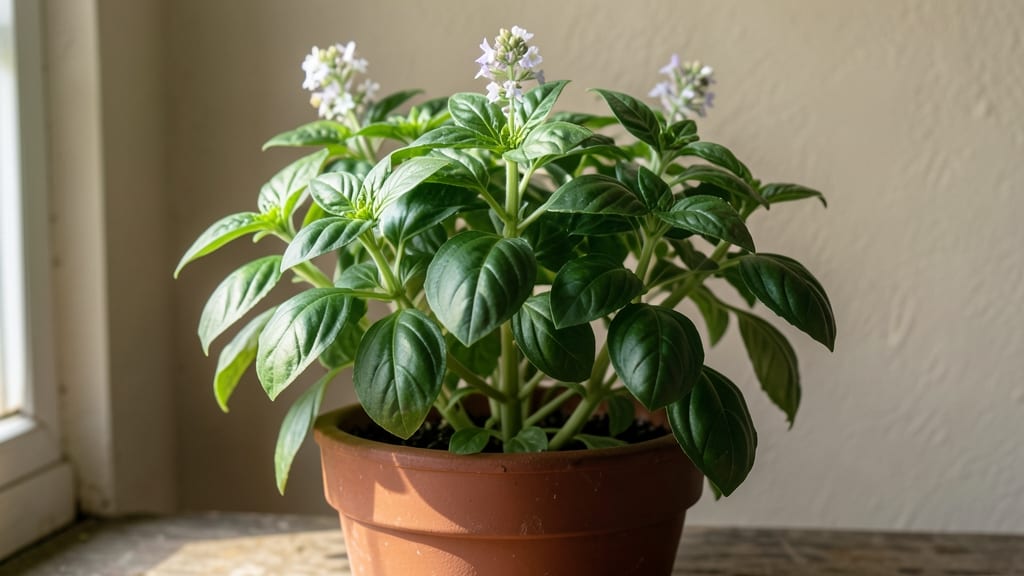
A basil plant fully grown looks like a lush, fragrant green machine standing 18-24 inches tall with glossy, broad leaves that smell like summer in a jar. 🌿 I’ve seen mine go from scraggly seedlings to vibrant bushes in just 8-10 weeks—when pruned right, they keep producing all season long.
The secret isn’t just cutting leaves; it’s pinching and shaping the plant to encourage bushier growth and thicker stems.
Those deep green, slightly wrinkled leaves are what you’ll harvest for cooking, but the real magic happens when you prune correctly. Start by snipping just above a leaf node (where leaves meet the stem) to encourage new branches.
My plants now produce three times more leaves than they did before I learned this trick—no fancy tools, just sharp scissors and a little patience.
With proper care, your basil will stay compact, healthy, and productive for months. The leaves stay tender, the aroma gets stronger, and you’ll have more than enough for pesto, salads, or garnishes.
The key is consistency: prune every 4-6 weeks, and your plant will reward you with thriving growth all summer long.
This method works for both kitchen gardens and container growing—whether you’re growing in pots on a balcony or in-ground beds. The same principles apply, so you’ll get that perfect basil harvest no matter your setup. Ready to transform your plant from scraggly to showstopping?
📚 In This Guide
- What you need
- Instructions
- Tips and common mistakes
- Wrapping up and next steps
What you need
- ● Basil seeds or seedlings: Choose Sweet Basil (classic), Genovese (culinary favorite), or Thai Basil (spicy kick). Start with 3–5 plants for a small harvest.
- ● Containers: Pot size: 6–12 inches in diameter (bigger = more roots = bigger plant!).
- ● Drainage holes: Mandatory! (Use pots with holes or DIY with a drill.)
- ● Material: Terracotta, fabric, or plastic (terracotta wicks away moisture best).
- ● Potting mix: 100% organic, well-draining soil (avoid garden soil—it compacts!). Mix 50% potting soil + 50% perlite or coconut coir for aeration.
- ● Fertilizer: Balanced liquid fertilizer (e.g., 10-10-10) or organic options like fish emulsion or compost tea.
- ● Dosage: Dilute to half-strength and apply every 2–3 weeks during growing season.
- ● Pruning shears: Sharp, clean scissors (sterilize with rubbing alcohol between cuts!).
- ○ Gloves: Optional but highly recommended (basil sap can irritate skin).
- ● Spray bottle: For misting leaves (especially in dry climates).
- ○ Support (optional): Trellis or tomato cage (if growing Genovese, which gets tall).
- ● Stakes or bamboo skewers for floppy varieties.
- ● Sunlight: 6–8 hours of direct sun daily (south-facing window or full sun outdoors).
- ● Temperature: Ideal range: 70–80°F (21–27°C). Avoid frost (below 50°F/10°C = sad basil!).
- ● Water: Consistent moisture (top inch of soil should stay damp, not soggy).
- ● Patience: Basil takes 6–8 weeks to fully mature from seed (or 2–3 weeks from seedlings).
Step-by-Step guide to pruning a fully grown basil plant
Here’s how to keep your basil thriving and productive—no more leggy stems or sparse leaves.
🌿 Step 1: Identify the Right Time to Prune
Prune when your basil has at least 6-8 sets of true leaves—this means it’s strong enough to handle trimming without stress. I like to wait until mornings when the plant is hydrated but not yet wilting in afternoon heat. Avoid pruning right after transplanting or during extreme heat, as the plant needs energy to recover.
Look for new growth at the top and healthy stems with vibrant green leaves. If you see yellowing leaves or flowers starting to form, that’s your cue to prune immediately—basil bolts (goes to seed) quickly, and once it flowers, the leaves turn bitter. This is the moment that matters: act fast to keep your plant producing flavorful leaves.
✂️ Step 2: Prune for Bushier Growth
Use clean, sharp scissors or pruning shears to pinch or cut just above a leaf node (the point where leaves meet the stem). This encourages the plant to branch out instead of growing tall and leggy. I always make my cuts at a 45-degree angle to prevent water from pooling on the stem, which can cause rot.
Start by trimming the top set of leaves—this is called "topping." For a bushier plant, also snip any stems that are growing too long or crowded. Don’t remove more than one-third of the plant at once, or you’ll shock it. Real talk: if you’re unsure, less is better. You can always prune again in a few weeks.
☀️ Step 3: Encourage New Growth with Light and Water
After pruning, place your basil in bright, indirect light (like a south-facing window) for a few days to recover. Basil loves 6-8 hours of sunlight daily, but too much direct sun right after pruning can stress the plant. Watch for new leaves forming at the nodes—this is your sign that the plant is responding well.
Water the soil until it’s moist but not soggy, about 1 inch deep. I like to water at the base rather than from above to avoid wetting the leaves, which can lead to fungal issues. Keep the soil consistently moist but never waterlogged—basil roots need oxygen to thrive. You’ll see fresh, vibrant growth within 7-10 days if everything is just right.
🌱 Step 4: Harvest Regularly for Continuous Growth
Once your basil has recovered, start harvesting outer leaves regularly to encourage more growth. Always leave at least 4-6 sets of leaves on the plant so it can keep producing. I harvest in the morning when the oils in the leaves are at their peak for flavor. Pinch off leaves just above a node to keep the plant bushy.
If your basil starts to flower, remove the flowers immediately—this redirects energy back into leaf production. I know it seems counterintuitive to prune flowers, but trust me, your plant will thank you with bigger, tastier leaves. With consistent pruning and care, your basil can keep producing for months, even in containers.
Tips & tricks for perfect basil pruning
Here’s what nobody tells you—these tricks will transform your basil from leggy to lush in no time.
Timing is Everything: The morning after a light rain is ideal for pruning. Basil absorbs moisture through its leaves, making it more resilient to trimming. If you must prune in dry conditions, do it in the early morning when dew is still present—this mimics nature’s perfect timing. I’ve noticed my plants recover faster when pruned this way, especially during hot summers.
The Technique That Changed Everything: When you make that 45-degree cut in Step 2, imagine you're guiding water away from the stem. This simple angle prevents rot better than straight cuts. I also recommend using your thumb and forefinger to pinch smaller stems—it’s gentler than scissors and gives you more control over the cut. Just be sure to sterilize your fingers with rubbing alcohol first to prevent disease transfer.
Light and Recovery: After pruning, move your basil to a spot with bright, indirect light for 2-3 days. A sheer curtain over a south-facing window works perfectly. I’ve seen basil shock when moved directly into full sun after pruning—it’s like going from a spa day to a tanning bed too soon! Watch for new leaves forming at the nodes within 7-10 days as your sign everything’s on track.
Harvesting Hack: For continuous harvests, focus on the outer leaves first—they’re fully mature while protecting the inner growth. I harvest in the morning because that’s when basil’s essential oils are at their peak flavor. Pro tip: If you notice flowers forming, snip them immediately. I know it seems counterintuitive, but this redirects all the plant’s energy back into leaf production instead of seed-making.
Pro Tips for Basil Plant Fully Grown
- Here’s what nobody tells you—these tricks will transform your basil from leggy to lush in no time.
- Timing is Everything: The morning after a light rain is ideal for pruning. Basil absorbs moisture through its leaves,...
- The Technique That Changed Everything: When you make that 45-degree cut in Step 2, imagine you're guiding water away ...
Frequently asked questions
How long does it take for a basil plant to reach full maturity?
A basil plant typically reaches full maturity—about 12–18 inches tall—in 6–8 weeks from seed or 4–6 weeks from a transplant. With proper care (sunlight, water, and nutrients), you’ll see rapid growth, and it’ll be ready for pruning and harvesting in no time!
Can I prune a fully grown basil plant too much?
Yes, but balance is key! Prune no more than 1/3 of the plant at once to avoid stress. Over-pruning can stunt growth or attract pests. Focus on removing flower buds (they reduce flavor) and pinching back the top sets of leaves. Think of it like giving your basil a haircut—just enough to encourage bushiness!
What’s the best time of year to grow basil fully outdoors?
Basil thrives in warm weather (after the last frost) and struggles in cold or extreme heat. Plant seeds or transplants in late spring or early summer for optimal growth. In hot climates, provide afternoon shade to prevent wilting. For year-round harvests, consider container growing and move pots indoors during winter!
What can I do if my basil plant stops growing after reaching full size?
Stunted growth often signals nutrient deficiency, pests, or poor conditions. Check for:
- Yellow leaves → Overwatering or nitrogen deficiency (use balanced fertilizer).
- Chewed leaves → Aphids or spider mites (spray with neem oil).
- Leggy stems → Not enough light (move to a sunnier spot).
Can I grow basil indoors year-round, and how big will it get?
Indoor basil grows 6–12 inches tall (smaller than outdoor varieties) but thrives with 6+ hours of sunlight daily (a south-facing window or grow light works). Use a 6–8 inch pot with drainage, and prune regularly to encourage compact growth. With care, you’ll enjoy fresh basil for salads, pesto, or teas all winter long!
Wrapping up and next steps
Growing a fully grown basil plant is a rewarding journey that brings fresh, fragrant herbs right to your kitchen! With the right pruning techniques—like pinching, cutting back, and maintaining healthy growth habits—you’ll enjoy bushier plants and bountiful harvests all year.
Whether you’re a beginner or a seasoned gardener, these secrets will keep your basil thriving and productive.
Now that you’re armed with the know-how, take the next step—grab your shears and give your basil a little TLC! Start pruning today, and soon you’ll be savoring homegrown basil in your favorite dishes. Happy gardening! 🌿✨