
Planting
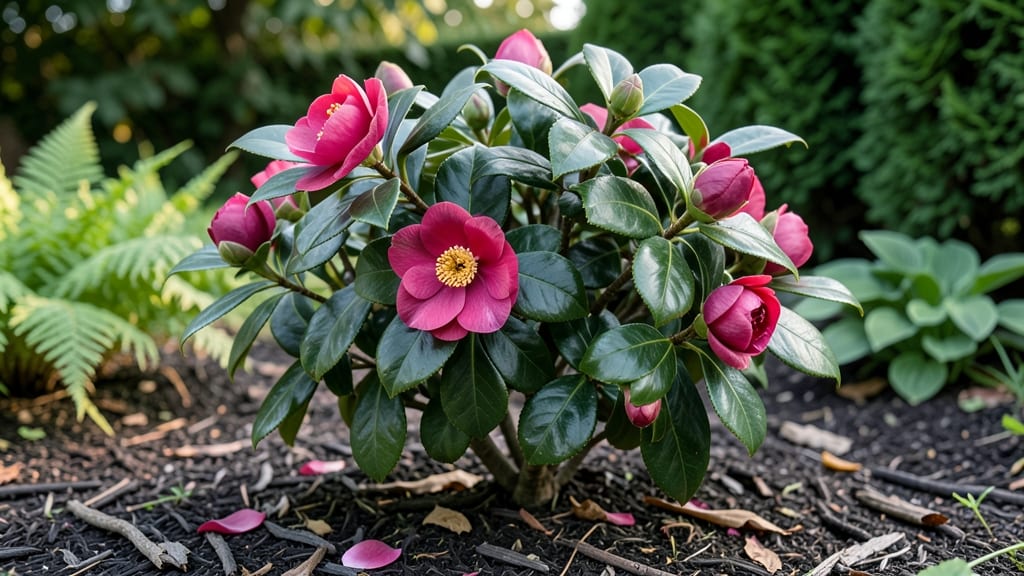
Camellia japonica thrives where winters stay above 20°F—that’s USDA Zones 7-9, but with winter protection, you can grow them as far north as Zone 6. 🌿 I’ve watched these glossy-leaved beauties survive brutal winters in my Zone 7 garden, and the secret lies in the right site, soil, and a little extra care when frost arrives.
The key to success starts with morning sun and afternoon shade—camellias hate scorching afternoons. Amend heavy clay soil with compost and ensure good drainage (they hate soggy roots). In colder zones, plant against a south-facing wall or mulch heavily with 6 inches of wood chips to insulate roots.
My Zone 6 camellias? They’re tucked under a brick wall with extra mulch, and they bloom every spring like they’ve been there for decades.
By summer, you’ll be rewarded with 3-inch blooms in shades of pink, red, or white that last for weeks. The glossy leaves add texture year-round, and with proper care, these plants live for centuries—some in Japan are over 1,000 years old!
The only trade-off? Patience—it takes 3-5 years for mature blooms, but the wait is worth it.
For colder climates, consider container growing—you can overwinter potted camellias in a garage or unheated shed. Just keep the roots from freezing solid, and they’ll bounce back in spring.
Whether you’re in the Deep South or a chilly coastal zone, these tips will help your camellia thrive where you live.
📚 In This Guide
- What you need
- Instructions
- Tips and common mistakes
- Wrapping up and next steps
What you need
- ● Camellia japonica plants: 1–3 mature plants (choose varieties suited to your hardiness zone, like ‘Yuletide’ or ‘Kiri Shimizu’)
- ● Well-draining acidic soil: 1–2 bags (50 lbs each) of peat moss or pine bark fines (pH 5.0–6.0)
- ● Organic compost: 1–2 bags (20–30 lbs) of aged compost or leaf mold
- ● Slow-release fertilizer: 1 bag of acid-loving plant fertilizer (e.g., 8-3-9 or 10-10-10)
- ● Mulch: 1–2 bags (10–15 lbs) of pine needles, wood chips, or shredded bark
- ● Garden gloves & trowel: 1 pair and 1 sturdy trowel (6–8" length)
- ● Watering can or hose with spray nozzle: 1 (5-gallon capacity recommended)
- ● Soil pH test kit: 1 (to confirm acidity levels)
- ● Pruning shears: 1 pair (for shaping and deadheading)
- ● Stakes & ties: 2–4 stakes (for young or windy climates)
- ● Rain gauge: 1 (to monitor watering needs)
- ● Epsom salt (magnesium sulfate): 1 small bag (for nutrient boosts)
- ● Shade cloth (30–50% coverage): 1 roll (for young plants in hot zones)
Step-by-step guide to planting camellia japonica in the right zone
Here's how to give your camellia the perfect start for year-round blooms.
🌱 Step 1: Choose the Ideal Planting Location
Camellia japonica thrives in zones 7-9 where winter temperatures stay above 10°F. Pick a spot with morning sun and afternoon shade—this protects delicate blooms from harsh afternoon rays while ensuring enough light for vibrant flowers. I always test the site by placing a plant in the spot for a week first to watch how it reacts.
Dig a hole twice as wide as the root ball but only as deep. The top of the root ball should sit 1 inch above ground level—burying it too deep suffocates the plant. Amend the native soil with 2-3 inches of compost mixed into the bottom of the hole for better drainage and nutrient supply.
☀️ Step 2: Plant at the Right Time and Prepare the Soil
Plant in early spring (March-April) or fall (September-October) when temperatures are mild. Avoid summer heat or winter cold, which stress the plant. Before planting, soak the root ball in lukewarm water for 20-30 minutes to hydrate the roots—this helps them establish faster.
Loosen the roots gently if they're circling the root ball. Place the plant in the hole, backfill with native soil mixed with compost, and water deeply to settle everything. The soil should feel moist but not soggy—camellias hate waterlogged roots. Mulch with 2-3 inches of organic mulch (like pine bark) to retain moisture and protect roots from temperature swings.
💧 Step 3: Water and Fertilize for Strong Growth
Water deeply once a week during the first year, ensuring the soil stays evenly moist but not waterlogged. You'll know it's right when the top 2 inches of soil feel damp but not wet. Overwatering causes root rot, while underwatering stresses the plant—both lead to poor blooms.
Fertilize in early spring with a slow-release, acid-loving plant fertilizer (like one formulated for azaleas or rhododendrons). I use a 10-10-10 blend at half strength to avoid burning the roots. Repeat in mid-summer for a second feeding. Avoid high-nitrogen fertilizers—they promote leafy growth at the expense of flowers.
✂️ Step 4: Prune and Maintain for Year-Round Blooms
Prune right after flowering (late spring) to shape the plant and remove dead or crossing branches. Use clean, sharp pruners to make cuts just above a leaf node. Never prune in fall or winter—this removes next year's flower buds. I also remove any suckers (shoots growing from the base) to keep energy focused on the main plant.
Watch for yellowing leaves—this usually means the soil is too alkaline. Camellias love acidic soil (pH 5.5-6.5). Test your soil annually and amend with sulfur or peat moss if needed. In winter, protect young plants from frost with burlap wraps or a lightweight frost cloth if temperatures dip below 20°F.
Tips & tricks for perfect camellia japonica planting
These practical pointers will help you avoid common pitfalls and give your camellia the best possible start for stunning year-round blooms.
Zone Verification: Before planting, double-check your specific zone within 7-9—some areas in zone 7 might experience brief dips below 10°F. If you're on the cooler edge, consider planting near a south-facing wall for extra winter protection. I always verify using the USDA Plant Hardiness Zone Map and add a frost cloth as a precaution for borderline zones.
Root Ball Prep: The 20-30 minute soak in lukewarm water is crucial, but don't skip the root inspection. Gently separate circling roots with your fingers—they'll be tight from the nursery. This prevents girdling as the plant grows. I also trim any severely circling roots with clean pruners, but only remove about 10% to avoid shocking the plant.
Mulching Strategy: That 2-3 inches of organic mulch isn't just for moisture—it's also insulation. In winter, mulch helps protect roots from temperature swings that can cause stress. I use pine bark because it breaks down slowly and adds acidity over time, which camellias love. Just keep mulch 2-3 inches away from the trunk to prevent rot.
Watering Wisdom: The "evenly moist but not soggy" test is key, but timing matters too. Water in the morning so leaves have time to dry before evening. I check moisture by pushing a finger 2 inches into the soil—if it's dry at that depth, it's time to water. Overwatering is the #1 reason camellias struggle, so when in doubt, wait another day.
Pro Tips for Camellia Japonica Zone
- These practical pointers will help you avoid common pitfalls and give your camellia the best possible start for stunning year-round blooms.
- Zone Verification: Before planting, double-check your specific zone within 7-9—some areas in zone 7 might experience brief dips below 10°F.
- Root Ball Prep: The 20-30 minute soak in lukewarm water is crucial, but don't skip the root inspection.
Frequently asked questions
Got questions about growing Camellia japonica in your zone? You’re not alone!
Here are the most common concerns—and straightforward answers to help you nurture stunning blooms year-round.
What USDA hardiness zones does Camellia japonica thrive in?
Camellia japonica prefers USDA zones 7-9, where winter temps stay above 10°F (-12°C). In colder zones (6 or below), plant in sheltered microclimates (e.g., near south-facing walls) or choose cold-hardy varieties like 'Winter’s Star'. Mulch heavily in fall to protect roots!
When is the best time to plant Camellia japonica?
Plant in early spring or fall (4–6 weeks before first frost) for optimal root establishment. Avoid summer heat or winter freezes—both stress young plants. If planting in containers, use well-draining soil and water thoroughly after transplanting.
Can I grow Camellia japonica in containers? If so, what size pot do I need?
Yes! Containers work well for smaller varieties or urban gardens. Use a 15–20 gallon pot with drainage holes and a mix of acidic potting soil (pH 5.0–6.0). Repot every 2–3 years, and move pots indoors (or to a garage) if temps drop below 20°F (-6°C).
What pests or diseases should I watch for with Camellia japonica?
Common issues include:
- Camellia leaf gall (caused by fungus)—remove infected leaves and improve airflow.
- Scale insects (sticky residue on leaves)—spray with horticultural oil or insecticidal soap.
- Root rot (from overwatering)—ensure pots/containers drain well and avoid soggy soil.
Are there low-maintenance alternatives to Camellia japonica for my zone?
If Camellia japonica seems high-maintenance, try these zone-friendly evergreens:
- Camellia sasanqua (hardier, blooms in fall/winter)
- Pieris japonica (drought-tolerant, white spring flowers)
- Rhododendron (similar care, vibrant blooms)
Wrapping up and next steps
Growing Camellia japonica in the right zone can transform your garden into a stunning, year-round sanctuary of color and elegance. 🌸 By selecting the perfect planting spot, providing proper care, and understanding its unique needs, you’ll enjoy blooms that last from fall to spring.
Now that you’re armed with expert tips, take the next step—visit a local nursery, pick out your favorite variety, and start planting! Your dream garden is just a shovel’s throw away.