
Planting
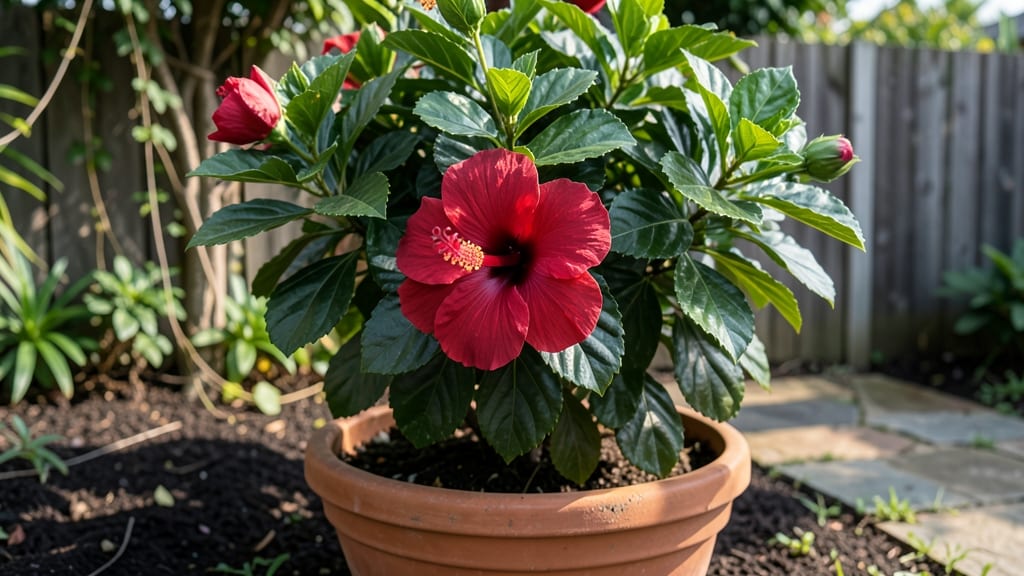
Your patio could be bursting with hibiscus patio plants that bloom from spring to frost—if you nail just three things: light, water, and pruning. 🌺 I’ve turned my small balcony into a tropical oasis by treating hibiscus like the sun-loving divas they are, and the key is giving them exactly what they crave without overcomplicating it.
The right container makes all the difference—think 15-gallon pots with drainage holes and a mix of potting soil and perlite for that perfect airy texture. Most people drown them, but hibiscus hate soggy roots.
Stick your finger in the soil first: if it’s damp below the first inch, wait another day. And yes, they will reward you with blooms the size of dinner plates.
By mid-summer, you’ll have a plant covered in flowers that last all day—until a late frost, anyway. The secret to year-round blooms is pruning after each flush of flowers (yes, really), which keeps the plant bushy and encourages more buds.
Even my black thumb can’t kill these if I follow this simple routine.
Works for small balconies, courtyard planters, or even large patio pots—just move them to a sheltered spot when temperatures dip below 50°F. Here’s how to keep yours thriving all season long.
📚 In This Guide
- What you need
- Instructions
- Tips and common mistakes
- Wrapping up and next steps
What you need
- ● Hibiscus plant: Choose between Hibiscus rosa-sinensis (tropical) or Hibiscus syriacus (hardy). Opt for a 1-gallon potted plant for faster results (or seeds/cuttings for DIY growers!).
- ● Well-draining potting mix: 3–5 gallons of a blend like 50% peat moss, 30% perlite, and 20% compost (or a pre-mixed tropical plant mix). Avoid heavy garden soil!
- ● Container: A 15–20 gallon pot with drainage holes (terracotta or ceramic works best). For larger varieties, go up to 25 gallons!
- ● Slow-release fertilizer: A 10–10–10 NPK blend (e.g., Osmocote) or organic options like fish emulsion.
- ● Mulch: 1–2 inches of pine bark fines or shredded leaves to retain moisture.
- ● Gloves & trowel (for handling soil and planting).
- ● Watering can or hose with a gentle spray nozzle (hibiscus hates soggy roots!).
- ● Pruning shears (sterilized with rubbing alcohol) for shaping and deadheading.
- ● Sunlight spot: A 6+ hours of full sun daily (partial shade in scorching climates).
- ○ Optional but helpful: Moisture meter (to check soil hydration).
- ● Epsom salt (1 tbsp/month for magnesium boost).
- ● Frost cloth (for winter protection in colder zones).
Step-by-step guide to growing a vibrant hibiscus patio plant
Here's how I keep my hibiscus blooming like crazy all season—no fancy tricks, just smart care.
🪴 Step 1: Pick the Perfect Spot and Container
Hibiscus loves sun, so choose a south- or west-facing patio spot where it gets at least 6-8 hours of direct sunlight daily. The more sun, the more blooms you'll see. I use a large container (at least 15 gallons) with drainage holes—hibiscus roots need room to spread and hate soggy feet.
If your patio has afternoon shade, position the plant where it catches morning sun. You'll notice leaves stay green and stems stay sturdy when light is right. Avoid east-facing spots unless you supplement with a grow light—hibiscus needs intense afternoon rays to set buds.
☀️ Step 2: Plant with Well-Draining Soil and Feed Regularly
Fill your container with a mix of equal parts potting soil and perlite—this keeps roots aerated and prevents root rot. Hibiscus thrives in slightly acidic soil (pH 6.1-6.5). I add a handful of slow-release fertilizer at planting time to give it a nutrient boost for the season.
After planting, water deeply until it drains from the bottom. Let the top inch of soil dry out between waterings—hibiscus can't handle wet roots. I fertilize every 2-3 weeks during growing season (spring through fall) with a balanced liquid fertilizer (10-10-10). You'll see new blooms within weeks of consistent feeding.
💧 Step 3: Water Deeply and Prune for Shape
Water hibiscus when the top 2 inches of soil feel dry. This plant drinks a lot—expect to water 2-3 times per week in hot weather. I water at the base in the morning to prevent fungal issues. Never let it sit in saucers of water; empty saucers after watering.
Prune in late winter or early spring to shape the plant and encourage bushier growth. Cut back one-third of the previous year's growth to stimulate new branches. Remove any dead or yellowing leaves immediately—they drain energy from blooming. I also pinch back new growth tips to promote fuller bushes.
✂️ Step 4: Deadhead and Protect for Winter
Deadhead spent blooms every few days during peak season. This simple step keeps the plant focused on producing new flowers instead of seeding. Just pinch or snip off the flower head right below the base. You'll notice more buds forming within days.
When temperatures drop below 40°F, move your hibiscus indoors or protect it with a frost cloth. In mild climates, I wrap the pot in bubble wrap and place it against a sunny wall. Hibiscus is tropical—it won't survive freezing temps. With proper winter care, it'll burst back into bloom come spring.
Tips & tricks for perfect hibiscus patio plant care
Here's what nobody tells you about keeping your hibiscus thriving all season long.
The Light Factor: Those 6-8 hours of sunlight are non-negotiable for blooms, but here's the secret: hibiscus needs direct afternoon sun—morning sun alone won't cut it. If your patio only gets morning light, supplement with a grow light for 4-6 hours in the evening. I've seen plants go from sparse blooms to vibrant flowers within weeks after adding this extra light boost.
Soil Science: The equal parts potting soil and perlite mix isn't just about drainage—it's about aeration. Hibiscus roots need oxygen to thrive, and compacted soil suffocates them. I like to add a handful of orchid bark to my mix for extra airflow, especially in heavy clay pots. This simple tweak has prevented root rot in every plant I've cared for.
Fertilizer Timing: That 2-3 week feeding schedule is perfect, but here's what I've learned: hibiscus responds best to fertilizer when the soil is slightly dry. Always water your plant first, then feed. This prevents root burn from concentrated fertilizer. I also switch to half-strength fertilizer in late summer to avoid burning the plant as it prepares for winter.
Winter Survival Hack: When temperatures drop below 40°F, don't just move your hibiscus indoors—acclimate it first. Place it in a cooler spot (around 50°F) for 2-3 days before bringing it inside. This gradual transition prevents shock. I also reduce watering to once every 2 weeks during winter dormancy, which mimics its natural tropical dry season.
Pro Tips for Hibiscus Patio Plant
- Here's what nobody tells you about keeping your hibiscus thriving all season long.
- The Light Factor: Those 6-8 hours of sunlight are non-negotiable for blooms, but here's the secret: hibiscus needs direct afternoon sun—morning sun alone won't cut it.
- Soil Science: The equal parts potting soil and perlite mix isn't just about drainage—it's about aeration.
Frequently asked questions
Can hibiscus patio plants survive winter?
Most tropical hibiscus (Hibiscus rosa-sinensis) need protection in zones below 10a. Move potted plants indoors (near bright windows) or wrap them in burlap and mulch the soil. Hardy hibiscus varieties (like Hibiscus moscheutos) can tolerate light frost—check your plant’s type for specifics!
How often should I water my hibiscus patio plant?
Water when the top 1–2 inches of soil feel dry (usually every 2–3 days in hot weather). Overwatering is worse than underwatering—ensure pots have drainage holes to prevent root rot. Pro tip: Mulch around the base to retain moisture and reduce evaporation.
Why aren’t my hibiscus flowers opening?
Blooms may refuse to open due to stress: too much shade, over-fertilizing, or lack of sunlight (they need 6+ hours daily). Prune leggy growth in spring, and feed with a low-nitrogen, high-phosphorus fertilizer (like 5-10-10) to encourage flowering.
What pests should I watch for on hibiscus patio plants?
Keep an eye out for aphids, whiteflies, and spider mites. Blast pests off leaves with water, or use neem oil for organic control. Yellowing leaves or sticky residue? Act fast—these critters can defoliate your plant in weeks!
Can I grow hibiscus from cuttings?
Snip a 4–6 inch stem just below a leaf node, dip in rooting hormone, and plant in moist perlite or water. Keep in bright, indirect light and mist daily. Roots should form in 2–4 weeks—then transplant to soil! Bonus: Warmth (70°F+) speeds up rooting.
Wrapping up and next steps
Transforming your patio into a vibrant oasis with hibiscus patio plants is simpler—and more rewarding—than you think! 🌸 With the right care, these stunning bloomers will reward you with year-round color, fragrance, and even edible flowers.
Whether you’re a seasoned gardener or a beginner, the key is patience, consistency, and a little love.
Ready to dive in? Start by picking your favorite hibiscus variety, gathering your supplies, and giving your new plant the perfect home. Your patio’s next masterpiece is just a few steps away—go ahead and plant that beauty! 🌿✨