
Planting
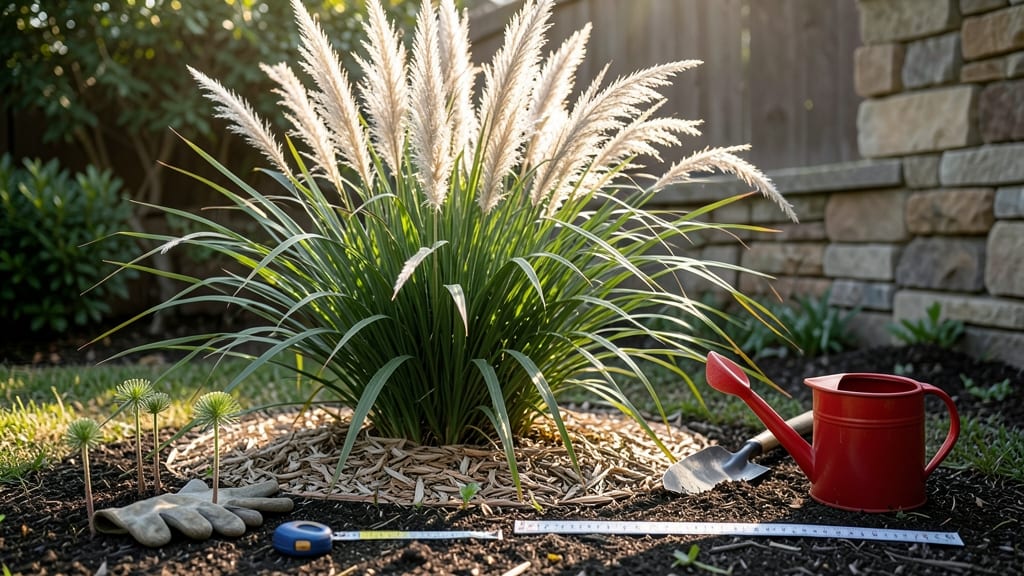
Planting pampas grass 3 to 6 feet apart is the secret to those showstopping, wind-resistant clumps that transform any landscape. 🌿 I learned the hard way—crowding them too close leads to weak, floppy stems and fewer dramatic plumes.
The right spacing ensures they thrive, spread naturally, and create that signature wispy silhouette without fighting for resources. Start with well-draining soil and full sun—pampas grass rewards both. Amend heavy clay with sand or gravel, and avoid waterlogged spots.
In warmer climates, space them closer (3 feet); in cooler zones, give them more room (up to 8 feet) to mature fully. The payoff? Airflow reduces fungal diseases, and those feathery plumes sway dramatically in the breeze.
Overcrowding is the biggest mistake—plants compete for nutrients, leading to sparse growth and fewer blooms. If you’re planting along fences or borders, stagger them in rows for a lush, layered effect. For container growing, use large pots (at least 18 inches wide) and space them 4 feet apart.
With proper spacing, your pampas grass will become a low-maintenance focal point that adds texture and movement to your garden. Just remember: patience is key—it takes 2 to 3 years for them to reach their full, dramatic potential.
📚 In This Guide
- What you need
- Instructions
- Tips and common mistakes
- Wrapping up and next steps
What you need
- ● Pampas grass plants: Choose healthy, established clumps (3–5 gallons in size) from a reputable nursery. Quantity depends on spacing—see the guide for specifics!
- ● Shovel or trowel: A garden spade (12–18 inches wide) for digging holes, or a hand trowel for smaller plants.
- ● Compost or well-aged manure: 2–3 gallons per plant to enrich the soil.
- ● Organic mulch: Pine straw or wood chips (2–3 inches thick) to retain moisture and suppress weeds.
- ● Gloves & knee pads: Protect your hands and joints—planting pampas grass can get messy!
- ● Watering can or hose with a gentle spray nozzle: Pampas grass loves moisture but hates soggy roots.
- ● Soil test kit: Check pH (ideal: 6.0–7.5) and amend if needed with lime or sulfur.
- ● Pruning shears: For trimming dead foliage after planting.
- ● Stakes or landscape fabric: If planting in windy areas, secure young plants temporarily.
- ● Slow-release fertilizer: A balanced 10-10-10 or low-nitrogen option (like 5-10-5) for a gentle boost.
Step-by-step planting guide for pampas grass clumps
Here's the spacing method I use to create those bold, breezy landscapes—no guesswork, just proven results.
🌱 Step 1: Choose the Perfect Planting Location
Pampas grass thrives in full sun—at least 6-8 hours daily—so scout your yard for the sunniest, most open spot. Avoid low-lying areas where cold air settles, as these plants can't handle frost. I always check the soil first by digging a 6-inch hole—if it feels dense or clay-heavy, mix in 2 inches of compost to improve drainage.
This grass grows aggressively, so plan for its mature height (8-15 feet) and width (6-10 feet). If you're planting near structures or power lines, give it extra space—those plumes can reach 15 feet wide in ideal conditions. I like to sketch a rough layout first, marking where each clump will go with stakes and twine.
🪴 Step 2: Dig Holes for Optimal Spacing
For dramatic impact, space mature clumps 10-15 feet apart. If you're planting smaller nursery-size plants (1-2 feet tall), you can reduce spacing to 8-10 feet—they'll fill in over time. Dig holes twice as wide as the root ball but only 1-2 inches deeper than the container's depth. Pampas grass hates sitting in soggy soil.
I tap the hole gently with a shovel to break up compacted soil at the bottom—this prevents root circling later. If your soil drains poorly, add a 2-inch layer of coarse sand or gravel at the hole's base. Moisten the hole lightly before planting; dry soil pulls roots out of position.
☀️ Step 3: Plant and Water for Establishment
Remove the plant from its container and loosen any circling roots with your fingers. Place it in the hole so the top of the root ball sits 1 inch above soil level—settling will occur after watering. Backfill with native soil, pressing gently to eliminate air pockets. I never tamp down hard; the roots need room to spread.
Water deeply right after planting to settle the soil and eliminate air gaps. Aim for 1-2 gallons per plant—enough to moisten the soil 12 inches deep. Mulch the base with 2-3 inches of organic mulch (like shredded bark) to retain moisture and suppress weeds. Avoid piling mulch against the crown; keep it 3 inches away to prevent rot.
✂️ Step 4: Prune and Monitor for Wind Resistance
In late winter or early spring, cut back the previous year's growth to 12-18 inches tall using sharp shears. This encourages fresh, vigorous growth and prevents the plant from becoming top-heavy in storms. I always wear gloves—those plumes are razor-sharp! After pruning, fertilize lightly with a balanced 10-10-10 formula to support new growth.
Pampas grass is wind-resistant, but newly planted clumps may need staking in exposed areas. Use 3-4 stakes per plant, tying them loosely to the center stem with soft twine. Check stakes monthly and adjust as the plant grows. Over time, the thick stems will support themselves, but the first year is critical for stability.
⏰ Step 5: Maintain for Long-Term Dramatic Effect
Water newly planted clumps once weekly for the first 2 months, then taper to every 2-3 weeks once established. Mature pampas grass is drought-tolerant but looks best with consistent moisture. I test soil moisture by sticking my finger 2 inches deep—if it feels dry, it's time to water.
Divide clumps every 3-5 years in early spring to control spread. Dig around the perimeter with a spade, lifting the entire plant and separating it into 3-4 sections with sharp pruners. Replant divisions immediately in prepared holes. This keeps your landscape looking intentional, not overgrown.
Tips & tricks for perfect pampas grass planting
These simple tricks will help you create a stunning, wind-resistant landscape without the guesswork.
Sunlight Strategy: While pampas grass thrives in full sun (6-8 hours daily), I've found that morning sun with afternoon shade works surprisingly well in hotter climates. The key is avoiding the harsh afternoon rays that can scorch the foliage. If your area gets intense afternoon sun, consider planting near a structure that provides partial shade during peak heat hours.
Soil Prep Secret: Before mixing in compost, I always test soil drainage by filling a small container with water and placing it in the planting area. If water drains in under 30 minutes, your soil is fine. If it takes longer, you definitely need that 2-inch sand layer at the hole's base. This simple test saves you from soggy soil headaches later.
Planting Depth Cue: The 1-inch above soil level rule is critical—here's how to check: After placing the plant, press the soil gently around the base. If the top of the root ball is flush with the surrounding soil after pressing, you're good. Too high and it'll dry out; too low and it'll rot. I use a small ruler to verify this measurement every time.
Staking Shortcut: For newly planted clumps in windy areas, I use bamboo stakes tied with soft garden twine. The trick is to tie them loosely—tight knots can damage the stems as they grow. I check the ties monthly and adjust as needed. This prevents the plant from snapping while still allowing natural movement that strengthens the stems.
Pro Tips for How Far Apart To Plant Pampas Grass
- These simple tricks will help you create a stunning, wind-resistant landscape without the guesswork.
- Sunlight Strategy: While pampas grass thrives in full sun (6-8 hours daily), I've found that morning sun with afternoon shade works surprisingly well in hotter climates.
- Soil Prep Secret: Before mixing in compost, I always test soil drainage by filling a small container with water and placing it in the planting area.
Frequently asked questions
Got questions about spacing pampas grass like a pro?
Here are the answers to the most common ones—so you can plant with confidence and avoid common pitfalls!
How close can I plant pampas grass if I’m worried about wind damage?
Even though pampas grass is wind-resistant, planting them 4–6 feet apart gives roots room to anchor deeply. Closer spacing (3–4 feet) works in sheltered areas, but wider gaps reduce flailing in storms. Pro tip: Stagger plants in rows for extra stability!
Can I plant pampas grass too close together later and just space them out?
Not ideal! Pampas grass spreads slowly but forms dense clumps. If planted too close (<3 feet), they’ll compete for nutrients, leading to stunted growth. Solution: Start with proper spacing or divide mature clumps every 3–5 years to thin them out.
What’s the best time of year to plant pampas grass for optimal spacing?
Plant in early spring or fall when soil is workable but not freezing. This gives roots time to establish before extreme heat or cold. Bonus: Avoid summer planting—roots struggle in dry, hot conditions, slowing their spread.
Can I use pampas grass as a hedge? If so, how close should I plant them?
Yes! For a tight hedge, plant pampas grass 2–3 feet apart in rows 3–4 feet apart. Prune annually to encourage bushier growth. Warning: They grow tall (8–12 feet), so plan for height and consider support in windy areas.
My pampas grass isn’t spreading—what’s wrong?
Slow growth often means poor soil, lack of sunlight, or overcrowding. Ensure they get full sun (6+ hours/day) and well-draining soil. If spaced <6 feet apart, they may need 2–3 years to fill in. Fix it: Fertilize lightly in spring and divide clumps if needed.
Wrapping up and next steps
Planting pampas grass at the right distance—typically 6 to 10 feet apart—ensures stunning, wind-resistant clumps that thrive while preventing overcrowding. This spacing lets them flaunt their feathery plumes and creates that dramatic, dreamy look you’re after.
Now that you’ve got the spacing down, it’s time to watch your garden transform!
🌱 Next step: Grab your gloves, mark those spots, and plant with confidence. Before you know it, your landscape will be the talk of the neighborhood! 🌿