
Planting
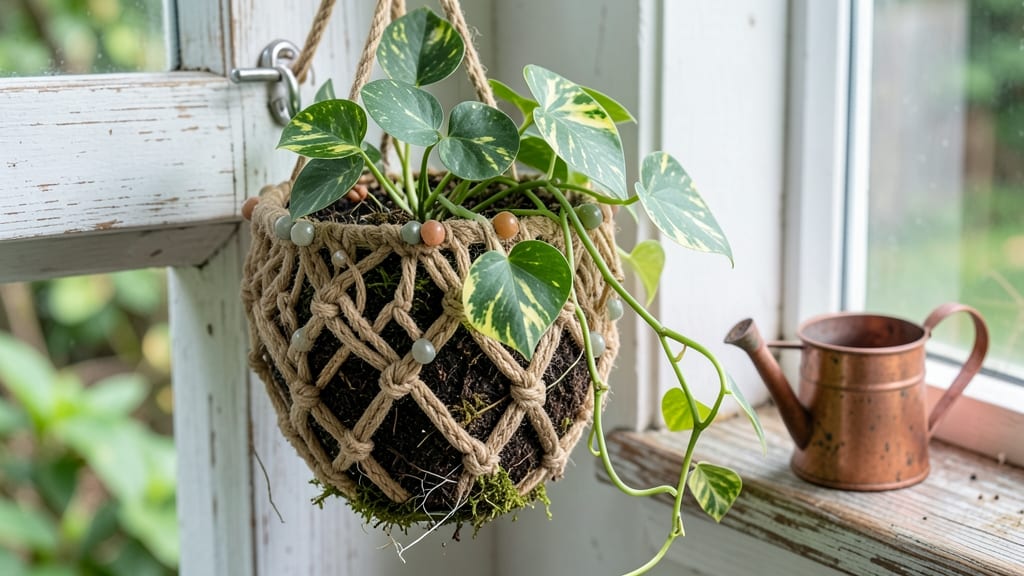
Creating a hanging plant holder transforms any space into a lush, vertical garden—no green thumb required. ✨ I started with a simple macramé knot and wooden slat combo, and now my balcony looks like a tropical escape without breaking the bank.
The best part? You can customize it to fit any plant, from trailing pothos to delicate ferns.
This project uses basic supplies: 3/8-inch cotton rope, a wooden slat (or recycled tray), and a drill for drainage holes. If you’re new to macramé, don’t worry—just follow the square knot pattern, and your holder will be sturdy enough to hold 10+ pounds of soil and plants.
The key is spacing the knots evenly so the weight distributes properly.
Once assembled, you’ll have a durable, stylish planter that adds texture and life to patios, porches, or even indoor nooks. Hang it near a window for trailing herbs like thyme or nasturtiums, or let ferns spill over for a soft, feathery look.
The drainage holes keep roots happy, and the design works with any container size—from small pots to oversized baskets.
Pro tip: Line the bottom with landscape fabric to prevent soil from slipping through the knots. For extra flair, add beads or tassels to the rope ends—it’s the perfect way to make your garden space uniquely yours. Ready to get started?
📚 In This Guide
- What you need
- Instructions
- Tips and common mistakes
- Wrapping up and next steps
What you need
- ● Macramé Cord: 3–5mm thick, 10–15 feet (3–5m) of natural jute or cotton rope (for knot designs).
- ● Wooden Slats: 2–4 thin, sanded slats (1–2 inches wide, 12–18 inches long) for the base (cedar or pine works well).
- ● Drill & Bits: ¼-inch or ⅜-inch bit for pilot holes (if attaching hardware).
- ● Screws/Nails: Small deck screws or finishing nails (for securing slats).
- ● Hook or Eye Screw: 1–2 heavy-duty hooks (for hanging).
- ● Sandpaper: 120–220 grit (to smooth rough edges).
- ● Measuring Tape & Pencil: For precise cuts and markings.
- ● Scissors or Utility Knife: For trimming cord or wood.
- ● Wood stain or paint (for customizing slats).
- ● Decorative beads or tassels (to enhance macramé designs).
- ● Wood glue (for extra reinforcement).
- ● Staple gun (alternative to screws for lightweight slats).
Step-by-Step instructions for crafting a macramé hanging plant holder
This project combines simple knots and sturdy wood for a stylish, functional planter you can customize endlessly.
🪴 Step 1: Gather Materials and Tools
You'll need 4-6 feet of ¼-inch thick cotton macramé cord (natural or colored), a 6-8 inch wooden slat (½-inch thick), and a wooden dowel or embroidery hoop for the hanging loop. Grab a pair of sharp scissors, a measuring tape, and a pencil for marking. I like to work on a clean, flat surface like a table or floor—it keeps everything organized and prevents tangles.
Measure and mark the wooden slat at 2 inches from each end—these will be your knot attachment points. The wider the slat, the more plants you can fit later. For a standard 6-inch slat, two knots on each side work perfectly. Use a pencil to make light marks so you don't gouge the wood.
🧵 Step 2: Create the Hanging Loop
Cut 4 equal strands of your macramé cord, each about 18 inches long. Tie these strands together at the top to form a loop—this will be your hanging loop. I use a simple square knot here for durability. Start by overlapping two strands, then cross the other two over them, and pull tight. Repeat with the remaining two strands to secure.
Once the loop is tight, thread the wooden dowel or embroidery hoop through it. This will be your hanging point later. Leave about 6 inches of cord below the loop—this extra length will help distribute weight evenly. If you're using a dowel, make sure it's smooth so the cord doesn't fray over time.
🌿 Step 3: Attach the Wooden Slat
Now, cut 8 additional strands of cord, each 24 inches long. These will connect the hanging loop to the wooden slat. Fold each strand in half and tie a knot around the wooden slat at your marked points—2 knots per mark. Space them evenly so the slat sits level. I like to use a lark's head knot here because it's secure and easy to adjust if needed.
Once all 8 strands are knotted to the slat, tie them to the hanging loop below the dowel. Use a simple overhand knot to attach each pair of strands to the loop. Leave about 1 inch of slack in the knots so the slat can hang freely. Double-check that the slat is balanced—if one side feels heavier, adjust the knots slightly until it's even.
✂️ Step 4: Add Decorative Knots and Fringe
For a finished look, create a series of square knots along each side of the slat. Use the remaining cord or cut new strands if needed. Space the knots about 1-2 inches apart—this adds structure and prevents the plants from slipping through. I like to add a few spiral knots near the ends for extra flair.
Once the knots are complete, trim the excess cord to create fringe. Leave about 3-4 inches of fringe on each side—this adds texture and makes the planter look fuller. If you want a cleaner look, you can tie off the ends with a small knot and trim them even with the slat. Test the weight by gently lifting the planter—it should feel sturdy but not too heavy.
🪴 Step 5: Add Plants and Hang
Place your chosen plants in the planter, arranging them so their roots spread evenly along the slat. For trailing plants like pothos or string of pearls, let them cascade over the sides. Water the plants lightly before hanging to help them settle into their new home. I like to use a spray bottle for this—it keeps the soil moist without oversaturating it.
Hang the planter from a hook or sturdy branch using the wooden dowel or hoop. Make sure the hook can support the weight of the planter and plants—macramé is strong, but it's always better to be safe. Position it where it gets the right amount of light for your plants. For example, a pothos plant thrives in bright, indirect light, while succulents need more direct sunlight.
Tips & tricks for perfect macramé hanging plant holders
These simple strategies will help you create a sturdy, stylish planter that lasts—and looks amazing.
Knot Tightness Matters: When creating your hanging loop in Step 2, pull each square knot snug but not overly tight. Too loose and the loop won't hold weight; too tight and the cord can weaken over time. I like to test by gently tugging—if it doesn't budge after a firm pull, it's secure. This same principle applies to all knots throughout the project.
Wood Selection Tip: For Step 1, look for a wooden slat that's ½-inch thick or slightly thicker if you plan to add heavier plants. Cedar or pine work beautifully, but avoid softwoods like fir that can warp. Sand the edges lightly before knotting to prevent fraying. I've found that pre-drilling tiny pilot holes at your marked points prevents splintering when you tie knots.
Decorative Knot Placement: In Step 4, arrange your square knots symmetrically along the slat—think of it like creating a visual rhythm. For a boho look, space them 1-1.5 inches apart; for a more structured appearance, tighten to ½-inch intervals. The spiral knots at the ends should mirror each other for balance. This attention to spacing makes all the difference in the finished look.
Weight Distribution: Before adding plants in Step 5, test the planter's balance by gently swinging it. The slat should feel level, and the hanging loop should distribute weight evenly. If one side feels heavier, adjust the overhand knots in Step 3 by adding or removing a tiny bit of slack. This prevents uneven wear on your knots over time.
Pro Tips for Make Hanging Plant Holder
- These simple strategies will help you create a sturdy, stylish planter that lasts—and looks amazing.
- Knot Tightness Matters: When creating your hanging loop in Step 2, pull each square knot snug but not overly tight.
- Wood Selection Tip: For Step 1, look for a wooden slat that's ½-inch thick or slightly thicker if you plan to add heavier plants.
Frequently asked questions
Got questions about crafting your own hanging plant holder? Here are some common ones—and their answers—to help you get started with confidence!
What’s the best material for a beginner-friendly hanging plant holder?
If you're new to macramé or woodworking, start with cotton rope (for macramé) or pre-sanded wooden slats (for DIY holders). Cotton is forgiving for knots, while wood is sturdy and easy to customize with basic tools like a drill.
How long does it take to make a hanging plant holder?
For a simple macramé design, expect 1–3 hours depending on your knot speed. Wooden slat holders take 30 minutes–2 hours (longer if you’re staining/painting). Pro tip: Practice knots on scrap rope first to save time!
Can I use these holders for heavy plants like monstera or pothos?
Yes! For macramé, choose 3/8"–½" thick rope and reinforce knots with a wooden dowel inside. For wooden slats, ensure the holder has wide, sturdy straps (or add metal hooks) to support 5+ lbs. Always check weight limits!
What if my knots keep coming undone?
Loose knots are usually due to uneven tension or slippery rope. Try wetting the rope slightly before knotting (it grips better when damp), or use paracord—it’s stiffer and holds knots tighter. For wooden holders, pre-drill holes to prevent splintering.
How can I customize my plant holder for a specific style?
Add personality with paint, dye, or beads! For macramé, dyed rope or tassel accents elevate the look. Wooden slats? Stain them ombré or attach leather straps for a boho-chic vibe. Pro tip: Mix materials—combine wood and rope for a modern twist!
Wrapping up and next steps
Creating your own hanging plant holder is a rewarding project that blends creativity with functionality.
Whether you choose the boho charm of macramé or the rustic appeal of a wooden slat design, you now have the skills to bring greenery to life in any space. Start small—pick a plant, gather your materials, and let your hands guide you!
🌱 Pro tip: Once you’ve mastered one design, experiment with colors, textures, or even combine techniques for a unique look! Share your creations and inspire others to grow their green thumbs too.