
Planting
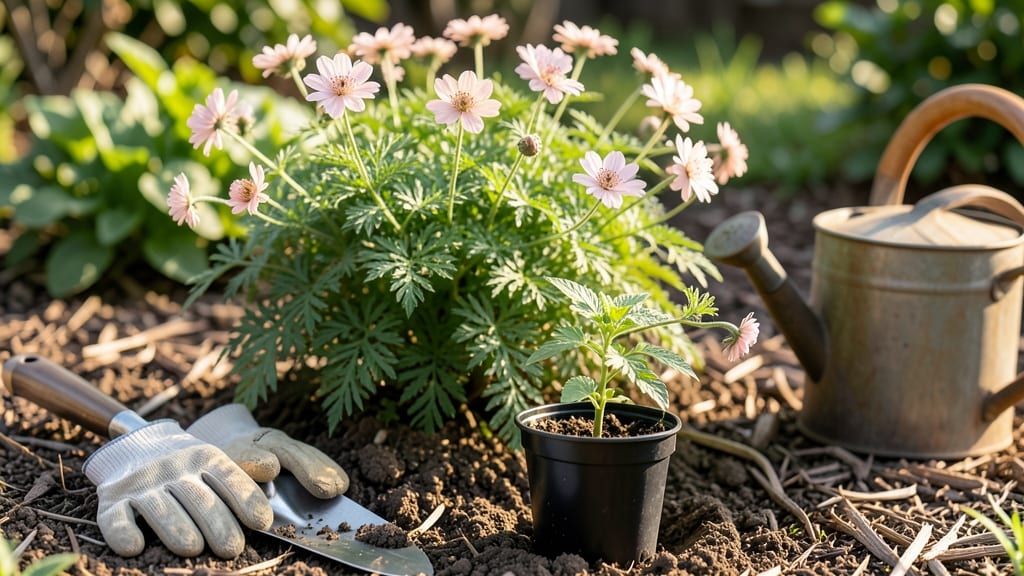
Planting gaura transforms your sunny borders into a whirling dance of butterflies—literally. 🌸 This drought-tolerant perennial thrives with almost no effort once you get the basics right, and I’ll show you exactly how to set it up for years of effortless blooms.
Start with well-draining soil and full sun—gaura wilts in shade or soggy spots. Dig holes twice as wide as the root ball but only as deep, then space plants 12-18 inches apart to give their airy stems room to sway.
Water deeply after planting, then let the soil dry between waterings (they hate wet feet). By midsummer, you’ll see those signature pink, purple, or white flowers dancing on delicate stems, blooming nonstop from June until frost. The secret?
Prune back by one-third in early spring to encourage bushier growth—no deadheading required. Perfect for rock gardens, borders, or even containers. Here’s how to keep them thriving with minimal fuss!
📚 In This Guide
- What you need
- Instructions
- Tips and common mistakes
- Wrapping up and next steps
What you need
- ● Gaura plants: Start with healthy nursery-grown seedlings (1-2 per 12" of garden space) or seeds (sow indoors 6-8 weeks before last frost). Choose varieties like Gaura lindheimeri or Gaura 'Siskiyou Pink' for vibrant blooms.
- ● Well-draining potting mix: 5-10 gallons (depending on pot size) for container gardening. For in-ground planting, amend sandy or loamy soil with compost (1 part compost to 3 parts soil).
- ○ Balanced fertilizer: A 10-10-10 or 5-10-5 NPK ratio (1 tbsp per plant at planting time). Optional: Slow-release granules for seasonal feeding.
- ● Mulch: 2-3 inches of organic mulch (pine straw, shredded bark, or straw) to retain moisture and deter weeds.
- ● Garden trowel or transplant spade (for digging holes 12-18" apart).
- ● Pruners or shears (for trimming dead blooms or leggy stems).
- ● Gloves (to protect hands from soil and thorns on some varieties).
- ● Watering can or hose with a gentle spray nozzle (gaura hates soggy roots!).
- ○ Optional: Plant markers (if you’re growing multiple varieties) or a moisture meter (to check soil dryness).
- ● Sunlight: Full sun (6+ hours/day)—gaura wilts in shade! Partial shade (<4 hours) may reduce blooms.
- ● Climate: Thrives in USDA Zones 5-10. Pro tip: In hot zones, provide afternoon shade to prevent leaf scorch.
- ● Water needs: Drought-tolerant once established—water deeply 1-2 times/week (more in extreme heat). Never let soil stay soggy!
- ● Soil pH: Prefers slightly acidic to neutral (6.0-7.0). Test soil with a pH kit if unsure.
Step-by-step instructions for planting gaura
Gaura thrives with minimal fuss—here's how to plant these sun-loving perennials for years of effortless blooms.
🪴 Step 1: Choose the Perfect Location and Prepare the Soil
Gaura demands full sun—at least 6-8 hours daily—so pick a spot where it gets morning light and afternoon sun without afternoon shade. I always test the soil first by digging a 6-inch hole and checking drainage. If water pools after 10 minutes, amend with 1-2 inches of coarse sand or perlite to improve drainage.
Gaura tolerates poor soil but blooms best in well-draining, average garden soil. Work in a 1-inch layer of compost to enrich the soil without making it too heavy. Avoid fresh manure—it can burn delicate roots. The goal is loose, airy soil that mimics its native prairie habitat.
🌱 Step 2: Plant Gaura at the Right Depth and Spacing
Dig holes twice as wide as the root ball but only as deep as the container's root level. Gaura roots are shallow, so planting too deep suffocates them. Gently remove the plant from its container, tease the roots if they're circling, and place it in the hole so the top of the root ball sits just below soil level.
Space plants 12-18 inches apart for a full, airy look. Gaura grows in clumps, so closer spacing leads to crowded stems and fewer blooms. I like to plant in odd-numbered groupings (3, 5, or 7) for a natural, flowing appearance. Water each plant deeply right after planting to settle the soil around the roots.
☀️ Step 3: Water and Mulch for Healthy Growth
Water gaura deeply once a week for the first month, letting the soil dry out between waterings. Overwatering causes root rot, and gaura’s drought tolerance means it’ll thrive with less. You’ll know moisture is right when the top 2 inches of soil feel dry to the touch.
Apply a 2-inch layer of mulch around each plant, keeping it 2 inches away from the stem to prevent rot. I use shredded bark or straw because they break down slowly and improve soil as they decompose. Mulch also suppresses weeds, which compete for water and nutrients.
✂️ Step 4: Prune and Maintain for Long-Lasting Blooms
Deadhead spent blooms by snipping stems back to the nearest set of leaves in early summer. This encourages more flowers and prevents the plant from seeding itself everywhere. Gaura blooms on new growth, so don’t worry about cutting back too much—it rebounds quickly.
In late fall or early spring, cut the entire plant back by half its height to promote fresh, vigorous growth. This also tidies up the garden bed and prevents flopping. Gaura is hardy in zones 5-9, so it returns year after year with almost no care.
🌿 Step 5: Divide and Propagate Every Few Years
Gaura forms dense clumps over time, so divide it every 3-4 years in early spring or fall. Dig up the entire plant, gently separate the clumps with a knife or your hands, and replant the largest sections. Each division should have at least 3-5 stems to establish quickly.
You can also propagate gaura from cuttings in early summer. Snip 4-inch stem tips, remove the lower leaves, and dip them in rooting hormone. Plant in moist potting mix and cover with a plastic bag to retain humidity. Roots form in 4-6 weeks, and you’ll have ready-to-plant cuttings for friends or new garden spots.
Tips & tricks for perfect gaura planting
Let me share the little details that make all the difference when planting gaura—these are the tricks I wish I'd known when I first tried growing these beauties.
Sunlight Secret: Gaura's love for full sun (6-8 hours daily) isn't just about quantity—it's about quality. I've found that morning sun paired with afternoon sun works best, especially in hotter climates. If your garden gets intense afternoon shade, consider planting gaura near the morning sun side of structures or fences. The key is avoiding that "hot afternoon sun trap" where plants can get stressed.
Root Care: When planting, I can't stress enough how critical the root ball depth is. The top should sit just below soil level—never deeper. I test this by making sure the root flare (where roots meet stem) is visible above the soil line. This prevents suffocation and encourages strong root growth. Also, if roots are circling in the container, gently tease them apart with your fingers to help them establish outward.
Watering Wisdom: That first month is crucial for establishing roots, but gaura's drought tolerance kicks in quickly. I use the "finger test" method: stick your finger 2 inches into the soil. If it feels dry, water deeply. The goal is to encourage deep root growth rather than frequent shallow watering. Overwatering is the #1 mistake I see with new gaura growers—it leads to root rot faster than you'd think.
Pruning Pro Tip: When deadheading in early summer, I always cut back to the nearest set of leaves rather than just snipping off the flower. This encourages new growth from leaf nodes, which means more blooms. And that late fall/early spring pruning back by half? It might look drastic, but it prevents flopping and gives you fresh, vigorous growth that blooms like crazy the following season.
Pro Tips for Plant Gaura
- Let me share the little details that make all the difference when planting gaura—these are the tricks I wish I'd known when I first tried growing these beauties.
- Sunlight Secret: Gaura's love for full sun (6-8 hours daily) isn't just about quantity—it's about quality.
- Root Care: When planting, I can't stress enough how critical the root ball depth is.
Frequently asked questions
Got questions about growing gaura? You’re not alone—this cheerful perennial is a favorite, but even the easiest plants have a few quirks! Here are the answers to the most common queries to help you plant with confidence.
When is the best time to plant gaura?
Gaura thrives when planted in early spring or early fall—just as temperatures stabilize. Avoid extreme heat or frost, which can stress young plants. If you’re planting in summer, opt for transplants (not seeds) and keep them well-watered until established. Pro tip: If your zone has mild winters, fall planting can give roots a head start for spring blooms!
How much sun does gaura really need?
Gaura is a sun-worshipper—plant it in full sun (6+ hours daily) for the most vibrant blooms. While it tolerates partial shade (4–6 hours), flowers may become sparse or leggy. Warning: Too little light = floppy stems and fewer blooms. If your yard is shady, consider a container near a sunny window or patio.
Can I grow gaura from seed, or should I buy plants?
Both work! Seeds are budget-friendly but slower (germination takes 10–20 days). Start them indoors 6–8 weeks before your last frost. For faster results, buy nursery plants—they’re already established and bloom the first year. Pro tip: If sowing directly outside, wait until soil is warm (60°F+) to avoid rot.
Why aren’t my gaura plants blooming?
Common culprits:
- Too much fertilizer (focus on low-nitrogen feed like 5-10-10 in spring).
- Overcrowding—thin plants to 12–18" apart for airflow.
- Deadheading neglect—snip spent blooms to encourage more flowers.
- Shade stress—move to sunnier spot if flowers are sparse.
Are there drought-tolerant gaura varieties?
Some top picks for low-water gardens include:
Variety Height Color Gaura lindheimeri ‘Siskiyou Pink’ 2–3 ft Soft pink ‘Whirling Butterflies’ 1–2 ft White/pink blend ‘Crimson Butterflies’ 1.5–2 ft Deep red-pink
Wrapping up and next steps
Planting gaura is a breeze—whether you’re a seasoned gardener or just starting out! With its sun-loving nature, drought tolerance, and stunning blooms, this perennial is the perfect low-maintenance addition to your garden.
Remember to choose the right spot, prep the soil, and give it space to thrive, and you’ll be rewarded with months of effortless color.
Now that you’ve got the know-how, why not take the next step? Grab your gaura plants (or seeds!) and get planting—your future garden will thank you! 🌸 And if you’re feeling inspired, experiment with different varieties or pair gaura with complementary plants for a show-stopping display.