
Planting
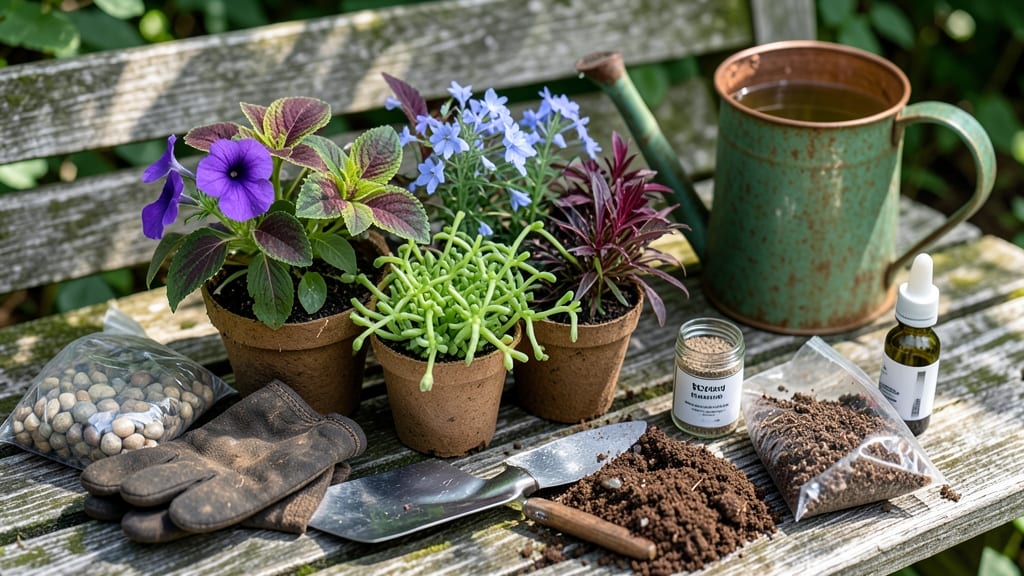
Planting in tall planters transforms your space into a vertical jungle—just follow these layered soil secrets for roots that thrive. 🌱 I learned the hard way that shallow pots stunt growth, but deep containers let plants stretch their roots like they would in the ground.
The trick is balancing drainage, soil layers, and plant spacing so nothing gets crowded or waterlogged.
Start with a sturdy planter at least 12 inches deep, then add 3 inches of gravel at the bottom for drainage. Mix in high-quality potting soil enriched with compost—this gives roots room to explore while keeping moisture just right.
For larger plants like tomatoes or peppers, divide the pot into three soil layers, adding compost between each to feed roots as they grow downward.
You’ll end up with lush, productive plants that stay upright and healthy all season. The right spacing (check plant tags!) prevents competition, and a slow-release fertilizer keeps them fed without fuss. Even herbs and leafy greens grow taller and fuller in deep containers—no more leggy, weak stems.
This method works for any tall container, from decorative pots to repurposed buckets. Just avoid overwatering—deep planters hold moisture longer than you’d expect. Perfect for balconies, patios, or small yards where space is limited but ambition isn’t.
📚 In This Guide
- What you need
- Instructions
- Tips and common mistakes
- Wrapping up and next steps
What you need
- ● Tall planter: Minimum 12–18 inches deep (or deeper for root crops like carrots or potatoes). Ensure it has drainage holes at the bottom.
- ● Potting soil: High-quality, well-draining mix (e.g., 50% potting soil + 50% perlite or coconut coir for aeration). Quantity: Enough to fill the planter in layers (typically 2–3 cubic feet for a 12"x12" planter).
- ● Drainage layer: Small gravel (¼–½ inch pebbles) or perlite (2–3 inches thick).
- ○ Optional: Landscape fabric (to prevent soil from clogging drainage holes).
- ● Plants: Choose deep-rooted or trailing varieties like: Herbs (basil, rosemary, thyme)
- ● Vegetables (tomatoes, peppers, green onions)
- ● Flowers (petunias, nasturtiums, ferns)
- ● Watering can or hose: With a gentle spray nozzle for even moisture distribution.
- ● Gloves & trowel: For easy handling and soil layering.
- ● Slow-release fertilizer: Mix into soil layers for 3–6 months of nutrients (e.g., osmocote or compost).
- ● Mulch: Straw or shredded bark to retain moisture and suppress weeds.
- ● Support structures: Trellis or stakes for vining plants (e.g., cucumbers, beans).
- ● pH testing kit: To check soil acidity (ideal range: 6.0–7.0 for most plants).
- ● Self-watering system: Wick or reservoir kit for low-maintenance hydration.
Step-by-Step instructions for planting in tall planters
Layering soil properly is the secret to thriving plants in deep containers—here's how to do it right.
🪴 Step 1: Select and Prepare Your Tall Planter
Choose a container with drainage holes at the bottom and a minimum depth of 12 inches for most plants. I like to place a 2-inch layer of gravel or broken pottery at the base before adding soil—this ensures proper drainage while preventing fine soil from clogging the holes. If your planter has no drainage, add a 3-inch layer of coarse sand instead to create a capillary break.
Clean the planter thoroughly with soapy water to remove any residue from previous plants. Rinse well and let it dry completely before adding soil. This prevents fungal growth and ensures your new plants start with a clean slate. For decorative planters without drainage, consider adding a 1-inch layer of landscape fabric over the gravel to keep it in place while still allowing water to pass through.
🌱 Step 2: Build Soil Layers for Optimal Root Growth
Start with a 3-inch layer of coarse, gritty potting mix at the bottom. This layer promotes root penetration and prevents compaction. I like to use a blend of 50% peat moss and 50% perlite or coarse sand for this base layer—it mimics the loose, well-draining conditions deep roots crave. Press it down lightly with your fingers to create a stable foundation.
Next, add a 4-inch layer of high-quality potting soil mixed with compost or worm castings for nutrients. This middle layer is where most of your plant’s root system will develop, so it needs to be rich but still well-aerated. Avoid garden soil—it compacts easily and can suffocate roots. Tap the sides of the planter gently to settle the soil evenly without compacting it.
🌿 Step 3: Plant Your Deep-Rooted Specimens
For tall planters, focus on plants with deep root systems like lavender, rosemary, or ornamental grasses. Dig a hole in the middle layer of soil that’s just deep enough to accommodate the root ball of your plant. Hold the plant by its leaves or stem—never by the roots—to avoid damaging them. Place it in the hole and fill the gap with additional potting soil, pressing gently to eliminate air pockets.
If planting from seed, sow seeds at the correct depth for your chosen plant—usually twice the diameter of the seed. For example, tomato seeds go ¼ inch deep, while larger seeds like beans need 1 inch of coverage. Water gently after planting to settle the soil around the roots or seeds. Avoid overwatering at this stage, as it can dislodge newly placed plants or seeds.
⏰ Step 4: Water and Maintain Proper Moisture Levels
Water the planter thoroughly until water runs freely from the drainage holes. This ensures the entire root zone is moistened without leaving dry pockets. Let the planter drain completely, then wait until the top 1-2 inches of soil feel dry to the touch before watering again. Overwatering is a common mistake—tall planters can hold a lot of moisture, and soggy soil leads to root rot.
After the initial watering, maintain a consistent moisture level by checking the soil daily. Tall planters dry out more slowly than shallow ones, so you’ll likely water every 3-5 days depending on your climate. Mulch the soil surface with a ½-inch layer of organic mulch to retain moisture and regulate temperature. Avoid mulching right up against the stems of your plants to prevent rot.
☀️ Step 5: Provide Light and Care for Long-Term Success
Most deep-rooted plants need 6-8 hours of sunlight daily, though some like lavender tolerate full sun. Position your planter where it gets the most light possible, and rotate it a quarter turn weekly to encourage even growth. You’ll notice leggy growth if the light isn’t sufficient—this is your plant stretching toward the nearest light source.
Fertilize your tall planter every 4-6 weeks with a balanced, slow-release fertilizer to support deep root development. I like to use a 10-10-10 or 20-20-20 formula diluted to half strength. Avoid over-fertilizing, as excess salts can build up in the soil and harm your plants. Monitor your plants closely, and adjust care as needed—deep-rooted plants often show stress symptoms like yellowing leaves if their roots aren’t getting enough oxygen or nutrients.
Tips & tricks for perfect tall planter planting
Between us, the devil is in the details when it comes to tall planters—these are the small things that'll make your deep-rooted plants thrive where others fail.
Drainage Layer Logic: That 2-inch gravel layer in Step 1 isn't just decoration—it's your insurance against soggy roots. For containers without drainage, the 3-inch coarse sand creates a capillary break that mimics natural soil conditions. Pro tip: Rinse your gravel before adding it to remove any dust or fine particles that could clog drainage holes over time.
Soil Texture Matters: In Step 2, resist the urge to skip the 3-inch gritty base layer. I've seen gardeners use regular potting soil all the way to the bottom, and within weeks, the roots suffocate from compaction. The 50% peat moss/50% perlite mix gives roots the air pockets they crave—think of it as creating a "breathing zone" for your plants' deepest extensions.
Planting Precision: When placing your deep-rooted specimens in Step 3, here's what nobody tells you: The hole should be just deep enough so the top of the root ball sits 1 inch below the soil surface. This prevents stem rot while allowing roots to access the nutrient-rich middle layer. For seeds, that twice the diameter rule is your friend—press them gently but firmly into place so they maintain contact with moist soil without being buried too deep.
Watering Wisdom: The 1-2 inches dry at the surface guideline in Step 4 is your best friend, but here's the catch: Tall planters hold moisture like a sponge. I've seen people water every other day and still end up with root rot. Stick to the 3-5 day range, but check with your finger—if it's still damp at 2 inches down, wait one more day. And that ½-inch mulch layer? It's not just for looks—it regulates temperature swings that can stress deep roots.
Pro Tips for Plant In A Tall Planter
- Between us, the devil is in the details when it comes to tall planters—these are the small things that'll make your deep-rooted plants thrive where others fail.
- Drainage Layer Logic: That 2-inch gravel layer in Step 1 isn't just decoration—it's your insurance against soggy roots.
- Soil Texture Matters: In Step 2, resist the urge to skip the 3-inch gritty base layer.
Frequently asked questions
Got questions about maximizing your tall planter’s potential? You’re not alone! Here are answers to the most common queries—plus a few pro tips to keep your plants thriving.
What’s the best soil mix for tall planters?
Use a well-draining potting mix blended with 20-30% perlite or vermiculite to prevent compaction. For heavy feeders (like tomatoes), add compost or worm castings to the bottom layers. Avoid garden soil—it compacts and suffocates roots!
When is the best time to plant in a tall planter?
Plant in spring or early fall when temperatures are mild (50–75°F). For cold-hardy plants (e.g., kale, pansies), you can start in late winter if your zone allows. Avoid summer planting—heat stresses seedlings and dries out soil quickly.
How often should I water a tall planter?
Check moisture daily in hot weather—stick your finger 2–3 inches deep. Tall planters dry out faster at the top; water until it runs out the drainage holes. Mulch the surface to retain moisture and reduce evaporation.
Can I grow herbs or shallow-rooted plants in a tall planter?
Yes! Use the top 6–12 inches for herbs (basil, thyme) or lettuce. Fill the rest with lightweight mix (like coconut coir) to avoid overwatering. Just ensure the container has drainage holes to prevent root rot.
Why are my plants wilting even with regular watering?
Overcrowding or poor drainage are likely culprits. Check for:
- Roots circling the edges (time to repot!).
- Salty buildup (flush with water if using tap water).
- Pests like aphids blocking nutrients (spray with neem oil).
Wrapping up and next steps
Planting in tall planters is your ticket to bountiful harvests and thriving greenery—no sprawling garden required! 🌱 By mastering the layered soil technique, you’re giving roots the perfect home to stretch, grow, and flourish. Start small, experiment with textures, and watch your plants reach new heights (literally!).
Now that you’re armed with the soil secrets, it’s time to roll up your sleeves and get planting. Grab that tall planter, pick your favorites, and let nature do the rest—your future self (and hungry critters!) will thank you. 🌿