
Planting
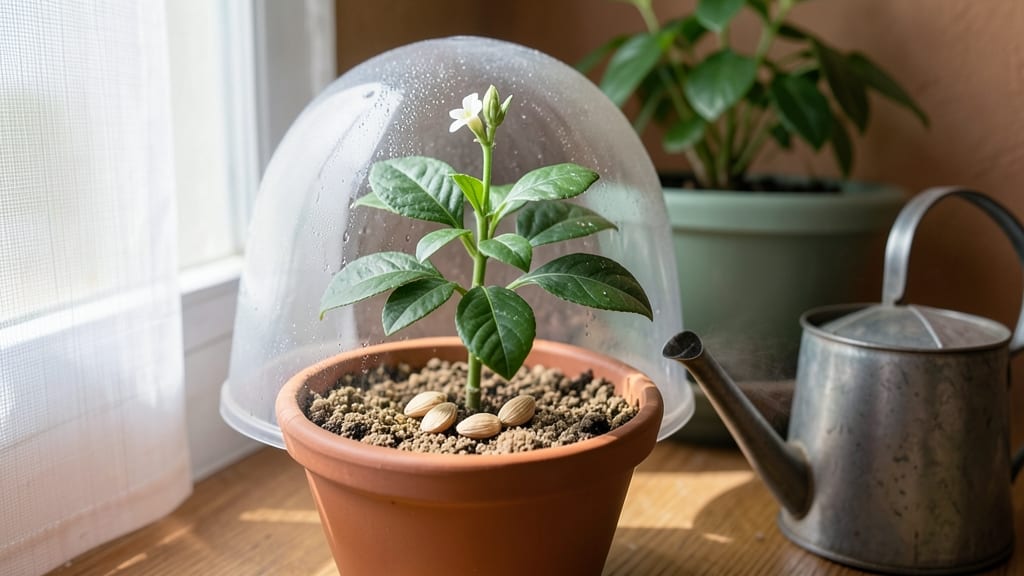
Planting lemon seeds at home turns your kitchen scraps into a sunlit citrus tree—if you know the fast tricks. 🌱 The secret isn’t just patience; it’s mimicking the Mediterranean climate where lemons thrive, right on your windowsill.
I’ve grown three from grocery-store seeds, and the first true leaves appear in just 3-4 weeks with the right setup.
You’ll need a shallow tray or small pot, well-draining soil mix (equal parts potting soil and perlite), and a warm spot with bright, indirect light. Skip the fancy tools—just a spray bottle, patience, and a sunny windowsill.
The key is keeping the soil moist but never soggy; citrus seeds rot faster than they sprout if they’re too wet.
By week 6, you’ll see sturdy seedlings with glossy leaves, ready to transplant. The first harvest? Not for years, but watching those tiny leaves unfurl makes every damp paper towel worth it.
These little trees grow surprisingly fast once established, and you’ll end up with a fragrant, leafy plant that’s the envy of your neighborhood.
Works for Meyer lemons, Eureka lemons, or any citrus seed you can scrounge. The only downside? Most won’t produce fruit like store-bought trees—but the journey is half the joy. Here’s how to get those seeds sprouting without the guesswork.
📚 In This Guide
- What you need
- Instructions
- Tips and common mistakes
- Wrapping up and next steps
What you need
- ● Lemon seeds: 3–5 fresh, plump seeds (from organic or pesticide-free lemons for best results).
- ● Small pots or seed trays: 3–4 (4–6 inches deep) with drainage holes. Tip: Biodegradable pots work great!
- ● Well-draining potting mix: 2–3 cups of a high-quality, peat-free mix (or a blend of perlite, coconut coir, and compost).
- ● Watering can or spray bottle: With a fine mist nozzle for gentle hydration.
- ● Plastic wrap or clear lid: To create a mini greenhouse effect.
- ○ Heat mat (optional but helpful): Keeps soil warm (70–85°F) for faster germination.
- ● Grow lights or sunny windowsill: A south-facing spot with 6+ hours of indirect light.
- ● Fungicide: A light spray to prevent mold if humidity is high.
- ● Fertilizer: A balanced, diluted citrus fertilizer (after sprouting).
- ● Humidity dome: For extra moisture control.
- ● Label markers: To track planting dates!
Step-by-step instructions for planting lemon seeds at home
Here’s how I get lemon seeds sprouting in just 2-3 weeks—no fancy tools needed.
🌱 Step 1: Extract and Prepare the Seeds
Cut open a fresh lemon and scoop out the seeds, rinsing off any pulp. The key to fast germination is a 12-hour soak in lukewarm water—this softens the tough outer coating and jumpstarts root growth. Place the seeds in a small bowl and cover with water, letting them sit overnight. I like to use a mesh bag or strainer so they don’t sink to the bottom.
After soaking, drain the water and let the seeds air-dry for 10-15 minutes. This prevents mold while keeping them moist enough to plant. If you’re impatient (like me), you’ll notice tiny white roots peeking out after just 24 hours—that’s your first sign of success.
🪴 Step 2: Choose Containers and Fill With Moist Soil
Use small pots or even plastic cups with drainage holes—just 3-4 inches deep is perfect. Fill them with a mix of potting soil and perlite (I use a 3:1 ratio) to keep roots aerated. Moisten the mix until it’s damp but not soggy—think of a wrung-out sponge. Press it down lightly so the soil stays in place but doesn’t compact.
Plant 1-2 seeds per pot, about ½ inch deep. Cover them gently with soil, patting the surface smooth. Too deep and they’ll struggle to break through; too shallow and they’ll dry out. I label each pot with the date—trust me, you’ll forget which ones you planted first!
💧 Step 3: Create a Humid, Warm Germination Environment
Place the pots in a clear plastic bag or under a glass cloche to trap warmth and moisture. Lemons love 70-80°F for germination, so a sunny windowsill or a seedling heat mat works best. Check daily—mist the soil lightly if it feels dry to the touch, but avoid soaking it. Overwatering now will rot the seeds before they sprout.
In 7-10 days, you’ll see tiny green shoots poking through the soil. That’s your cue to remove the cover immediately—too much humidity now invites mold. Once the first true leaves appear (not the initial seed leaves), thin to the strongest seedling per pot. Weak competition means faster, healthier growth.
☀️ Step 4: Transition to Bright, Indirect Light
Move the seedlings to a spot with bright, indirect light—like an east-facing window. Direct sun now will scorch their delicate leaves. Rotate the pots a quarter turn weekly so they grow straight, not lopsided. You’ll know they’re thriving when new leaves unfurl every 2-3 weeks.
After 4-6 weeks, when seedlings have 4-5 leaves, transplant them into slightly larger pots (about 6 inches wide). Use fresh potting mix and water deeply to settle the roots. This is also when I start fertilizing lightly—just a quarter-strength citrus fertilizer every 4 weeks to avoid burning tender roots.
⏰ Step 5: Harden Off and Prepare for Outdoors
Before moving seedlings outside, harden them off over 2 weeks. Start by placing them outdoors in a shaded spot for 1 hour daily, gradually increasing time and sun exposure. Watch for wilting—if leaves droop, they’re not ready yet. Once they tolerate 6+ hours of sun without stress, they’re ready for their forever home.
Choose a sunny spot with well-draining soil, and plant them 12-18 inches apart. Mulch around the base to retain moisture and keep roots cool. Real talk: These seedlings won’t fruit for 3-5 years, but the journey is worth it. Patience pays off with fragrant blooms and (eventually) homegrown lemons!
Tips & tricks for planting lemon seeds at home
These little tricks will help you skip the common pitfalls—and get those lemon seeds sprouting faster than you’d expect.
Soak Smart: That 12-hour soak in lukewarm water is your secret weapon. I’ve learned the hard way that cold water slows germination, while water hotter than 80°F can damage the seeds. Use a mesh bag to keep them suspended—this prevents them from sinking to the bottom where they might rot. After draining, give them that 10-15 minute air-dry, but don’t let them sit out longer than 20 minutes or they’ll dry out completely.
Container Wisdom: The 3-4 inch depth recommendation isn’t just about space—it’s about drainage. If your containers don’t have drainage holes, drill a few small holes in the bottom before planting. Too much moisture at this stage causes mold faster than you can say "failed experiment." And here’s the thing: plastic cups work perfectly, but make sure they’re clean—soap residue can inhibit germination.
Humidity Hack: When you create that humid environment with plastic bags, don’t seal them completely. Leave a small gap or use a cloche with ventilation—condensation buildup can lead to mold in just 7-10 days. I place a small piece of cardboard under my cloche to prevent soil from touching the plastic, which keeps everything cleaner and healthier. The goal is moisture, not a swamp!
Light Transition: That bright, indirect light in Step 4 is crucial after the 4-6 week mark. I’ve seen seedlings get sunburned when moved too quickly to direct sunlight. Start with just 2-3 hours of morning sun, then gradually increase. And that weekly rotation? It’s not just for looks—it prevents your seedlings from growing lopsided toward the light source. Think of it like giving them a gentle massage to stay balanced.
Pro Tips for Plant Lemon Seeds At Home
- These little tricks will help you skip the common pitfalls—and get those lemon seeds sprouting faster than you’d expect.
- Soak Smart: That 12-hour soak in lukewarm water is your secret weapon.
- Container Wisdom: The 3-4 inch depth recommendation isn’t just about space—it’s about drainage.
Frequently asked questions
Got questions about growing lemons from seeds? Here are some common ones—and their answers—to help you succeed!
How long does it take for lemon seeds to germinate?
Lemon seeds typically germinate in 14 to 30 days, depending on temperature and moisture. Keep soil warm (around 70–80°F) and consistently damp for the best results. Patience is key—some seeds may take longer, especially if stored or dried.
Can I plant lemon seeds in winter?
Yes, but germination slows in cold weather. If planting in winter, use a seedling heat mat or place pots near a sunny window. Alternatively, start seeds indoors under grow lights until spring. Lemons love warmth—spring or summer is ideal for outdoor planting.
Will my homegrown lemon tree produce fruit?
Most likely, no—unless you have a pollinated variety (like 'Eureka' or 'Meyer'). Seed-grown trees often produce small, bitter lemons or no fruit at all. For reliable fruit, graft a known variety onto your seedling or buy a nursery-grown tree. Patience pays off!
What if my lemon seedling turns yellow or wilts?
Yellowing leaves or wilting usually means overwatering or poor drainage. Let the top inch of soil dry out between waterings, and ensure pots have drainage holes. Check for pests (like aphids) or fungal issues—remove affected leaves and adjust care as needed.
Can I grow a lemon tree indoors year-round?
Place your seedling near a south-facing window (or under grow lights) for 6+ hours of sunlight daily. Use a well-draining potting mix and rotate the pot weekly for even growth. In winter, reduce watering—lemons thrive indoors but need consistent light.
What’s the fastest way to speed up germination?
Try the paper towel method: Wrap seeds in a damp paper towel, seal in a plastic bag, and place in a warm spot. Check daily—once sprouted (in 7–14 days), transplant to soil. For extra speed, soak seeds in warm water for 24 hours before planting.
Wrapping up and next steps
Growing a lemon tree from seed at home is a rewarding journey—one that blends patience, care, and a touch of green-thumb magic. 🌱 By following these steps, you’ll not only nurture a thriving citrus plant but also enjoy the satisfaction of watching something you’ve grown from scratch.
Once your seedling sprouts and matures, don’t stop there: share your harvest with friends, experiment with homegrown lemons, or even propagate more trees!
Ready to take the next step? Explore advanced citrus care tips or dive into other DIY gardening projects to keep your green adventures growing!