
Planting
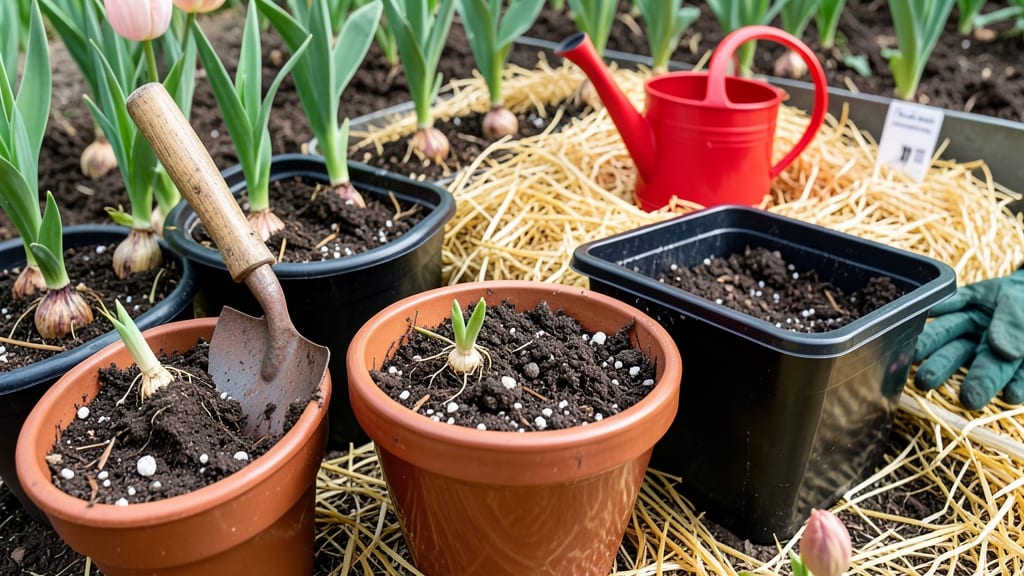
Fall is the perfect time to plant tulip bulbs in pots—they’ll need that cold snap to bloom like crazy next spring. 🌱 I’ve tried this trick for three winters now, and my patio always gets the first showy blooms of the season, while neighbors are still waiting for their in-ground tulips to wake up.
You’ll need a container with drainage holes (terracotta or plastic both work), a mix of potting soil and compost, and bulbs that say “hardy” on the package. The secret?
Planting them deep enough so the top of each bulb sits about 2 inches below soil level—this mimics their natural winter dormancy underground. Overcrowding is the #1 mistake, so space bulbs 4-6 inches apart for those dramatic spring stems.
Water them well after planting, then let nature handle the rest until spring. The key is keeping the soil moist but not soggy until the ground freezes. I’ve even left pots outside through winter—just move them to a sheltered spot if your winters are brutal.
By March, you’ll have stems shooting up like little green rockets. This method works for daffodils and hyacinths too, and you can even bring pots indoors for a frost-free early bloom. Just don’t forget to harden them off before moving back outside! The payoff?
Stunning blooms when your garden is still sleeping.
📚 In This Guide
- What you need
- Instructions
- Tips and common mistakes
- Wrapping up and next steps
What you need
- ● Tulip bulbs: 1–3 bulbs per 6-inch pot (or 3–5 bulbs per 10-inch pot). Choose hardy varieties like Darwin Hybrid or Fosteriana for cold tolerance.
- ● Containers: Pots with drainage holes (6–10 inches deep). Use terracotta, fiberglass, or plastic—just ensure they’re frost-resistant!
- ● Potting mix: A well-draining blend like cactus/succulent mix or add perlite/vermiculite (20–30% by volume) to regular potting soil.
- ● Gravel or drainage material: Small pebbles or coarse sand (1–2 inches) to layer at the pot’s bottom.
- ● Watering can or spray bottle: For gentle hydration without over-saturating.
- ● Slow-release fertilizer: A bulb-specific formula (e.g., Osmocote Bulb Food) for a nutrient boost.
- ● Mulch: A light layer of straw or shredded leaves to insulate bulbs in winter.
- ● Plant labels: To track varieties if you’re experimenting!
- ● Pot feet or saucers: To elevate pots and prevent waterlogging.
Step-by-step instructions for planting tulip bulbs in pots
Here's how to get vibrant spring blooms using just a few simple supplies and fall timing.
🌱 Step 1: Choose and Prepare Your Containers
Select pots with drainage holes that are at least 6 inches deep—tulip bulbs need room to grow roots downward. I like terracotta because it breathes and helps prevent rot. If your pot lacks drainage, drill holes in the bottom before planting.
Place a layer of gravel or broken pottery shards at the bottom to create a drainage barrier. This prevents water from pooling around the bulbs, which can cause them to rot over winter. The gravel layer should be about 1 inch thick—just enough to support the pot's weight when full.
🌱 Step 2: Layer the Drainage and Planting Medium
Fill the pot halfway with a mix of potting soil and sand (about 50/50 ratio). This combination drains well while still holding enough moisture for the bulbs. I like to add a handful of perlite to the mix for extra air circulation—it keeps the soil loose so roots can grow freely.
Gently press the soil down to remove air pockets. You want it firm but not compacted. The goal is a balance that supports the bulbs while allowing water to penetrate evenly. Leave about 2 inches of space at the top of the pot for the bulbs and additional soil.
🌱 Step 3: Plant the Tulip Bulbs Correctly
Place the tulip bulbs in the pot with their pointed ends facing upward. I arrange them close together but not touching—about 1 inch apart. This encourages a full, lush display of blooms come spring. If your pot is large, you can plant multiple bulbs in layers, but keep each layer spaced 1 inch apart vertically.
Cover the bulbs with about 2 inches of soil, leaving the very tips exposed. This ensures they have enough light to begin root growth but still stay protected from harsh winter elements. Gently pat the soil down to settle it around the bulbs—no need to pack it tightly.
💧 Step 4: Water and Prepare for Winter
Water the pot thoroughly until water drains from the bottom. You'll know it's done when water runs out of the drainage holes. This step is critical—it helps the bulbs establish roots before the ground freezes. After watering, place the pot in a location that gets full sun until the first frost.
Once frost arrives, move the pots to a sheltered spot like a garage or under an overhang. Keep them in a place where temperatures stay between 32-50°F—this mimics natural winter conditions and helps the bulbs develop properly. Check the soil occasionally to ensure it stays slightly moist but never soggy.
☀️ Step 5: Bring Pots Indoors Before Blooming
In late winter, when you see green shoots emerging from the soil, move the pots back to a sunny indoor spot. Place them near a south-facing window where they'll get at least 6 hours of sunlight daily. This encourages the bulbs to bloom indoors, extending your spring display.
Water sparingly during this phase—just enough to keep the soil moist but not waterlogged. Overwatering now can cause the blooms to fade prematurely. Watch for buds to form, and once they appear, enjoy your indoor tulips for about 1-2 weeks before they finish blooming.
Tips & tricks for planting tulip bulbs in pots
Here's what nobody tells you about getting those tulips to bloom beautifully—these little details make all the difference.
Container Selection: Terracotta pots are ideal because they breathe and help prevent rot, but if you don't have any, any container with drainage holes will work. For larger pots, use multiple drainage holes if they don't come pre-drilled—just be sure they're at least 6 inches deep to accommodate root growth. The key is preventing water from pooling around the bulbs, which can cause them to rot over winter.
Soil Mix Matters: That 50/50 mix of potting soil and sand is crucial for proper drainage while still holding moisture. I always add a handful of perlite to improve aeration—this keeps the soil loose so roots can grow freely without becoming waterlogged. If you're short on perlite, you can substitute it with vermiculite or even a little coarse sand.
Planting Depth and Spacing: The 2-inch soil coverage is perfect—it protects the bulbs while leaving the tips exposed for light. When planting multiple layers in larger pots, keep each layer spaced 1 inch apart vertically. This creates room for root growth and prevents overcrowding, which can lead to smaller blooms. Think of it like giving each bulb its own little space to thrive.
Winter Care: Those 32-50°F temperatures are critical for proper bulb development. If your garage or sheltered spot gets colder than 32°F, consider adding a layer of mulch or straw around the pot for extra insulation. Just make sure the soil stays slightly moist—not soggy—throughout the winter months. This mimics natural winter conditions and helps the bulbs develop properly for spring blooms.
Pro Tips for Plant Tulip Bulbs In Pots In Fall
- Here's what nobody tells you about getting those tulips to bloom beautifully—these little details make all the difference.
- Container Selection: Terracotta pots are ideal because they breathe and help prevent rot, but if you don't have any, any container with drainage holes will work.
- Soil Mix Matters: That 50/50 mix of potting soil and sand is crucial for proper drainage while still holding moisture.
Frequently asked questions
Got questions?
Planting tulip bulbs in pots is easy, but every gardener has a few curiosities—especially when it comes to timing, care, and troubleshooting. Here’s what you need to know before you start!
When is the best time to plant tulip bulbs in pots?
Plant them 6–8 weeks before the ground freezes—typically late September to early November in most U.S. zones. This gives roots time to establish before winter. If you miss the window, don’t worry! You can plant as late as winter (just add extra mulch for protection).
Can tulip bulbs survive winter in pots?
Yes! Use frost-proof pots (like those with drainage holes) and place them in a sheltered spot (e.g., against a wall or under eaves). Add 3–4 inches of mulch or straw around the base to insulate them. Avoid plastic containers—they trap cold and moisture.
Do tulip bulbs need sunlight in pots?
Tulips thrive in full sun to partial shade (6+ hours of sunlight daily). In pots, they’ll need even more light since containers heat up faster. If your spot is shady, choose dwarf varieties (like Tulipa ‘Dwarf Gem’)—they tolerate lower light better.
How often should I water potted tulip bulbs in fall?
Water sparingly after planting—just enough to keep soil moist (not soggy). Once frozen, reduce watering to once a month (unless there’s a dry spell). Overwatering in winter can rot bulbs. In spring, resume watering when shoots appear.
Can I reuse the same pot for tulips every year?
Not ideal! Tulips deplete soil nutrients and are prone to tulip fire disease (a fungal issue) if replanted in the same pot. After blooming, remove and compost the bulbs, then refresh the soil with a new mix. Rotate pots or sterilize them with a 10% bleach solution if reusing.
Why aren’t my potted tulips blooming?
Common culprits:
- Not enough light: Move pots to a sunnier spot.
- Overcrowded bulbs: Space them 4–6 inches apart.
- Poor drainage: Ensure pots have holes and use well-draining soil.
- No winter chill: Tulips need 12–16 weeks below 40°F to bloom. If your climate is mild, try a cold frame or garage.
Wrapping up and next steps
Planting tulip bulbs in pots this fall is a simple, rewarding way to enjoy vibrant spring blooms—even in small spaces! 🌸 With the right containers, soil, and timing, you’ll create a stunning display that thrives year after year. Don’t wait—grab your bulbs and get started before the ground freezes!
Now that you’re ready to plant, mark your calendar for early spring: watch for those first shoots and prepare to nurture your tulips into full, colorful glory. Happy planting! 🌱