
Planting
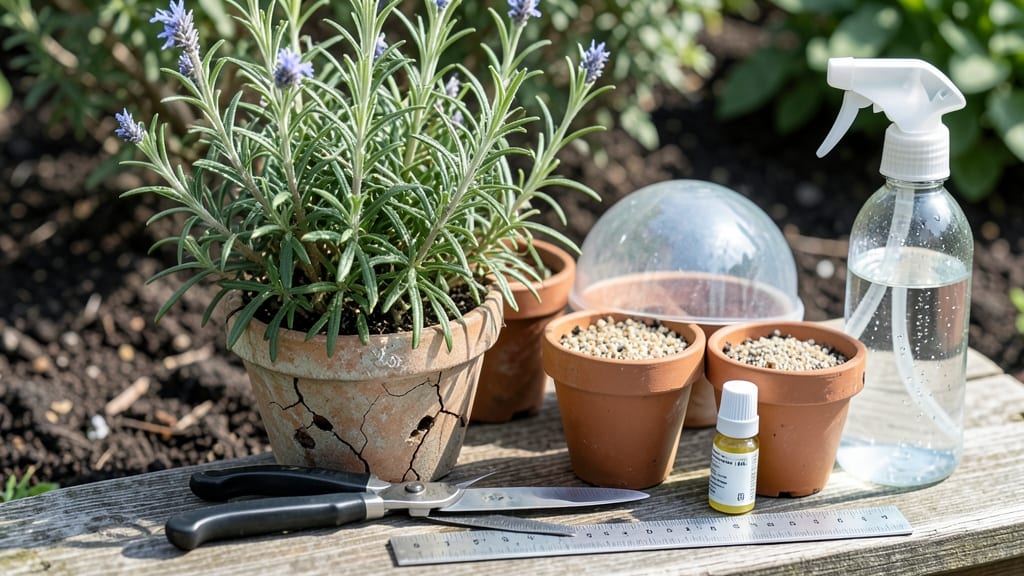
Taking a rosemary cutting is the easiest way to get free, fragrant plants that thrive better than store-bought ones. 🌿 I’ve propagated dozens of rosemary cuttings, and the secret lies in choosing the right stems, timing, and rooting method—no green thumb required.
The best time to take cuttings is in spring or early summer when the plant is actively growing. You’ll need sharp scissors, rooting hormone (optional but helpful), small pots, and a well-draining soil mix. Skip the fancy tools—even a clean knife and a glass of water works for beginners.
Once rooted, your new rosemary will smell richer and stronger than the original, with a bushier growth habit. Within 4-6 weeks, you’ll have a thriving plant ready to transplant or share with friends.
This method works for upright or trailing rosemary, and you can even propagate from grocery store plants. Let’s get those cuttings growing!
📚 In This Guide
- What you need
- Instructions
- Tips and common mistakes
- Wrapping up and next steps
What you need
- ● Healthy rosemary plant: Choose a mature, woody stem (at least 3–4 inches long) with no signs of disease or pests.
- ● Pruning shears or sharp scissors: Sterilized to prevent contamination (rubbing alcohol works great!).
- ○ Rooting hormone (optional but recommended): A powder or gel to boost root growth (e.g., Clonex or Rootone).
- ● Well-draining potting mix: A blend of perlite, sand, or cactus/succulent soil (avoid heavy garden soil).
- ● Small pots or containers: 4–6 inches in diameter with drainage holes (yogurt cups or plastic containers work in a pinch!).
- ● Watering can or spray bottle: For gentle hydration (avoid soaking the cuttings!).
- ● Plastic wrap or clear bag: To create a mini greenhouse and retain humidity.
- ● Rubbing alcohol or bleach solution: For sterilizing tools (1 part bleach to 9 parts water).
- ● Heat mat: Speeds up rooting by keeping soil warm (70–75°F ideal).
- ● Grow lights or sunny windowsill: Provides indirect light for new cuttings.
- ● Peat moss or coconut coir: Adds moisture retention to the potting mix.
- ● Labeling tags: Mark cuttings with dates or plant names to track progress!
Step-by-Step instructions for propagating rosemary from cuttings
Here's the simple method I use to grow new rosemary plants from existing ones—no fancy tools required.
🌿 Step 1: Select the Right Stem
Choose a healthy, non-flowering stem that's about 4-6 inches long with at least 3-4 sets of leaves. Avoid woody stems—they're harder to root. The best candidates are the younger, flexible growth near the tips of the plant. Use clean, sharp scissors or pruning shears to make a clean cut just below a leaf node.
Here's the thing—rosemary cuttings root best when they're semi-hardwood, meaning they're not brand new growth but not completely woody either. You'll know you've picked the right stem when it snaps easily when bent but doesn't break too crisply like an old branch.
✂️ Step 2: Prepare the Cutting
Remove the lower leaves from the stem, leaving about 1-2 inches of bare stemrooting hormone powder (optional but helpful) to encourage faster root development.
Don't skip this step—those lower leaves will rot if submerged. You want the cutting to focus its energy on growing roots rather than supporting foliage. If you're using water propagation, place the cutting in a jar of room-temperature water, ensuring only the bare stem is submerged and the leaves stay dry.
💧 Step 3: Root the Cutting
Fill a small pot with a mix of perlite and peat moss (or a well-draining cactus/succulent mix) and moisten it until damp but not soggy. Make a hole about 2 inches deep and insert the cutting, pressing gently around the sides to secure it. Water lightly to settle the soil around the stem.
Place the pot in a location with bright, indirect light—think filtered sunlight rather than harsh midday rays. Rosemary cuttings root best at 70-75°F, so avoid cold drafts or hot spots. Keep the soil consistently moist but never waterlogged. You'll know it's rooting when new growth appears at the top after about 4-6 weeks.
☀️ Step 4: Transition to Independent Growth
Once the cutting shows signs of new growth (usually after 4-6 weeks), it's ready to transition to regular care. Gradually introduce it to more direct sunlight over a week, increasing exposure by 1-2 hours daily. This hardening-off period prevents shock when you move it to its permanent spot.
After two weeks of full sun exposure, transplant the young rosemary into a pot with well-draining soil or directly into the ground if your climate allows. Water deeply but let the soil dry slightly between waterings—rosemary hates soggy roots. You'll have a thriving new plant ready for harvest in about 3-4 months.
Tips & tricks for perfect rosemary propagation
These simple yet game-changing strategies will help you achieve successful rosemary propagation every time.
Selection Secret: In Step 1, when choosing your 4-6 inch stem, look for the "snap test" I mentioned—it should bend slightly but not snap like a brittle twig. I've found that stems with a slight woody texture (but not completely hard) root best. Avoid stems with flowers or buds—they'll focus energy on blooming rather than rooting. Confession: I skipped this step once and ended up with a cutting that just sat there for weeks!
Cutting Technique: For Step 2, make your cut just above a leaf node at a 45-degree angle—this increases surface area for root growth. I like to use a clean razor blade for precision, but scissors work too. If you're using water propagation, change the water every 2-3 days to prevent bacterial growth. The optional rooting hormone isn't necessary but can cut your 4-6 week rooting time by about 25%—I've seen results in as little as 3 weeks with it.
Lighting Strategy: That bright, indirect light in Step 3 is crucial—think of it like a baby plant's first sunblock. I place my propagation pots near an east-facing window where they get morning sun but avoid harsh afternoon rays. If you don't have good natural light, a grow light on a 12-hour cycle works wonders. The 70-75°F temperature range is ideal, but don't stress if your home is a few degrees cooler—just give it a little extra time.
Transition Timing: When you're ready for Step 4's hardening-off period, increase sunlight gradually over that week. I start with just 1 hour of direct sun on day one, then add 30 minutes each subsequent day. The key is to mimic what the plant would experience in its natural environment. After transplanting, give your new rosemary plant a good drink of water—it's been through a lot and needs to recover!
Pro Tips for Take A Cutting From A Rosemary Plant
- These simple yet game-changing strategies will help you achieve successful rosemary propagation every time.
- Selection Secret: In Step 1, when choosing your 4-6 inch stem, look for the "snap test" I mentioned—it should bend sl...
- Cutting Technique: For Step 2, make your cut just above a leaf node at a 45-degree angle—this increases surface area ...
Frequently asked questions
Got questions about propagating rosemary from cuttings?
You’re not alone! Here are answers to the most common concerns—so you can grow your herb garden with confidence.
When is the best time to take rosemary cuttings?
The ideal time is during the plant’s active growing season—spring or early summer. Avoid winter cuttings, as rosemary grows slowly and may struggle to root. If you must propagate in fall, use a heat mat to encourage rooting.
How long does it take for rosemary cuttings to root?
With proper care, rosemary cuttings typically root in 2–4 weeks. Keep them in a warm, humid environment (like a propagator or sealed plastic bag) and mist daily. Patience is key—don’t rush the process!
What if my rosemary cutting isn’t rooting?
If your cutting refuses to root after 4 weeks, check these fixes:
- Humidity: Increase moisture with a humidity dome or pebble tray.
- Light: Move it to bright, indirect light (no direct sun yet).
- Health: Trim any yellowing leaves and dip the stem in rooting hormone for a boost.
Can I propagate rosemary from a grocery store plant?
Yes, but with caution! Store-bought rosemary is often sprayed with growth inhibitors to keep it bushy. Rinse the plant first, then take cuttings from the healthiest stems. Success rates may be lower—be patient and use rooting hormone for better results.
Should I keep my rosemary cutting indoors or outdoors while rooting?
Start indoors in a warm, bright spot (like a sunny windowsill) to control humidity. Once roots form (gently tug to check), transplant outdoors only after the last frost and when night temps stay above 50°F (10°C). Rosemary thrives in full sun!
Wrapping up and next steps
Taking a cutting from your rosemary plant is a simple, rewarding way to expand your garden—no green thumb required! 🌱 With just a few tools and a little patience, you’ll soon have thriving new plants ready to share or grow.
Now that you know the steps, why not try it today? Once your cuttings root, consider transplanting them into pots or your garden bed for a fragrant, low-maintenance herb that keeps giving.
Pro tip: Snap a photo of your progress—watch those roots grow, and soon you’ll be the proud rosemary whisperer in your circle! 🌿✨