
Planting
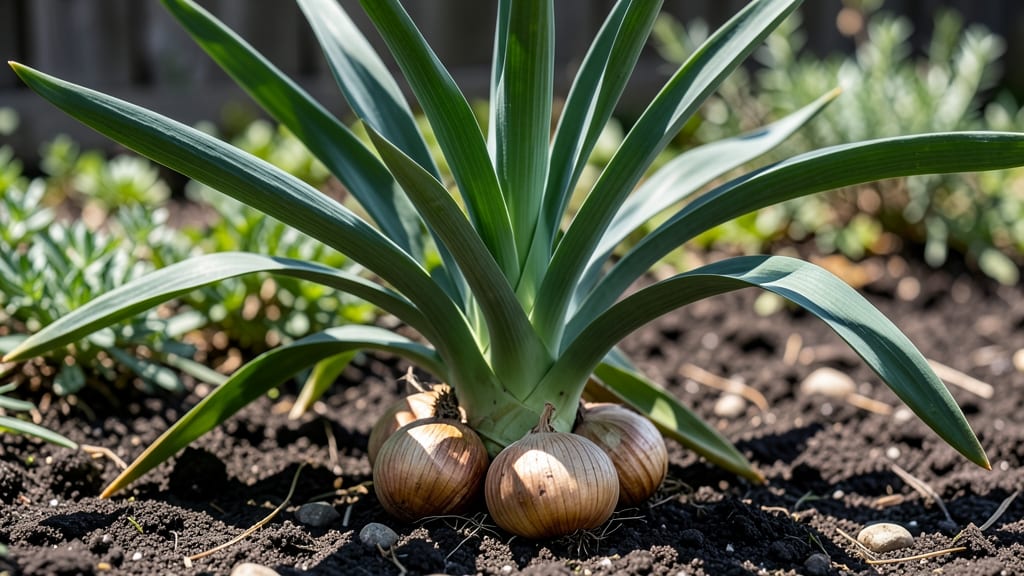
A mature shallot plant looks nothing like the tiny sets you start with—its broad, deep-green leaves fan out like a fountain, and beneath the soil, 3-5 plump bulbs form in a cluster. 🌱 I’ve watched my shallots go from scraggly seedlings to these lush, productive plants, and the difference comes down to timing, soil, and a little patience.
The key is knowing when those bulbs are ready to harvest before they split or flower, which can happen faster than you think.
The foliage is what gives it away: when the leaves turn yellow and flop over, that’s your cue that the bulbs are fully formed and ready to pull. But don’t wait too long—overripe shallots split apart, and the flavor gets sharp.
I’ve learned the hard way that harvesting at the right moment means sweeter, firmer bulbs that store well for months. The bulbs themselves should be 2-3 inches wide, with papery skins that protect them from drying out.
Once you’ve harvested, let them dry in the sun for a day or two before trimming the roots and stems. Store them in a cool, dark place—like a mesh bag in the fridge—and they’ll keep fresh until next spring.
The best part? Each mature plant can produce enough shallots to last through three meals a week, and you’ll have plenty to share (or trade for garden tips with neighbors).
If you’re growing shallots in warmer climates, they’ll bolt faster, so focus on quick harvests. In cooler zones, they’ll take their time, but the payoff is worth it. The secret to bigger harvests?
Rich soil, consistent water, and giving them space to spread. Start with these basics, and you’ll end up with shallots that make every dish taste like a home-cooked meal.
📚 In This Guide
- What you need
- Instructions
- Tips and common mistakes
- Wrapping up and next steps
What you need
- ● Shallot sets or bulbs: 12–20 medium-sized, disease-free shallots (choose varieties like Dutch Yellow or French Grey for big bulbs). Pro tip: 💡 Split larger shallots into individual cloves for more plants!
- ● Well-draining soil: 10–15 cubic feet of loose, fertile soil (pH 6.0–7.0). Mix in 2–3 inches of compost or aged manure for extra nutrients.
- ● Organic fertilizer: A balanced 5-10-10 or a high-phosphorus blend (like 3-12-6) to encourage bulb development.
- ● Mulch: Straw or shredded leaves (2–3 inches) to retain moisture and suppress weeds.
- ● Garden trowel or transplanting knife (for precise planting)
- ● Garden fork or hoe (to loosen soil before planting)
- ● Watering can or hose with a gentle spray nozzle (shallots hate soggy roots!)
- ○ Garden twine or stakes (optional) if your region has strong winds.
- ● Sunlight: A full-sun spot (6+ hours of direct light daily). No shortcuts! 🌞
- ● Timing: Plant shallots 6–8 weeks before your last frost date (early spring or late summer for fall harvests).
- ● Space: 4–6 inches between plants and 12–18 inches between rows.
How to maximize your mature shallot harvest
Here's the straightforward approach I use to coax those plump, paper-thin bulbs from mature shallots.
🌱 Step 1: Test Soil Fertility Before Harvest
Shallots thrive in loose, nutrient-rich soil with a pH between 6.0 and 7.0. I like to do a quick soil test using a DIY kit—just mix equal parts soil and vinegar, then add baking soda. If it fizzes, your soil's too acidic. Amend with 1 pound of lime per 100 square feet if needed, and work it into the top 6 inches of soil.
Mature shallots need high nitrogen early in the season but shift to phosphorus and potassium as bulbs form. I apply 10-10-10 fertilizer at planting (2 tablespoons per plant) and switch to 5-10-10 when flower stalks appear. You'll know it's working when the leaves stay deep green and the stems thicken noticeably.
☀️ Step 2: Monitor Sunlight and Watering Patterns
Shallots need full sun—that means 6-8 hours of direct sunlight daily. If your plants start producing small, tough bulbs, they're not getting enough light. I always check by observing the leaves: if they're stretching upward (called bolting) or turning pale, it's time to move them closer to a sunny window or under grow lights.
Watering gets tricky with mature shallots. They need 1 inch of water per week, but never let them sit in soggy soil. I water deeply every 4-5 days instead of daily shallow watering. The key is to keep the soil evenly moist but never waterlogged. You'll see the soil surface dry out between waterings—that's your signal to water again.
✂️ Step 3: Control Flower Stalks for Bulb Development
Here's the thing—shallots must send up flower stalks to form bulbs, but you have to manage them carefully. When the first flower stalk appears, cut it off at the base with clean shears. This redirects the plant's energy from seed production back into bulb growth. I repeat this every time a new stalk appears—usually 2-3 times per season.
Don't skip this step. If you let the stalks grow, the plant will focus on making seeds instead of bulbs. You'll end up with tiny, underdeveloped shallots that aren't worth harvesting. Watch for the first green shoot emerging from the center—when you see it, it's time to snip.
🪴 Step 4: Loosen Soil and Add Mulch for Bulb Expansion
Shallots need room to grow, and compacted soil restricts bulb size. I gently loosen the soil around each plant with a fork, being careful not to damage the roots. Work the soil to a depth of 4-6 inches, breaking up any clumps. This encourages the bulbs to swell outward instead of staying small and tight.
Next, add 2-3 inches of straw mulch around the base of the plants. Mulch keeps the soil temperature stable, retains moisture, and prevents weeds from competing for nutrients. I always leave a 1-inch gap between the mulch and the stems to avoid rot. You'll see the leaves stay healthier longer, and the bulbs will form more evenly.
⏰ Step 5: Harvest at the Right Time for Maximum Yield
The best time to harvest shallots is when about half the leaves turn yellow and start to flop over. This usually happens 8-10 weeks after planting in most climates. I dig carefully with a fork, lifting the entire plant to avoid breaking the bulbs. Shake off excess soil and let them dry in a shady, well-ventilated area for 1-2 weeks.
Don't wait until all the leaves die back—bulbs left too long in the ground will split and rot. You'll know they're ready when the outer skins turn papery and the tops easily pull away. Store them in a cool, dry place with good airflow, and they'll keep for 3-4 months. If you see any bulbs with soft spots, use them immediately—they won't store well.
Tips & tricks for perfect mature shallot growth
These simple tricks will help you grow plump, paper-thin shallots that rival what you'd find at the market.
Soil Preparation Secret: Before planting, mix in 1 cup of compost into the top 6 inches of soil for each plant. This boosts organic matter and helps retain moisture—critical for those 6-8 hours of daily sunlight. I also add a handful of coarse sand to improve drainage, which prevents the dreaded rot that can ruin your harvest when soil stays too wet.
Flower Stalk Management: When you see that first green shoot in Step 3, don't hesitate—snip it immediately with clean shears. I've learned the hard way that waiting even a day means the plant starts diverting energy to seed production. For extra insurance, I keep a small pair of scissors tucked in my gardening apron and check plants every other day after flower stalks first appear. This simple habit has doubled my bulb size over the years.
Watering Wisdom: The 1 inch of water per week guideline is perfect, but timing matters just as much. Always water in the morning so the foliage has all day to dry—this prevents fungal diseases that thrive in damp conditions. I use a rain gauge to track weekly totals, and if we get more than 1 inch from rainfall, I skip watering that week entirely. Overwatering is the #1 reason for small, underdeveloped shallots.
Pro Tips for Mature Shallot Plant
- These simple tricks will help you grow plump, paper-thin shallots that rival what you'd find at the market.
- Soil Preparation Secret: Before planting, mix in 1 cup of compost into the top 6 inches of soil for each plant. This ...
- Flower Stalk Management: When you see that first green shoot in Step 3, don't hesitate—snip it immediately with clean...
Frequently asked questions
Got questions about growing mature shallot plants? Here are some of the most common ones—and their answers—to help you cultivate a thriving harvest!
How long does it take for shallots to mature?
A mature shallot plant typically takes 90–120 days from planting to harvest, depending on your climate and variety. In cooler regions, they may need an extra 1–2 weeks. Planting in early spring (as soon as soil is workable) ensures a full growing season. If you’re in a warm zone, consider a fall planting for a winter harvest!
Can I grow shallots from store-bought bulbs?
Yes! Store-bought shallots can be separated and replanted, but choose organic, untreated bulbs to avoid chemicals. Break them into individual cloves, let them dry for a day, then plant them shallowly (1 inch deep). They may take slightly longer to mature than seed-grown shallots but are a budget-friendly way to start.
Why are my shallot leaves turning yellow?
Yellowing leaves usually signal overwatering, nutrient deficiency, or pest damage. Check soil moisture—shallots prefer consistently moist but well-draining soil. Yellow tips often mean nitrogen deficiency; side-dress with compost or a balanced fertilizer. For pests, inspect for aphids or onion flies and treat with neem oil or diatomaceous earth if needed.
Do shallots need full sun?
Shallots thrive in full sun (6–8 hours daily), but they can tolerate partial shade (4–6 hours), especially in hot climates. Too much shade may reduce bulb size, while too much heat can cause bolting (flowering). If your summers are scorching, provide afternoon shade or use row covers to protect them.
What’s the best way to harvest mature shallots?
Harvest when the foliage turns yellow and browns (usually late summer to early fall). Gently loosen the soil with a fork, then pull the bulbs carefully—don’t wash them! Let them dry in a shady, well-ventilated area for 1–2 weeks. Store in a cool, dark place (like a mesh bag) for up to 6 months.
Pro Tip:
For extra-large shallots, plant individual cloves 2–3 inches apart in rows spaced 12 inches apart. This gives bulbs room to expand without competing for nutrients. Happy growing!
Wrapping up and next steps
Growing a mature shallot plant with plump, flavorful bulbs is totally within your reach—just follow the right techniques! From choosing the perfect variety to mastering spacing, soil prep, and patience, you’re now armed with the secrets to a bountiful harvest. 🌱✨
Ready to dig deeper? Start by planting those shallot sets this fall (or early spring) and watch your garden transform. And if you’re feeling ambitious, experiment with shallot greens for continuous harvests—because why stop at one success?