
Planting
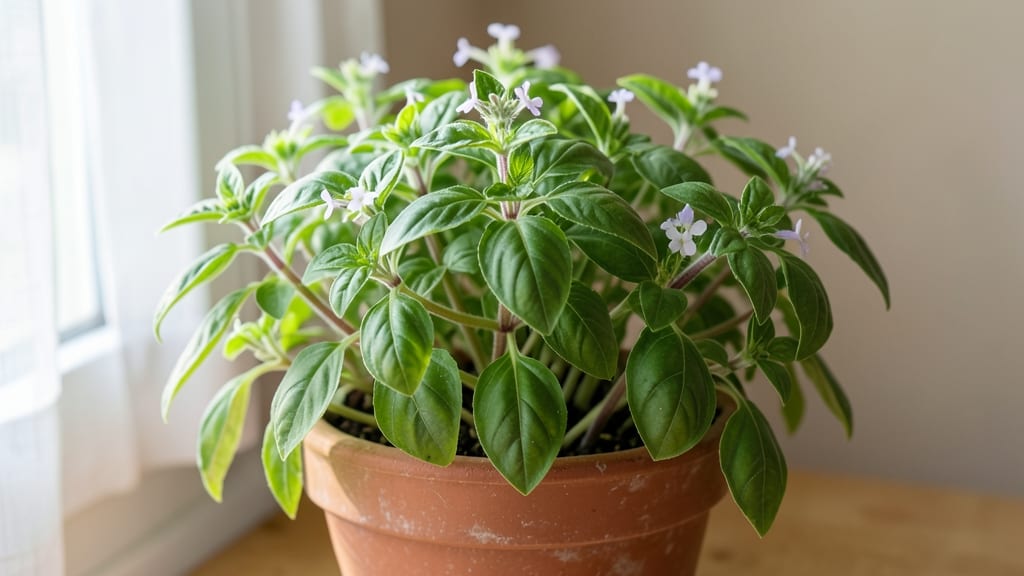
Growing a perpetual basil plant means never running out of fresh leaves again—even when it’s snowing outside. 🌱 I’ve had mine thriving through three winters now, and the secret isn’t magic, just a few simple tweaks to light, warmth, and care that turn basil from seasonal to year-round.
The biggest difference with perpetual basil is its ability to regrow from the base after heavy pruning, almost like a shrub.
Regular basil bolts and dies back, but this variety keeps producing tender leaves if you give it the right conditions—bright light, consistent moisture, and warmth (around 65-75°F). No fancy equipment needed, just a south-facing window or a basic grow light.
By pruning correctly, you’ll harvest pint after pint of fresh basil without sacrificing the plant’s health. The leaves stay tender, the flavor stays bright, and you’ll never again pay $4 for a half-wilted bunch from the grocery store.
Works just as well in a sunny kitchen, a greenhouse corner, or even under grow lights in a basement. Here’s how to keep yours going strong all year.
📚 In This Guide
- What you need
- Instructions
- Tips and common mistakes
- Wrapping up and next steps
What you need
- ● Perpetual basil seeds or seedlings: Choose Ocimum basilicum varieties like 'Genovese,' 'Thai,' or 'Purple Ruffles' (3–5 plants for a small harvest).
- ● Growing containers: 5–7" pot with drainage holes (1–2 per plant) or
- ● A window herb garden kit (with removable trays).
- ● High-quality potting mix: Seed-starting mix or a well-draining blend (50% peat/coir, 30% perlite, 20% vermiculite). 1–2 gallons per pot.
- ● Grow lights: Full-spectrum LED (12–16W) or fluorescent bulb (4000K–6500K color temp). 12–16 hours/day for optimal growth.
- ○ Humidity dome or plastic wrap: To retain moisture during germination (optional but helpful).
- ● Watering can or spray bottle: With a fine mist nozzle for gentle hydration.
- ● Fertilizer: Balanced liquid fertilizer (10-10-10 or 20-20-20, diluted to half-strength).
- ● OR Slow-release granules (5–10g per pot).
- ● Thermometer/hygrometer: To monitor 70–80°F (21–27°C) temps and 40–60% humidity.
- ● Self-watering system: Like a wicking tray or hydroponic reservoir for low-maintenance care.
- ● Pruning shears: Sharp, small scissors (sterilized with rubbing alcohol).
- ● Insecticidal soap: For aphid or spider mite prevention (1 tsp per quart of water).
- ● Decorative trays or stands: To elevate pots and improve airflow (e.g., wire shelves or stackable planters).
Step-by-Step instructions for creating a perpetual basil indoor greenhouse
Here's how to keep your basil thriving indoors all year—no winter dormancy required.
🌱 Step 1: Select and Prepare Your Basil Plants
Start with 4 healthy basil plants (genovese or sweet basil work best). Look for stems with at least 4-6 leaves and no signs of yellowing or pests. I always snip off any flowers or buds—they signal the plant to focus on reproduction, not leaf growth. This ensures you get maximum foliage for your perpetual harvest.
Trim each plant back by one-third right away. Cut just above a leaf node where new branches will sprout. You'll see fresh growth within 5-7 days—this jumpstarts your perpetual cycle. Place the cuttings in a glass of water if you want to propagate new plants from them (they root in about 10 days).
☀️ Step 2: Set Up Your Indoor Greenhouse Environment
Basil needs 6-8 hours of bright light daily—a south-facing window works, but I supplement with a 15-watt LED grow light on a timer for 12 hours/day. Position the light 6-12 inches above the plants and adjust as they grow. Without enough light, leaves turn pale and leggy—you'll know it's working when they stay dark green and compact.
Keep temperatures between 65-75°F during the day and 60-65°F at night. Basil wilts easily in heat over 80°F, so avoid placing it near vents or radiators. A small fan on low circulation keeps leaves from getting too soft and prevents powdery mildew.
💧 Step 3: Master the Watering and Humidity Balance
Water when the top inch of soil feels dry—stick your finger in to check. Basil hates soggy roots, so I use a self-watering pot or place the container on a saucer with pebbles and water (just enough so the pot sits above the waterline). Overwatering causes root rot, which kills plants faster than you'd think.
Maintain 50-60% humidity by misting leaves lightly in the morning or placing a tray of water near the plants. You'll notice leaves curling at the edges if it's too dry—this is your cue to increase moisture. A small humidifier on low works perfectly for a dedicated basil greenhouse.
✂️ Step 4: Prune and Harvest for Continuous Growth
Harvest leaves regularly by pinching off the outer leaves first, leaving the inner growth intact. This encourages bushier plants. I harvest every 2-3 weeks, always cutting just above a leaf node. Never take more than one-third of the plant at once—this keeps production steady without shocking the basil.
Prune leggy stems back to a leaf node to redirect energy. You'll see new shoots emerge within 7-10 days. I also remove any yellow leaves immediately—they drain nutrients and attract pests. This perpetual pruning cycle keeps your basil compact, productive, and looking fresh year-round.
🪴 Step 5: Rotate and Refresh for Long-Term Health
Rotate your basil plants a quarter turn weekly so all sides get even light. Uneven growth is a dead giveaway that your plants aren't getting balanced exposure. Every 3-4 months, repot into fresh well-draining potting mix—basil roots outgrow containers fast, and crowded roots lead to stunted growth.
Fertilize lightly every 4-6 weeks with a balanced liquid fertilizer (half-strength). I swear by fish emulsion—it gives basil that rich, sweet flavor we all love. Stop fertilizing in the last 2 weeks before harvest to avoid bitter-tasting leaves. This rotation and refresh cycle keeps your perpetual basil greenhouse thriving for months.
Tips & tricks for perpetual basil growth
I learned these tricks after watching my first batch of indoor basil turn sad and leggy—don't make my mistake!
Lighting is Everything: That 6-8 hours of bright light is non-negotiable, but here's the secret: position your grow light 8-10 inches away initially, then lower it gradually as plants grow. I start with the light at the top of the 6-12 inch range and adjust weekly. If leaves stretch toward the light, they're begging for more intensity—this is called etiolation, and it ruins the compact growth we want.
Pruning Pays Off: When you trim those leggy stems back to a leaf node in Step 4, you're not just cleaning up—you're redirecting the plant's energy. The key is to always cut just above a leaf node where new branches will sprout. I like to do this in the morning so any new growth has the full day to establish itself. Think of it like giving your basil a haircut that stimulates new growth instead of just removing leaves.
Temperature Troubleshooting: Those 65-75°F daytime temps are ideal, but if your home runs hotter, move your basil away from vents or radiators immediately. I've seen basil wilt dramatically when exposed to heat over 80°F—it's like watching a plant have a heatstroke. A small fan on low circulation helps prevent this by improving air movement around the leaves without drying them out.
Harvesting Hack: The 2-3 week harvest schedule works perfectly, but here's a pro move: harvest in the morning when leaves are most flavorful. Also, always cut just above a leaf node—this encourages bushier growth. I've found that harvesting the outer leaves first preserves the plant's center growth, which keeps producing new leaves for weeks longer than if I just snipped random leaves.
Pro Tips for Perpetual Basil Plant
- I learned these tricks after watching my first batch of indoor basil turn sad and leggy—don't make my mistake!
- Lighting is Everything: That 6-8 hours of bright light is non-negotiable, but here's the secret: position your grow l...
- Pruning Pays Off: When you trim those leggy stems back to a leaf node in Step 4, you're not just cleaning up—you're r...
Frequently asked questions
Got questions about growing perpetual basil indoors? You’re not alone!
Here are answers to the most common queries—so you can keep your green thumb thriving year-round.
How cold can perpetual basil tolerate before it dies?
Perpetual basil thrives in warmth (60–80°F) and wilts below 50°F. If temps drop further, it’ll suffer cold shock—yellow leaves, stunted growth, or even death. Move it indoors near a sunny window or under grow lights if frost is forecasted. A heat mat can help in chilly climates!
How long does it take for perpetual basil to regrow after pruning?
With proper care, perpetual basil bounces back in 2–4 weeks after pruning. Focus on the top 2–3 inches of stems (just above a leaf node) to encourage bushier growth. Keep it well-watered and in bright light—new sprouts should appear within days!
Can I grow perpetual basil in water instead of soil?
Basil roots well in water with a fresh change every 2–3 days and a pinch of fertilizer (like seaweed extract). Use a jar with indirect light, but expect slower growth than soil. For best results, transplant to soil after 4–6 weeks to boost vigor.
Why are my perpetual basil leaves turning yellow or crispy?
Yellow leaves often signal overwatering or poor drainage, while crispy edges mean underwatering or low humidity. Check soil moisture (top inch should dry out) and ensure pots have drainage holes. Boost humidity with a pebble tray or misting—basil loves it damp but not soggy!
Is perpetual basil different from regular basil in taste or use?
Not much! Perpetual basil has the same sweet, anise-like flavor as Genovese or Thai basil but stays productive longer. It’s perfect for pesto, salads, or garnishes—just harvest leaves before flowering for peak flavor. The main perk? No bolting in cold weather!
Wrapping up and next steps
Growing a perpetual basil plant indoors isn’t just a rewarding hobby—it’s a game-changer for fresh herbs year-round! 🌿 With the right setup (like a DIY greenhouse or grow lights), you’ll enjoy endless harvests without the fuss of seasonal replanting.
Whether you’re a beginner or a seasoned gardener, these hacks make it simple to keep your basil thriving.
Ready to take the next step? Start small—try a single plant in your kitchen greenhouse, then expand as you gain confidence. Your future meals (and Instagram-worthy snacks) will thank you! 🍅🍴