
Planting
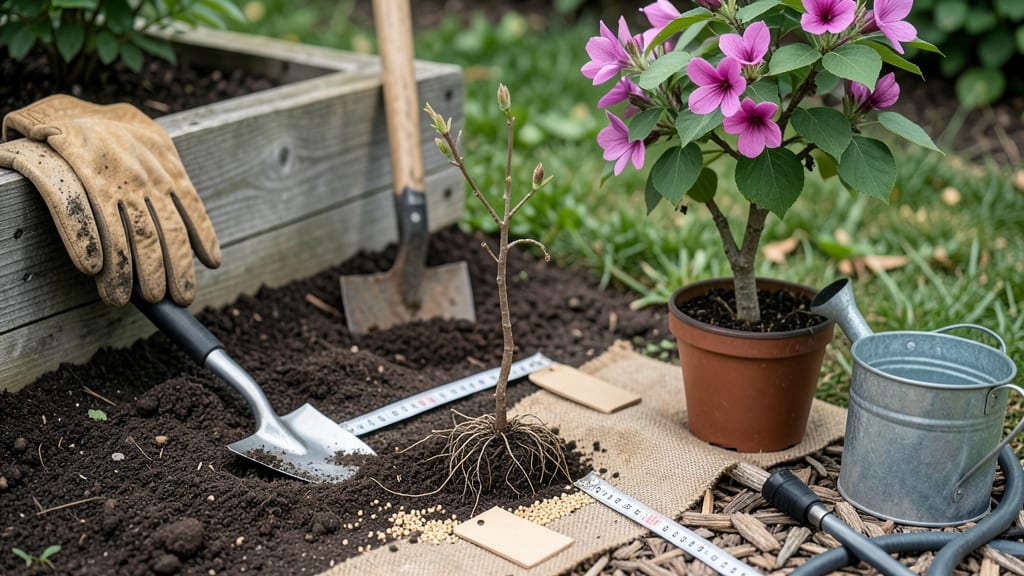
A redbud planting guide means fast root establishment and showstopping pink blooms by spring. 🌸 I’ve planted dozens, and the difference between a thriving tree and one that struggles comes down to three key factors: sunlight, soil, and timing. Skip any of them, and you’ll spend years waiting for that iconic canopy.
Redbuds crave full sun (6+ hours daily) and well-draining soil—think loamy or sandy mixes amended with compost. They’re tough once established but hate soggy roots, so raise beds if your yard stays wet.
The best planting window is late fall or early spring, when temperatures are cool but not freezing.
Within 4-6 weeks, you’ll see new growth signaling roots have taken hold. Water deeply once a week (1-1.5 gallons) until then, and mulch to lock in moisture. Avoid overwatering—their biggest enemy is root rot, not drought.
For zones 4-9, redbuds are low-maintenance stars. Just plant them 15-20 feet apart and watch them outperform store-bought shrubs. Here’s how to nail every step without guesswork.
📚 In This Guide
- What you need
- Instructions
- Tips and common mistakes
- Wrapping up and next steps
What you need
- ● Redbud tree sapling: Choose a healthy 1- to 3-gallon container-grown plant (native species like Cercis canadensis work best).
- ● Shovel: A garden spade or digging shovel (16–18" wide for ease).
- ● Garden gloves: Durable, breathable (nitrile-coated for grip).
- ● Mulch: 2–4 inches of organic mulch (shredded bark, wood chips, or pine straw).
- ● Watering can or hose: With a gentle spray nozzle (or a soaker hose for deep hydration).
- ○ Compost or aged manure: 5–10 lbs (optional but boosts soil fertility).
- ○ Stakes (optional but recommended): 2–3 wooden or metal stakes (4–5 ft tall) + soft tree ties for support.
- ● Sunlight: Full sun to partial shade (6+ hours of direct sun daily for best blooms).
- ● Soil type: Well-draining, slightly acidic to neutral (pH 6.0–7.5).
- ● Space: 15–20 ft apart (mature redbuds spread wide!).
- ● Planting time: Early spring or fall (avoid extreme heat or frost).
Step-by-step instructions for planting redbud trees
Here’s how to get your redbud trees off to a strong start—root establishment happens fastest when you nail these key details.
🌱 Step 1: Choose the Perfect Planting Window and Site
Plant your redbuds in early spring or fall, when soil temperatures hover around 50-60°F. This gives roots time to establish before summer heat or winter dormancy. Avoid planting in mid-summer or deep winter—roots struggle to adapt in extreme temperatures.
Select a location with full sun to partial shade—redbuds thrive with at least 6 hours of direct sunlight daily, but younger trees appreciate afternoon shade in hot climates. Test the soil by digging a 12-inch hole—if it drains slowly, amend with sandy loam to improve aeration. Avoid low spots where water pools.
🪴 Step 2: Dig and Prepare the Planting Hole
Dig a hole twice as wide as the root ball but only as deep as the container’s height. Redbuds hate being buried too deeply—this can suffocate roots and cause stress. Loosen the sides of the hole with a shovel to encourage root spread into surrounding soil.
Mix the native soil you removed with compost (about 20% of the hole’s volume) to enrich nutrients without overwhelming the tree. Avoid heavy amendments like manure—too much nitrogen now delays root growth. Tap the tree gently into the hole until the root ball sits 1-2 inches above ground level—settling will occur over time.
💧 Step 3: Water Deeply and Mulch for Moisture Retention
Fill the hole with water and let it drain completely. This preps the soil for planting and helps settle it around roots. After planting, water deeply again—aim for 1-2 gallons per inch of root ball diameter—until the soil 12 inches down feels damp. Overwatering now can suffocate roots, but consistent moisture is critical for the first 4-6 weeks.
Spread 2-3 inches of mulch (wood chips or shredded bark) over the root zone, keeping it 6 inches away from the trunk to prevent rot. Mulch locks in moisture and regulates soil temperature. Check moisture weekly by sticking your finger 2 inches into the soil—if it’s dry, water slowly until it’s evenly moist.
☀️ Step 4: Stake Only If Necessary and Prune Strategically
Stake only if your redbud is over 6 feet tall or in a windy location. Use two stakes placed diagonally from the trunk, tied loosely with flexible fabric strips—never wire, which can girdle the bark. Remove stakes after 1 year to avoid root circling.
Prune only to remove dead, crossing, or low-growing branches—never top the tree. Redbuds bloom on old wood, so pruning in late winter (before buds swell) is safest. Use clean, sharp shears to make cuts just outside the branch collar. Avoid heavy pruning now—focus on establishing roots first.
⏰ Step 5: Monitor and Adjust for Fast Root Growth
Watch for new leaves appearing within 4-6 weeks—this signals successful root establishment. If leaves yellow or wilt, check soil moisture and adjust watering. Redbuds in containers may need weekly watering until roots spread into the ground. Avoid fertilizing for the first year—too many nutrients now encourage top growth at the expense of roots.
After 6 months, gently scratch the soil surface with a trowel—if roots extend 6-12 inches outward, your tree is settling in. At this stage, you can lightly fertilize with a balanced 10-10-10 formula in early spring. By year two, your redbud should be self-sufficient with minimal intervention.
Tips & tricks for perfect redbud tree planting
Fast root establishment starts with these pro-level insights—trust me, I've watched redbuds thrive (and struggle) with these exact details.
Timing Secret: The 50-60°F soil temperature window in early spring or fall is non-negotiable for root growth. I've planted in late spring when temps hit 70°F and watched roots struggle to establish—wait for that cooler window. Use a soil thermometer if you're unsure; it's worth the investment for long-term success.
Soil Science: That 20% compost amendment in Step 2 is your secret weapon. I recommend mixing in finely screened compost rather than chunks—it breaks down faster and feeds roots immediately. For heavy clay soils, add an extra 10% perlite to improve drainage without overwhelming the tree's delicate root system.
Watering Wisdom: The 4-6 week critical moisture window means checking soil moisture every 2-3 days in hot weather, not just weekly. I use a moisture meter for accuracy—if it reads dry at 2 inches, water until it's damp at 12 inches. Overwatering here is just as damaging as underwatering; aim for consistently moist, not soggy.
Staking Strategy: If you must stake, use soft tree ties that won't cut into bark as the tree grows. I've seen wire stakes girdle trunks within months—it's a silent killer. And remember, those stakes should come out after one year max to prevent root circling from restricted movement.
Pro Tips for Redbud Planting Guide
- Fast root establishment starts with these pro-level insights—trust me, I've watched redbuds thrive (and struggle) with these exact details.
- Timing Secret: The 50-60°F soil temperature window in early spring or fall is non-negotiable for root growth.
- Soil Science: That 20% compost amendment in Step 2 is your secret weapon.
Frequently asked questions
Got questions about planting redbud trees? You’re not alone! Here are some of the most common concerns—and their answers—to help you grow a thriving tree with confidence.
When is the best time to plant a redbud tree?
Plant your redbud in early spring (March–April) or fall (September–October). These windows give roots time to establish before extreme heat or cold. Avoid planting in summer—drought stress can stunt growth. For container-grown trees, you can plant year-round, but spring or fall is still ideal.
How deep should I plant the root ball?
The top of the root ball should sit just above ground level—never buried deeper. Redbuds have shallow roots, so proper depth prevents rot and encourages strong root spread. Loosen soil around the edges to help roots expand naturally. A quick trick: Use a reference mark on the pot or stake to gauge depth before planting.
Are redbud trees prone to pests or diseases?
Redbuds are generally low-maintenance, but watch for Japanese beetles (they love the leaves!) and powdery mildew in humid climates. Prune affected branches promptly and apply neem oil if needed. Healthy soil (well-draining, slightly acidic) and spacing (15–20 feet apart) reduce stress, making your tree more resilient.
Can I grow a redbud in a container?
Yes! Dwarf varieties like ‘Little Henry’ thrive in large containers (15+ gallons) with drainage holes. Use a mix of potting soil and compost, and repot every 2–3 years. Place the container in full sun and water when the top inch of soil feels dry. Just remember: Container-grown redbuds may need winter protection in cold zones (mulch heavily or move indoors).
How do I protect a young redbud from winter damage?
Mulch the base with 3–4 inches of shredded bark to insulate roots, and wrap the trunk with burlap if temps drop below 10°F. Avoid heavy mulch against the trunk—keep it 6 inches away to prevent rot. Water deeply before the first freeze to hydrate roots. Most redbuds are hardy to USDA Zone 4, but young trees benefit from extra care.
Pro Tip:
Need a fast-growing alternative? Try ‘Forest Pansy’ redbud—its deep purple foliage adds drama, and it matures quicker than standard varieties. For shade tolerance, pair it with serviceberry or dogwood in mixed borders!
Wrapping up and next steps
Planting a redbud tree is a rewarding way to add vibrant color and charm to your landscape—and you’ve got all the know-how now! 🌱 From choosing the perfect sunny spot to nurturing those early roots, every step sets your tree up for stunning spring blooms and years of beauty. Don’t wait—spring is the ideal time to plant, but even now, your redbud can thrive with the right care!
Ready to roll up your sleeves? Grab your gloves, mark that sunny patch, and let the magic begin. Check out our seasonal care calendar to keep your redbud thriving all year long!