
Planting
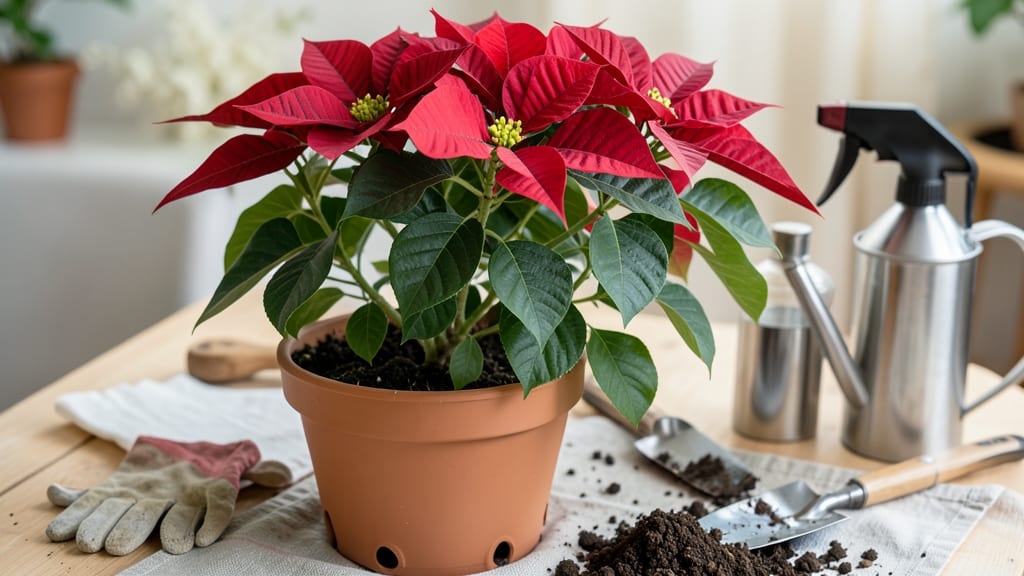
Repotting a poinsettia plant is the best way to give its roots the space they crave—and here’s how to do it right for next year’s showstopping blooms. 🌱 Repotting isn’t just about bigger pots; it’s about waking up those dormant roots and setting the stage for bold red flowers. I’ve saved more poinsettias from slow decline with this method than I can count, and the secret starts with timing and the right soil mix.
The best time to repot is in early spring, just as new growth begins to push through. You’ll need a pot just 2 inches larger in diameter than the current one, fresh well-draining potting mix (think peat-based with perlite), and a clean pair of pruners.
The goal is to disturb the roots as little as possible while giving them room to spread—no need for fancy tools, just patience and gentle hands.
After repotting, keep your plant in bright, indirect light and water only when the top inch of soil feels dry. You’ll see fresh green leaves within weeks, and by summer, those roots will be busy storing energy for next season’s showstopping blooms.
The payoff? A poinsettia that comes back stronger every year, with fewer yellow leaves and more vibrant color.
Works for both store-bought poinsettias and your own cherished houseplants. The key is consistency—don’t overwater, and avoid drafts. With this method, your poinsettia will thank you by blooming like it’s used to the spotlight.
📚 In This Guide
- What you need
- Instructions
- Tips and common mistakes
- Wrapping up and next steps
What you need
- ● New pot: Choose a container 1-2 inches wider than the current pot (e.g., if your poinsettia is in a 6-inch pot, opt for an 8-inch one). Ensure it has drainage holes at the bottom.
- ● Well-draining potting mix: A lightweight, airy blend like a 50/50 mix of peat moss or coconut coir and perlite (or a pre-mixed cactus/succulent mix). Avoid heavy garden soil.
- ○ Gloves: Optional but helpful for protecting your hands from soil and sap.
- ● Trowel or small shovel: For scooping soil and loosening roots.
- ● Watering can or spray bottle: To hydrate the plant post-repotting.
- ● Pruning shears (sterilized): For trimming dead or overgrown roots (if needed).
- ○ Mulch or pebbles (optional): For decorative top layer or drainage improvement.
- ● Root stimulator: A diluted liquid fertilizer (like seaweed extract) to encourage root growth.
- ● Pot saucer or tray: To catch excess water and protect surfaces.
- ● Plant support (if needed): A small stake for tall or leggy poinsettias.
- ● New mulch or decorative stones: To freshen up the pot’s appearance.
Step-by-Step instructions for repotting a poinsettia plant
Here’s how to refresh your poinsettia’s roots and set it up for vibrant next-season blooms.
🪴 Step 1: Choose the Right Pot and Fresh Potting Mix
Select a pot that’s just 1-2 inches wider than your current container—poinsettias thrive when slightly root-bound, but they need room to breathe. I prefer terracotta pots because they wick away excess moisture, which poinsettias hate. If you’re using plastic, make sure it has drainage holes.
Fill the new pot halfway with a well-draining peat-based potting mix mixed with 20% perlite or vermiculite. Poinsettias need aerated soil to prevent root rot. Tap the pot gently to settle the mix before adding your plant—this keeps the soil level and prevents air pockets.
✂️ Step 2: Gently Remove the Plant and Inspect the Roots
Water the poinsettia lightly the day before repotting so the roots slide out easily. Turn the pot upside down, cradling the base of the plant with one hand while tapping the sides firmly with the other. If the plant resists, run a knife around the edges to loosen it.
Once out, gently separate the roots from the old soil. Look for healthy white or light tan roots—these are good. Discard any black, mushy, or foul-smelling roots with clean scissors. I always trim the roots back by about 10% to encourage new growth—this prevents shock from too much root disturbance.
💧 Step 3: Position the Plant and Add Fresh Soil
Place the poinsettia in the center of the new pot, ensuring the top of the root ball sits ½ inch below the rim. This gives room for watering without spilling. Hold it steady and fill the sides with fresh potting mix, pressing lightly to eliminate air gaps. Don’t pack it down too hard—poinsettias need loose, breathable soil.
Water thoroughly until water runs out the drainage holes, then let it drain completely. Poinsettias are sensitive to soggy soil, so empty the saucer after 10 minutes. Place the plant in a spot with bright, indirect light for a week to recover—direct sun can scorch leaves after repotting.
☀️ Step 4: Adjust Care for Recovery and Growth
Keep the soil evenly moist but never soggy for the first 2-3 weeks. You’ll know it’s time to water again when the top 1 inch of soil feels dry to the touch. Avoid fertilizing until new growth appears—wait at least 4-6 weeks to give the roots time to establish.
Poinsettias need 12-14 hours of light daily to rebloom next season. If natural light is limited, supplement with a grow light 6 inches away. Watch for new leaves emerging from the center—this is your sign the plant is recovering. Once you see steady growth, resume regular care.
Tips & tricks for perfect repotting of poinsettias
Reviving a poinsettia after repotting takes patience—but these small adjustments make all the difference.
Pot Size Precision: That 1-2 inch wider rule isn't arbitrary. Poinsettias hate being too cramped, but too much space causes soil to stay damp too long. I measure the root ball's diameter and add just 1 inch—this gives roots room to spread without encouraging rot. For terracotta pots, I add an extra ½ inch since they dry faster.
Root Trimming Technique: When trimming those 10% of roots in Step 2, use clean, sharp scissors and cut at a 45-degree angle. This creates more surface area for new root growth. I always look for the "corky" transition point where healthy roots meet the stem—this is where new roots will emerge most vigorously. Never trim more than 10% or you'll shock the plant.
Post-Repotting Watering: The 10-minute drainage rule is non-negotiable. After watering, I always check the saucer after exactly 10 minutes and empty any remaining water. Poinsettias are tropical plants that hate soggy feet—even one night of sitting in water can cause root rot. I also avoid watering from above for the first week to prevent disturbing the fresh soil around the roots.
Light Recovery Strategy: That bright, indirect light requirement in Step 3 is crucial for the first week. I place my repotted poinsettias near an east-facing window where they get morning sun but no harsh afternoon rays. If your home has limited light, a simple LED grow light on a timer for 12 hours daily works wonders—just keep it 6 inches away as the instructions say.
Pro Tips for Repotting A Poinsettia Plant
- Reviving a poinsettia after repotting takes patience—but these small adjustments make all the difference.
- Pot Size Precision: That 1-2 inch wider rule isn't arbitrary.
- Root Trimming Technique: When trimming those 10% of roots in Step 2, use clean, sharp scissors and cut at a 45-degree angle.
Frequently asked questions
Got questions about repotting your poinsettia? You’re not alone! Here are some common concerns—and their answers—to help you tackle the task with confidence.
When is the best time to repot a poinsettia?
Repot your poinsettia after it finishes blooming (typically in late winter or early spring) and before new growth begins. This gives the plant time to recover from dormancy and adjust to its new pot without stress. Avoid repotting during active blooming—it can shock the plant and disrupt flowering!
How often should I repot a poinsettia?
Poinsettias only need repotting every 2–3 years, or when roots start circling the bottom of the pot or water drains too quickly. If you’re growing yours long-term, opt for a slightly larger pot (1–2 inches wider) each time. Over-potting can lead to soggy soil, so keep it modest!
What if my poinsettia looks stressed after repotting?
Stress is normal! After repotting, place your plant in bright, indirect light and avoid fertilizing for 2–3 weeks. Yellow leaves or wilting can signal shock, but keep soil lightly moist (not soggy). Most plants bounce back within 1–2 weeks. If problems persist, check for root rot or pests.
Can I repot a poinsettia in winter?
Not ideal! Poinsettias are dormant in winter, and repotting during this time can disrupt their natural cycle. Wait until late winter or early spring (after blooms fade) for the best results. If you must repot in winter, do so gently and provide extra care to help it recover.
What’s the best pot size for repotting?
Choose a pot that’s only 1–2 inches wider than the current one to avoid over-potting. Poinsettias prefer being slightly root-bound, which encourages blooming. Ensure the new pot has drainage holes—no exceptions! If using a decorative cache pot, place it over a nursery pot with holes.
Wrapping up and next steps
Repotting your poinsettia isn’t just about giving it a fresh home—it’s your chance to nurture its potential for next year’s stunning blooms! 🌱 By following these steps, you’ll encourage healthier roots, better growth, and a plant that thrives for seasons to come.
Now that you’re equipped with the know-how, take that next step: schedule your repotting during early spring dormancy and watch your poinsettia reward you with vibrant color and lush foliage!
Happy planting—your green thumb is about to shine even brighter! 🌟