
Planting
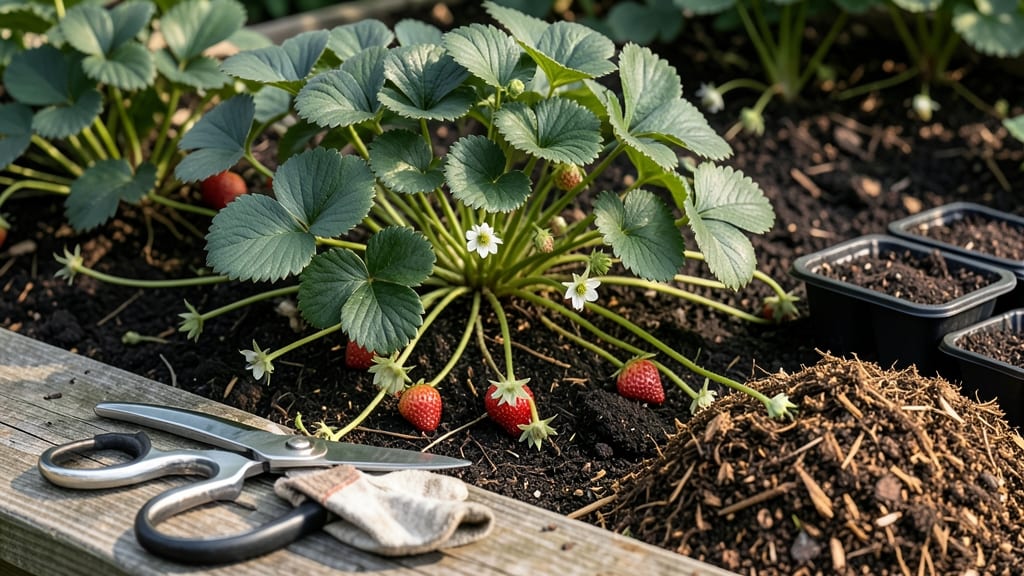
Cutting strawberry runners isn't just propagation—it's the secret to doubling your harvest every year. 🌱 I learned this the hard way after watching my favorite June-bearing patch dwindle from overcrowding, only to discover how simple it is to multiply plants for free. The key timing?
Late spring or early summer, when runners are 4-6 inches long and have rooted butts. You'll need sharp pruners, a clean tray of potting mix, and a sunny spot.
The trick is cutting runners at the mother plant (not the root) while leaving at least a 1-inch stem on the new plantlet. Most beginners make two mistakes: cutting too early (before roots form) or too late (when runners turn woody).
I've perfected this over five seasons—now my garden produces three times more berries than my original patch. Once cut, nestle the rooted runners into their own pots or directly into garden beds, keeping soil moist but not soggy.
Within 2-3 weeks, you'll see new leaves pushing through, signaling they've taken root. The best part? These new plants bear fruit the following year, creating a self-sustaining cycle. This method works for June-bearing, everbearing, and day-neutral varieties.
For container gardeners, use 6-inch pots—just remember to transplant them into the ground by fall. The payoff? A permanent strawberry patch that grows itself, with fewer pests and better air circulation than crowded mother plants.
📚 In This Guide
- What you need
- Instructions
- Tips and common mistakes
- Wrapping up and next steps
What you need
- ● Strawberry plants with healthy, established runners (at least 6–12 inches long with roots forming at the nodes).
- ● Sharp pruning shears or clean, sterilized scissors (to avoid disease transmission).
- ● Small pots or trays (4–6 inches in diameter) with drainage holes—quantity: 1 per runner.
- ● Well-draining potting mix (avoid garden soil; opt for a blend with perlite or sand). Quantity: Enough to fill pots 2/3 full.
- ○ Rooting hormone (optional but helpful)—speeds up root development.
- ● Spray bottle with water (for gentle hydration).
- ○ Clear plastic bag or humidity dome (to retain moisture; optional but recommended for beginners).
- ● Partial shade to bright, indirect sunlight (avoid scorching midday sun during hot months).
- ● Warmth: Ideal rooting temperature is 65–75°F (18–24°C).
- ● Consistent moisture—keep soil damp (not soggy) until roots establish (about 2–4 weeks).
How to cut and propagate strawberry runners for more plants
Here's how to turn those wandering strawberry runners into thriving new plants—no fancy tools needed.
🌱 Step 1: Identify and Select Healthy Runners
Look for runners that are 4-6 inches long with at least 3-4 leaves and a small root nodule at the tip. These are ready to separate. I always pick runners from the mother plant's outer edges—they get crowded and compete for nutrients anyway. Avoid runners that look yellowed, wilted, or overly leggy.
Gently grasp the runner where it meets the mother plant and wiggle it free. You'll hear a soft pop when it detaches cleanly. If it resists, don't force it—wait a few days for the connection to weaken naturally. I like to work on a cloudy morning when the soil is moist but not soggy, making the runners easier to handle.
✂️ Step 2: Prepare the Runner for Planting
Trim the runner just above the first leaf set, leaving about 2 inches of stem. This encourages the plant to focus energy on root growth rather than supporting extra foliage. Next, cut off any additional leaves beyond the first three—too many leaves mean the new plant will use up its energy before roots develop.
For the root end, leave the small root nodule intact. If it's not already formed, don't worry—roots will start growing within 3-5 days if kept moist. I dip the cut end in rooting hormone (optional but helpful for faster establishment) before planting. This step is especially useful in hot climates where moisture evaporates quickly.
🪴 Step 3: Plant the Runner in Moist Soil
Fill small pots or a shallow tray with well-draining potting mix and make a small hole about 1 inch deep. Insert the runner so the root nodule (or trimmed stem) sits just below the soil surface. Press the soil gently around the stem to remove air pockets. I use my fingers to create a slight depression around the base to help water pool there.
Water lightly until the soil feels evenly moist but not saturated. You'll know it's right when water beads up on the surface but doesn't pool. Place the pots in a spot with bright, indirect light—direct sun can scorch tender new leaves. Keep the soil consistently moist by misting daily or covering with plastic wrap to retain humidity.
☀️ Step 4: Encourage Root Growth and Harden Off
After 10-14 days, check for root growth by gently tugging on the runner. If resistance means roots have taken hold, it's time to transition to full sun. I gradually move the pots outside during the day, bringing them back in at night for the first week to avoid temperature shock.
Once the new plants have 4-5 leaves and roots are well established (about 3-4 weeks total), transplant them into their permanent spot. Space them 12-18 inches apart in well-draining soil. The first year, focus on root and leaf growth—don't expect fruit until the second season. This patience pays off with bigger, bushier plants that produce more berries year after year.
⏰ Step 5: Maintain and Enjoy Year-Round Growth
Water new transplants deeply 2-3 times per week until established, then taper to 1 inch of water per week once roots are strong. Mulch around the base with 2-3 inches of straw or shredded leaves to retain moisture and suppress weeds. I always add a balanced fertilizer in early spring to give the plants a nutrient boost for the growing season.
Here's the thing—once you master this trick, you'll never buy strawberry plants again. The key is consistency: keep runners pinched back on mother plants during fruiting season, and you'll have an endless supply of vigorous new plants. Watch your harvest grow from a few berries to bushels in just a couple of seasons!
Tips & tricks for propagating strawberry runners
These simple tricks will help you propagate strawberry runners like a pro—saving you time, money, and frustration along the way.
Selection is Everything: In Step 1, don't just grab any runner—look for ones with 3-4 mature leaves and a root nodule at the tip. The outer runners are always the best because they're already competing for resources from the mother plant. I've learned the hard way that leggy or yellowed runners rarely take root, so skip those unless you're feeling adventurous!
Timing Matters: The 3-5 day window for root growth in Step 2 is your best friend. Keep those trimmed runners in a damp paper towel or shallow water (just enough to cover the base) while you wait. This maintains moisture without drowning the delicate stems. I've had the most success when I work on cloudy mornings—the humidity helps prevent wilting while I prepare the planting area.
Rooting Hormone Hack: While rooting hormone is optional in Step 2, I've found it makes a noticeable difference in hot or dry climates. If you're using it, dip just the root end and tap off the excess—no need to go heavy. For those without hormone, a pinch of cinnamon (natural antifungal) on the cut end works surprisingly well. The key is keeping everything moist during those critical first 10-14 days.
Light Management: That bright indirect light in Step 3 is crucial—direct sun will fry tender new leaves before roots establish. I start my runners under fluorescent lights if natural light is limited, then gradually increase exposure. Watch for leaves that look pale or see-through—they're begging for more light, but not too much too soon! After the 10-14 day mark, you can slowly introduce full sun during the hardening off process.
Pro Tips for Strawberry Plant Runners Cut
- These simple tricks will help you propagate strawberry runners like a pro—saving you time, money, and frustration alo...
- Selection is Everything: In Step 1, don't just grab any runner—look for ones with 3-4 mature leaves and a root nodule...
- Timing Matters: The 3-5 day window for root growth in Step 2 is your best friend. Keep those trimmed runners in a dam...
Frequently asked questions
Got questions about trimming strawberry runners? You’re not alone! Here are answers to the most common queries to help you propagate like a pro—without the guesswork.
When is the best time to cut strawberry plant runners?
Trim runners in early summer (June) when they’re 3–6 inches long and have developed roots. Avoid cutting in late summer or fall, as the plant needs energy to prepare for winter. Pro tip: Wait until the runner is rooted but still flexible—this ensures the new plantlet thrives!
How do I know if a runner is ready to cut?
Look for these signs:
- A runner should be 3–6 inches long with 3–4 leaves.
- It should have small white roots (1–2 inches) at the tip.
- The runner should bend easily—if it’s stiff, it’s not ready yet.
Can I cut runners in pots instead of planting them directly?
Container propagation
is ideal for small spaces. Use 4–6 inch pots with well-draining soil, place the rooted runner in, and water lightly. Keep pots in partial shade for 1–2 weeks to reduce stress. Bonus: Pots let you control soil quality and spacing for denser harvests!
What should I do if my cut runners aren’t growing after planting?
Check these fixes:
- Too much water: Let soil dry slightly between waterings.
- Not enough light: Move pots/plants to 6+ hours of sun daily.
- Poor soil: Amend with compost or use a strawberry-specific mix.
- Root rot: Ensure pots have drainage holes and avoid soggy soil.
Will cutting runners reduce my strawberry harvest?
Not if done right! Pruning runners actually boosts fruit production by redirecting energy to the mother plant. Key rule: Never remove more than 1/3 of runners at once. Result: You’ll get bigger, sweeter berries and free plants for next season!
Wrapping up and next steps
Cutting and propagating strawberry runners is a simple yet powerful way to expand your garden and enjoy bushier harvests all year! By following these steps—timing, tools, and care—you’ll turn small cuttings into thriving plants that multiply your sweet rewards. 🌱✨
Ready to grow your strawberry patch? Start by planting your new runners in well-drained soil, watering them gently, and watching them flourish. Before you know it, you’ll have a lush, productive strawberry garden that keeps giving!