
Planting
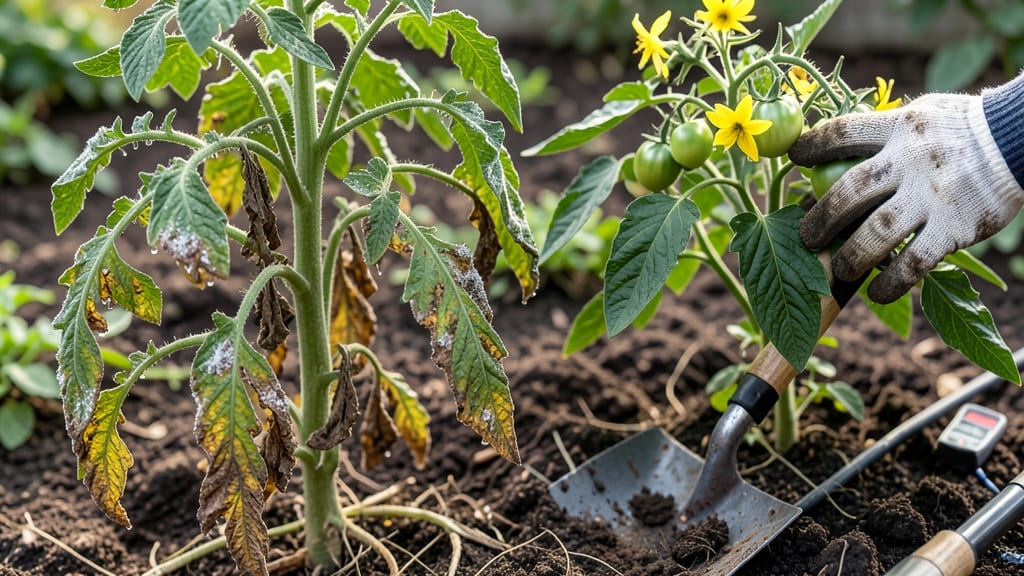
My tomatoes wilted after transplant, and I thought I’d lost them—until I discovered these simple fixes that brought them back in 24 hours. 🌱 The shock of moving plants from seed trays or nurseries to the garden can leave them limp, but it’s rarely permanent if you act fast.
What you need is a mix of patience, proper care, and a few targeted adjustments to soil, water, and environment.
The most common culprits are overwatering (which drowns roots) or underwatering (which stresses them), plus sudden temperature swings or harsh sunlight. I’ve revived plants by adjusting watering schedules, adding mulch to stabilize soil moisture, and even giving them a temporary shade cloth to ease the transition.
The key is treating the symptoms while addressing the root cause—literally.
Within a day, you’ll see leaves perk up, stems firm up, and new growth signaling the plant has recovered. The trick is consistency: keep soil evenly moist (not soggy), protect from extreme heat or cold, and avoid fertilizing until the plant shows signs of bouncing back.
This method works for seedlings, nursery-bought plants, or even mature tomatoes that got moved too soon.
For next season, harden off seedlings gradually and transplant on cloudy days to reduce stress. If wilting persists after 48 hours or you notice spots, yellowing, or mushy stems, it might be a fungal issue—time to dig deeper (literally) and check the roots.
But in most cases? These fixes save the day.
Root of the Problem
Understanding why your tomatoes wilt after transplanting is the first step to saving them. This issue often stems from a mix of environmental stress, improper handling, or underlying plant health concerns.
Below, we break down the key causes—each with a clear scientific explanation and actionable insights to help you diagnose the issue quickly.
---
When you move tomato seedlings from their nursery pots or seed trays to the garden, they experience transplant shock—a physiological response to sudden environmental changes. This shock triggers wilting as the plant’s vascular system struggles to adapt.
- Why it happens: Roots are damaged during removal, and the plant loses temporary water-holding capacity.
Additionally, the shift from a controlled nursery environment (consistent moisture, temperature, and light) to outdoor conditions can overwhelm young roots, causing osmotic imbalance (water loss exceeds uptake). - Key signs: Wilting within 24–48 hours, yellowing lower leaves, or a limp, droopy appearance. - Actionable fix: Water deeply before transplanting (1–2 days ahead) to encourage root growth toward the moisture.
Use a root stimulator (like mycorrhizal fungi or a diluted seaweed solution) to promote faster recovery.
---
If roots are circled, cut, or left exposed during transplanting, they can’t absorb water efficiently, leading to wilting.
- Why it happens: Roots grow in a pot-bound pattern when kept in small containers. When you pull the plant out, roots wrap around the pot’s edges, forming a dense mat. If not loosened, these roots strangle each other, restricting water and nutrient flow.
Even minor root pruning during transplanting can reduce the plant’s ability to uptake moisture. - Key signs: Wilting within hours, stunted growth, or roots appearing matted and tangled when inspected. - Actionable fix: - Loosen roots gently before planting by sliding your fingers between the root ball and the pot. - Trim only damaged roots (brown, mushy, or circling roots) with sterilized scissors. - Avoid burying the stem too deep—this can suffocate the plant and promote rot.
---
Tomatoes are sensitive to sudden exposure to harsh conditions after transplanting. Extreme heat, strong winds, or intense sunlight can cause transpirational stress, where water loss outpaces absorption.
- Why it happens: - Heat stress: High temperatures increase transpiration (water loss through leaves), while roots struggle to compensate. Temperatures above 85°F (29°C) can cause wilting even in healthy plants. - Windburn: Drying winds create a desiccating effect, similar to sunburn for plants.
Young leaves lack protective cuticles, making them prone to wilting. - Sunburn: If seedlings were shaded indoors but suddenly exposed to full sun, leaves can scorch, reducing photosynthesis and causing wilting. - Key signs: Wilting on one side (windward side), crispy or bleached leaf edges, or wilting worse in the afternoon. - Actionable fix: - Provide shade cloth (30–50%) for the first 3–5 days post-transplant. - Water deeply in the morning to reduce evening transpiration. - Use mulch (straw or grass clippings) to retain soil moisture and protect roots from temperature fluctuations.
---
Both overwatering and underwatering can cause wilting after transplanting, but the symptoms differ.
| Issue | Why It Happens | Key Signs | Fix | |--------------------|-----------------------------------------------------------------------------------|-------------------------------------------------------------------------------|--------------------------------------------------------------------------| | Underwatering | Roots aren’t established, so they can’t access moisture in dry soil. | Soil pulls away from pot edges, leaves feel paper-dry, wilting all day. | Water slowly and deeply until soil is moist 6 inches down.
Use drip irrigation for consistency. | | Overwatering | Poor drainage or compacted soil drowns roots, preventing oxygen uptake. | Yellowing leaves, mushy stems, wilting that worsens at night. | Improve drainage with sand or perlite, avoid watering until top inch of soil is dry. | | Inconsistent watering | Roots grow toward moisture, but erratic watering causes root desiccation. | Wilting only in the afternoon, stunted growth, or roots pulling away from soil. | Stick to a schedule (e.g., every 2–3 days) and water at the base, not the leaves. |
---
If the soil is too dense, waterlogged, or lacks nutrients, roots can’t function properly, leading to wilting.
- Why it happens: - Compacted soil restricts root growth and oxygen flow, causing anaerobic conditions (roots suffocate). - Clay-heavy soil holds too much water, leading to root rot. - Nutrient deficiency (especially potassium or calcium) weakens the plant’s vascular system. - Key signs: Wilting even after watering, stunted growth, or dark, mushy roots when dug up. - Actionable fix: - Amend soil with compost or aged manure before planting. - Test soil pH (ideal: 6.0–6.8) and adjust with lime (to raise pH) or sulfur (to lower it). - Add perlite or vermiculite to improve drainage in heavy soils.
--- Sometimes, wilting isn’t due to transplant stress but rather pests or pathogens that attack weakened plants.
- Why it happens: - Root-knot nematodes or fungal pathogens (like Phytophthora) infect damaged roots, blocking water flow. - Aphids or spider mites suck sap, causing vascular collapse and wilting. - Key signs: Wilting spreads unevenly, visible pests, or blackened roots with lesions. - Actionable fix: - Inspect roots before planting—discard any with galls, lesions, or odd discoloration. - Use neem oil or insecticidal soap as a preventive spray. - Rotate crops next season to prevent soil-borne diseases.
How to solve it
H2: Quick Fixes for Reviving Transplanted Tomatoes
Wilted tomatoes after transplanting can feel like a gardener’s worst nightmare—but don’t toss those plants just yet! With the right approach, you can often revive them within 24 hours (or even sooner). The key is identifying the root cause (literally and figuratively) and acting fast.
Below, we’ve mapped out practical solutions for the most common issues, along with prevention tips to keep your tomato plants thriving long-term.
---
Signs: Droopy leaves, dry soil at the surface, plants that perk up after watering but wilt again.
#### How to Revive: 🔥 Step 1: Deep Water Immediately - Water the base of the plant (not the leaves) until the soil is thoroughly moist—about 1–2 inches deep.
Use a slow drip (like a hose with a gentle flow) or a watering can with a narrow spout to avoid disturbing the roots. - Pro tip: 💡 If the soil feels dry more than 1 inch below the surface, your plants are thirsty.
Tomato roots need consistent moisture, especially after transplanting.
🍳 Step 2: Mulch to Retain Moisture - Spread 2–3 inches of organic mulch (straw, grass clippings, or shredded leaves) around the base. This keeps soil cool and moist while preventing evaporation. - Avoid mulching too close to the stem—leave a 1-inch gap to prevent rot.
👨🍳 Step 3: Adjust Watering Schedule - Morning watering (before 10 AM) is ideal—it gives leaves time to dry, reducing disease risk. - Water deeply 2–3 times per week (instead of daily shallow watering) to encourage deep root growth.
⏰ Step 4: Monitor for 24 Hours - If leaves stay perky after watering, your plants are recovering! If not, check for other stressors (like root damage or pests).
#### Prevention Tips: ✨ Water before transplanting—soilballs should be moist but not soggy. 🌡️ Use a transplanting solution (like seaweed extract or a rooting hormone) to reduce shock. 🎯 Stake or cage tomatoes early—wilting can worsen if plants flop over, blocking airflow.
---
Signs: Yellowing leaves, mushy stems, soil that stays soggy for days, or wilting that worsens at night.
#### How to Revive: 🔥 Step 1: Let Soil Dry Slightly - If the soil is waterlogged, pause watering for 1–2 days to allow excess moisture to drain. - Test drainage: Stick your finger 2 inches deep—if it’s damp, wait before watering again.
🍳 Step 2: Improve Soil Aeration - Gently loosen compacted soil around the roots with a fork (be careful not to damage them). - Add perlite or coarse sand to heavy clay soil to improve drainage.
👨🍳 Step 3: Repot or Relocate (If Needed) - If the pot or garden bed has no drainage holes, consider transplanting to a better spot with raised beds or containers with holes. - Pro tip: 💡 Tomatoes hate "wet feet"—ensure pots have drainage holes and saucers underneath.
⏰ Step 4: Use a Fan for Airflow - Place a small fan on low near the plants for 1–2 hours/day to speed up evaporation and prevent fungal issues.
#### Prevention Tips: ✨ Use well-draining soil mixes (50% potting soil, 30% compost, 20% perlite). 🌡️ Avoid watering at night—moisture lingers longer, promoting disease. 🎯 Check your irrigation system—drip lines should deliver slow, steady water (not a torrent).
---
Signs: Wilting within hours of transplanting, despite proper watering, stunted growth, or roots looking brown/mushy when inspected.
#### How to Revive: 🔥 Step 1: Trim Damaged Roots (If Severe) - If roots are circled or girdled (common with store-bought seedlings), gently prune any dark, mushy, or tangled roots with sterilized scissors. - Replant immediately in fresh, loose soil.
🍳 Step 2: Apply a Root Booster - Mix 1 tbsp of seaweed extract or mycorrhizal fungi into the watering can and soak the roots for 10 minutes before replanting. - Commercial rooting hormones (like Clonex) can also help stimulate regrowth.
👨🍳 Step 3: Shield from Stress - Avoid fertilizing for 1–2 weeks—new roots are fragile and can burn with nutrients. - Use shade cloth (30–50%) for 3–5 days to reduce transplant shock from sunlight.
⏰ Step 4: Watch for Recovery Signs - New small leaves or firmer stems in 3–5 days mean roots are healing. - If no improvement, the plant may be too stressed—consider propagating cuttings from healthy stems.
#### Prevention Tips: ✨ Hardening off seedlings (acclimating them to outdoor conditions for 7–10 days before transplanting). 🌡️ Transplant on a cloudy day to reduce sun stress. 🎯 Use biodegradable pots—if roots are circling, score the sides before planting to encourage outward growth.
---
Signs: Wilting only during extreme heat, leaves crisping at the edges, or plants drooping in windy conditions.
#### How to Revive: 🔥 Step 1: Provide Immediate Relief - Heat stress? Move pots to shadier spots or use shade cloth (avoid plastic, which traps heat). - Wind stress? Stake or cage plants immediately and tie stems gently to support them. - Cold stress? Cover plants with frost blankets at night if temps drop below 50°F (10°C).
🍳 Step 2: Adjust Watering for Extreme Conditions - Hot days? Water early morning + late evening (2x/day) to keep roots cool. - Wind? Mulch heavily to lock in moisture and water deeply to help roots anchor.
👨🍳 Step 3: Gradually Acclimate Plants - If moving from indoors to outdoors, slowly increase sun exposure over 1–2 weeks. - Avoid sudden temperature swings—keep plants in a stable microclimate (like a greenhouse or under a porch).
⏰ Step 4: Monitor for Pests - Stressed plants attract aphids or spider mites. Spray with neem oil if you see sticky residue or tiny webs.
#### Prevention Tips: ✨ Choose heat-tolerant varieties (like ‘Solar Fire’ or ‘Heatmaster’) if your climate is hot and dry. 🌡️ Use black plastic mulch in hot climates—it warms soil but can stress plants if overdone. 🎯 Plant in late spring (after last frost) to avoid early-season cold snaps.
---
Signs: Wilting with yellow spots, holes in leaves, or sticky residue (aphids), mold on stems (fungus).
#### How to Revive: 🔥 Step 1: Identify the Culprit - Fungal disease (early blight, Fusarium)? Remove infected leaves and spray with copper fungicide. - Pests (aphids, whiteflies)? Blast off with water or use insecticidal soap. - Viral infection? Unfortunately, **wilting may persist
Frequently asked questions about wilted tomatoes after transplanting
Why do my tomato seedlings wilt immediately after moving them outdoors?
This is classic transplant shock caused by root disturbance and sudden environmental changes. When roots are pulled from pots, they lose temporary water-holding capacity, while the shift from controlled nursery conditions to outdoor heat/sun overwhelms them. The good news? Most plants recover within 24–48 hours if you water deeply at the base and provide afternoon shade for a few days.
Can I save my tomatoes if they've been wilting for 3+ days?
It depends! If leaves are paper-dry and stems feel hollow when squeezed, recovery is unlikely. However, if only the leaves wilt (but stems stay firm) and soil is moist, try these steps: trim any mushy roots, replant in fresh soil with a root stimulator, and keep them in 50% shade for a week. Monitor for new growth—if none appears after 5–7 days, the plant may be beyond saving.
How do I tell if my wilting tomatoes need more water or less?
Check the soil and leaves: Underwatered plants have dry soil 1+ inches deep and leaves that feel crispy to the touch. Overwatered plants show yellowing leaves, mushy stems, and soil that stays soggy for days. For underwatering, water slowly until moisture reaches 6 inches deep. For overwatering, pause watering for 2 days and loosen compacted soil to improve airflow.
Should I fertilize my tomatoes right after transplanting?
Absolutely not—newly transplanted tomatoes are too stressed to handle fertilizer! Fertilizer burns fragile roots and can worsen wilting. Wait until you see new growth (usually 1–2 weeks post-transplant), then use a balanced 10-10-10 or tomato-specific fertilizer at half-strength. For immediate help, use a seaweed extract (like Maxicrop) to boost recovery without burning.
What's the best time of day to transplant tomatoes?
Transplant on a cool, cloudy day between 4–6 PM for best results. This gives plants time to settle in without immediate sun stress. If you must transplant in full sun, water deeply beforehand, provide shade cloth for the first 3 days, and avoid moving them until evening. Never transplant during peak heat (10 AM–4 PM)—roots can cook in hot soil.