
Planting
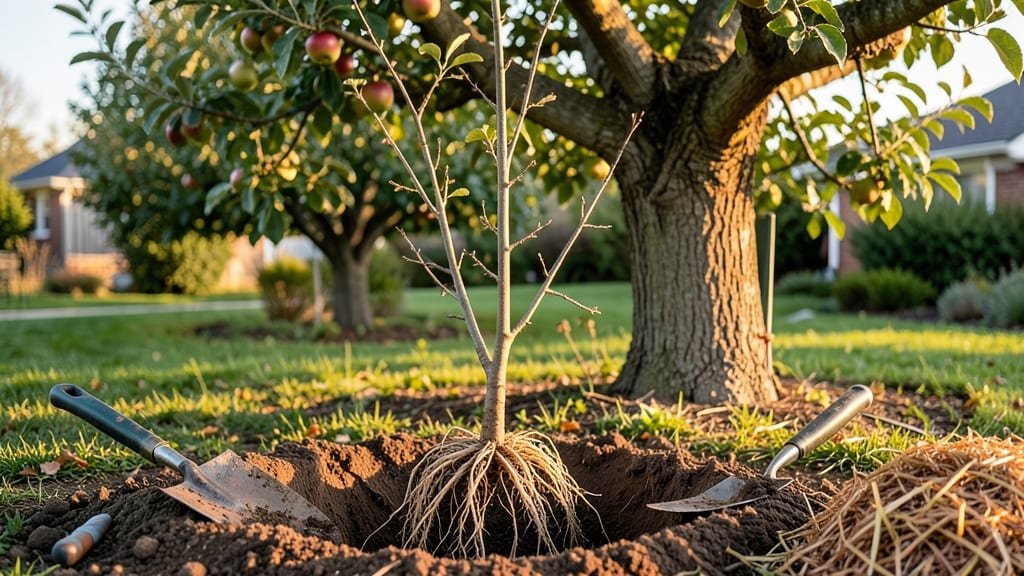
This apple planting guide will turn your backyard into a fruit-bearing paradise in half the time—imagine juicy apples in five years instead of ten! 🌳 The secret to a thriving orchard starts with matching your variety to your climate—cold-hardy Northern Spy in Zone 3 or heat-tolerant Fuji in Zone 9—and timing your planting for that sweet spot between dormancy and bud break.
You’ll need a sunny spot with at least 6 hours of light, well-draining soil (mix in compost if yours is heavy clay), and space—15-20 feet between trees for proper airflow and sunlight access. Dwarf varieties cut that down to 8-10 feet, perfect for small yards.
Once planted, water deeply once a week for the first month, then taper to every 10-14 days once established. Mulch around the base to lock in moisture and keep roots cool. By year three, you’ll see blossoms—and with proper pollination, fruit by year five.
This works for backyard orchards, homesteads, or even urban lots with dwarf varieties. Let’s get those roots in the ground!
📚 In This Guide
- What you need
- Instructions
- Tips and common mistakes
- Wrapping up and next steps
What you need
- ● Apple Tree Saplings: 1–5+ trees (depending on orchard size; dwarf varieties for small spaces, standard for full orchards).
- ● Choose pollination-compatible varieties (e.g., ‘Honeycrisp’ + ‘Gala’).
- ● Soil Amendments: 50 lbs compost or well-rotted manure per tree.
- ● 1 lb balanced fertilizer (10-10-10) or orgainc (per tree).
- ● Lime (if soil pH < 6.0; test first!).
- ● Planting Supplies: 1 5-gallon bucket of high-quality potting mix (for container prep).
- ● 1 shovel (round-point for digging, flat for backfilling).
- ● 1 pruning shears (sterilized with rubbing alcohol).
- ● 1 roll mulch (straw or wood chips, 2–4 inches thick).
- ● 1 tree stake (if needed for young trees; avoid over-staking).
- ● Location: Full sun (6+ hours/day).
- ● Well-draining soil (avoid clay or waterlogged areas).
- ● Zone-specific timing (e.g., dormant season for bare-root trees, spring for container-grown).
- ● Spacing: Dwarf trees: 8–12 ft apart.
- ● Semi-dwarf: 12–16 ft apart.
- ● Standard: 20–25 ft apart (or rows 25–30 ft apart).
- ○ Soil Test: Optional but highly recommended (kit or lab test for pH/nutrients; ~$20–$50).
- ● 1 tree guard (to protect from critters).
- ● 1 drip irrigation kit (for consistent watering).
- ● 1 fruit tree spray (organic or chemical, for pest/disease prevention).
- ● 1 pollinator-friendly plants (e.g., lavender, clover) nearby.
Step-by-Step instructions for planting apples in your yard
Here's the straightforward method I've used to plant healthy, productive apple trees that thrive for decades.
🌱 Step 1: Choose the Right Variety for Your Climate Zone
Select apple varieties that thrive in your USDA hardiness zone. For example, Honeycrisp and Gala do well in zones 4-8, while Granny Smith prefers zones 7-10. Check the tag or research your zone before buying—planting the wrong variety means poor fruit production or winter dieback.
If you want pollination, plant at least two compatible varieties within 50 feet of each other. Some apples are self-pollinating, but cross-pollination always improves fruit set. I always check the tag for pollination notes before purchasing.
🪴 Step 2: Dig the Planting Hole at the Right Size and Depth
Dig a hole twice as wide as the root ball but no deeper. The top of the root ball should sit 2 inches above ground level—this prevents water from pooling around the roots. If your soil drains poorly, add a 1-inch layer of gravel at the bottom of the hole to improve drainage.
Loosen the sides of the hole with a shovel so roots can spread easily. Avoid compacting the soil around the edges—this restricts root growth and weakens the tree over time. I like to rough up the sides with my shovel to encourage roots to branch out.
☀️ Step 3: Plant at the Correct Depth and Stake for Support
Place the tree in the hole so the graft union (the swollen area where the scion was attached) sits 2-4 inches above ground level. This ensures the tree develops strong roots while protecting it from potential rot. Backfill with native soil, tamping lightly every 6 inches to remove air pockets.
Install a 4-foot stake on the side opposite the prevailing wind. Tie the tree loosely to the stake with soft tree ties—too tight now, and you’ll restrict growth later. Water deeply after planting to settle the soil and remove air gaps.
💧 Step 4: Water Deeply and Mulch to Retain Moisture
Water the tree deeply—about 10 gallons—to encourage roots to grow downward. Shallow watering leads to weak, shallow roots that struggle in drought. After watering, apply 3 inches of organic mulch (like wood chips) in a 3-foot-wide ring around the tree, keeping it 6 inches away from the trunk.
Mulch helps retain moisture and regulates soil temperature, but too much can suffocate roots. I always check that the mulch doesn’t touch the trunk—this prevents rot and pests. Keep the mulch moist but not soggy for the first 3 months while roots establish.
⏰ Step 5: Prune and Protect for the First Critical Year
Remove any broken or crossing branches with clean, sharp pruners, cutting just outside the branch collar. This encourages a strong, open canopy. Avoid heavy pruning now—you want the tree to focus on root growth, not fruit production.
Wrap the trunk with tree guard or burlap if rabbits or deer are a problem. Young trees are vulnerable, and a single nibble can kill them. I also apply a dormant spray** in late winter to prevent fungal diseases before buds swell in spring.
Tips & tricks for perfect apple planting
Let me save you the trial-and-error I went through planting my first orchard—these are the details that make all the difference between a struggling sapling and a thriving tree.
Variety Selection: When choosing varieties in Step 1, pay special attention to the tag's pollination notes. Some labeled "self-pollinating" still produce more fruit with a compatible neighbor. I planted a Honeycrisp and Fuji together—they cross-pollinate beautifully, giving me consistent harvests. Also, check if your variety is disease-resistant; many newer cultivars include scab or fire blight resistance.
Soil Preparation: Before digging that hole in Step 2, test your soil's drainage. If water pools after 10 minutes, you definitely need that 1-inch gravel layer at the bottom. I learned this the hard way when my first tree's roots rotted from sitting in soggy soil. For heavy clay soils, consider amending with compost before planting—this improves root penetration dramatically.
Planting Depth: The 2-4 inch graft union placement in Step 3 is non-negotiable—this protects against potential rot while allowing the tree to establish strong roots. I always mark the graft union with a waterproof marker before planting to ensure proper depth. If your soil settles after backfilling, the root ball might sink too low, which can cause girdling issues later.
First-Year Care: During that critical 3-month mulch period in Step 4, I've found using wood chips instead of straw helps retain moisture longer. Just remember to keep it 6 inches from the trunk—this small gap prevents rot while still protecting roots. And don't forget to check tree ties every few weeks; they can cut into the trunk as the tree grows.
Pro Tips for Apple Planting Guide
- Let me save you the trial-and-error I went through planting my first orchard—these are the details that make all the ...
- Variety Selection: When choosing varieties in Step 1, pay special attention to the tag's pollination notes. Some labe...
- Soil Preparation: Before digging that hole in Step 2, test your soil's drainage. If water pools after 10 minutes, you...
Frequently asked questions
Got questions about planting apples? You’re not alone! Here are some of the most common concerns—plus straightforward answers to help you grow a thriving orchard.
When is the best time to plant apple trees?
The ideal window is late fall to early spring (before buds swell or after harvest). In warmer zones (7-9), plant in winter to avoid summer heat stress. Cooler zones (3-6) benefit from early spring planting (March-April) to let roots establish before summer. Avoid planting in extreme heat or frost.
How far apart should I space apple trees?
Spacing depends on your variety and climate. For standard trees, allow 20–25 feet between rows and 12–15 feet within rows. Dwarf trees (6–8 feet tall) need only 8–10 feet apart. Overcrowding reduces airflow, increasing disease risk. Check your tree’s tag for specific recommendations!
Can I plant apple trees in containers or small yards?
Yes! Dwarf or semi-dwarf varieties (like ‘Gala’ or ‘Honeycrisp’) thrive in large pots (15+ gallons) with well-draining soil. Ensure the container gets 6+ hours of sunlight and use a balanced fertilizer (10-10-10) every 4–6 weeks. Just know: container-grown trees may produce smaller yields than in-ground orchards.
Why are my new apple tree leaves yellowing or wilting?
Yellow leaves often signal overwatering, underwatering, or nutrient deficiency. Check soil moisture—it should be damp but not soggy. Wilting could mean root stress (common after transplanting) or pests like aphids. Prune damaged leaves, mulch to retain moisture, and test soil pH (ideal: 6.0–7.0). If issues persist, consult a local extension service.
Do apple trees need cross-pollination?
Most apple varieties require a second tree for pollination (even if it’s far away). Look for trees with compatible bloom times (e.g., ‘Fuji’ + ‘Gala’). Some self-pollinating types (like ‘Liberty’ or ‘Enterprise’) work alone but often produce better yields with a partner. Plant at least 2–3 trees for a reliable harvest!
Wrapping up and next steps
Planting apples is a rewarding journey that blends patience with the joy of nurturing life. Whether you’re a seasoned gardener or a beginner, choosing the right zone, timing, and spacing sets the stage for a bountiful harvest.
With the right tools, knowledge, and a little love, your orchard will flourish—and soon, you’ll be savoring homegrown apples straight from the tree! 🍏✨
Ready to take the next step? Start small—pick a sunny spot, gather your supplies, and mark your calendar for planting season. Before you know it, you’ll be harvesting apples that taste like summer itself!