
Planting
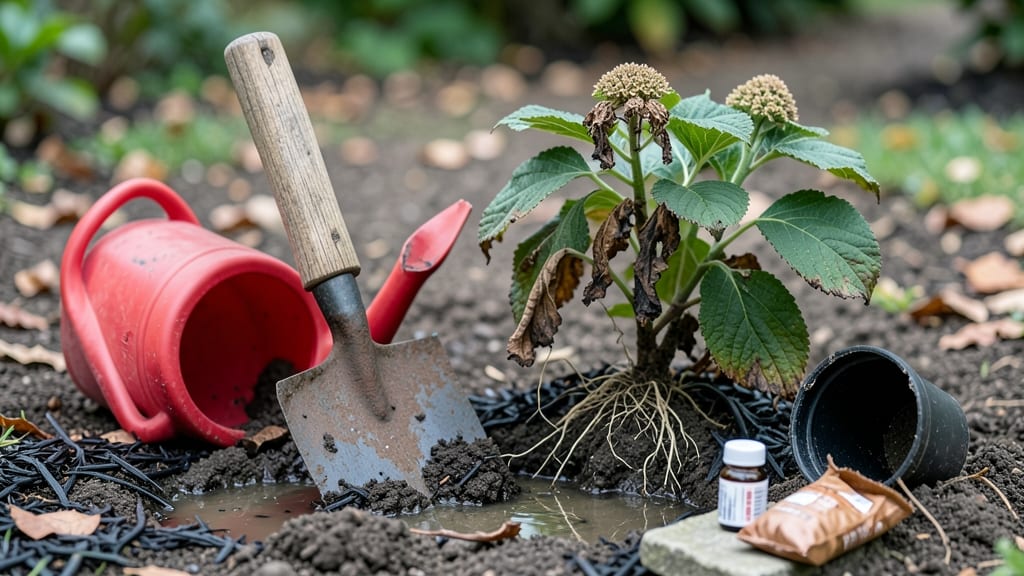
Your hydrangeas died after planting because of one sneaky culprit: root rot—and the good news is, you can still save them with these three simple steps. 🌿 I’ve nursed back more hydrangeas than I’d like to admit, and the key is catching the problem early before it spreads.
Most gardeners overwater or plant in soggy soil without realizing it, turning their new bushes into a science experiment gone wrong.
The first step is to check the roots—healthy ones are firm and white, while rotten ones smell foul and turn mushy brown. If you see signs of rot, trim the damaged roots with clean scissors and replant in well-draining soil mixed with perlite or sand.
Overwatering is the #1 mistake, so let the soil dry out between waterings—hydrangeas hate soggy feet.
By the time you’re done, your hydrangeas will be on the mend, with new growth pushing through in just 2-3 weeks. The secret? Less water, better soil, and a little patience. Once you’ve fixed the drainage, your bushes will reward you with those showstopping blooms all summer long.
This works for both container-grown and in-ground hydrangeas, so don’t let a soggy spot ruin your plans. Let’s get those roots breathing again!
Root Causes Of Hydrangea Failure
When your hydrangea wilts and dies shortly after planting, it’s often a sign of stress from avoidable mistakes. Understanding the root causes (literally!) helps prevent future heartbreak. Below, we break down the most common reasons—each with a scientific twist and actionable fixes.
Hydrangeas thrive in moist but well-draining soil. If planted in heavy clay or compacted ground without amendments, excess water pools around roots, suffocating them. This triggers root rot—a fungal or bacterial infection that cuts off oxygen and nutrients.
- Why it happens: Waterlogged soil (especially in pots or low-lying areas) creates anaerobic conditions, where roots drown instead of breathing.
- Signs: Yellowing leaves, mushy stems, and a foul odor near the base.
- Fix:
- Amend soil with perlite, sand, or compost to improve aeration.
- Plant in a spot with 6+ hours of sunlight (hydrangeas need light to dry soil faster).
- Use raised beds or containers if your yard has poor drainage.
Hydrangeas are light-sensitive. Too much direct sun (especially in hot climates) causes leaf scorch, while too little light weakens roots, making them vulnerable to disease.
- Why it happens: Sudden exposure to intense sunlight after shade-grown nursery life stresses plants, leading to oxidative damage in leaves.
- Signs: Brown, crispy edges on leaves; wilting despite adequate water.
- Fix:
- Choose a spot with morning sun + afternoon shade (ideal for most varieties).
- Acclimate nursery plants gradually by hardening off (expose to outdoor conditions for 1–2 weeks before planting).
- Use mulch (2–3 inches) to protect roots from temperature swings.
Timing matters! Planting hydrangeas when soil is too hot or too cold stunts root growth, leaving them defenseless against pests or disease.
- Why it happens:
- Late spring/summer planting: Roots can’t establish before winter, leading to freeze-thaw damage.
- Early spring planting: Warm soil triggers rapid growth, but roots may not have enough energy reserves for summer heat.
- Signs: Stunted growth, yellowing leaves, or sudden die-off after a few weeks.
- Fix:
- Plant in early spring (after last frost) or early fall (6–8 weeks before first frost).
- Water deeply 2–3 times per week for the first month to encourage root spread.
- Avoid planting in extreme heat (soil temps above 85°F slow root growth).
Newly planted hydrangeas are prime targets for pests (like slugs, aphids, or Japanese beetles) and fungal diseases (e.g., powdery mildew or botrytis). Weak roots can’t fight back.
- Why it happens:
- Pests: Chew roots or sap, transmitting pathogens.
- Fungi: Thrive in damp, crowded conditions (common in overwatered or shaded plants).
- Signs:
- Pests: Holes in leaves, sticky residue (aphids), or wilting despite water.
- Disease: White powder on leaves, black spots, or moldy stems.
- Fix:
- Inspect plants before buying—avoid those with chewed leaves or webbing.
- Use neem oil or insecticidal soap for pests; copper fungicide for mildew.
- Space plants 3–5 feet apart to improve airflow and reduce humidity.
Hydrangeas are pH-sensitive. Soil that’s too acidic (<4.5) or alkaline (>7.0) locks out essential nutrients like iron or phosphorus, causing nutrient deficiency and weak roots.
- Why it happens:
- Alkaline soil (common in clay): Prevents iron uptake, leading to chlorosis (yellow leaves with green veins).
- Acidic soil (peat-heavy): Can cause aluminum toxicity, stunting growth.
- Signs: Yellowing leaves (even on new growth), slow growth, or stunted stems.
- Fix:
- Test soil pH with a home kit (ideal range: 5.2–6.0 for most hydrangeas).
- Adjust with:
- Lime (for acidic soil): Sprinkle dolomitic lime and water in.
- Sulfur (for alkaline soil): Mix elemental sulfur into the top 6 inches of soil.
- Add organic matter (compost or peat moss) to buffer pH naturally.
Pro Tip: 💡 If your hydrangea’s leaves turn blue-green, it’s a sign of iron deficiency—common in alkaline soil. A quick fix? Iron chelate or Epsom salt spray (1 tbsp per gallon of water).
Revive Your Hydrangeas Now
If your hydrangeas are struggling after planting, don’t panic—there’s still hope! The key is identifying the root cause (literally!) and taking swift, targeted action. Below, we break down practical fixes for the most common issues, along with prevention tips to keep your plants thriving long-term.
Signs: Yellowing leaves, mushy stems, foul-smelling soil, or wilting despite wet soil.
How to Fix It: 🔥 Step 1: Stop Watering Immediately
- Let the soil dry out completely before watering again. Overwatering is the #1 killer of newly planted hydrangeas.
🍳 Step 2: Improve Soil Drainage - Test the soil: Dig a small hole (6–8 inches deep) near the plant.
If water pools or drains slowly (over 2 hours), your soil is too dense. - Amend the soil: Mix in coarse sand, perlite, or compost (50/50 with existing soil) to loosen it. For heavy clay, consider planting in a raised bed or container with well-draining potting mix.
👨🍳 Step 3: Prune Damaged Roots & Foliage
- Use sterilized pruners to trim:
- Black, mushy roots (cut healthy white roots only).
- Yellow/brown leaves (snip at the base to prevent disease spread).
- Pro tip: 💡 Sprinkle cinnamon or copper fungicide around the base to deter fungal growth while the plant recovers.
🥘 Step 4: Water Smartly
- Deep water 1–2 times per week (early morning) instead of daily shallow watering.
- Check moisture: Stick your finger 2 inches into the soil—water only if it’s dry.
🌡️ Prevention:
- Plant hydrangeas in mounds (slightly elevated) to encourage runoff.
- Avoid planting in low-lying areas where water pools.
- Use mulch (2–3 inches) to regulate soil temperature but keep it away from the stem.
Signs: Drooping leaves, slow growth, or leaves curling inward within 1–2 weeks of planting.
How to Fix It: 🔥 Step 1: Shield from Stressors
- Move to partial shade (if previously in full sun) for 2–3 weeks to reduce stress.
- Avoid fertilizing for 4–6 weeks—new plants need time to establish roots before feeding.
🍳 Step 2: Support the Roots
- Water deeply (1–2 gallons per plant) every 3–4 days to encourage root growth.
- Add a root stimulator (like mycorrhizal fungi or seaweed extract) to boost recovery.
👨🍳 Step 3: Stake if Needed
- If stems are weak, lightly stake the plant to prevent wind damage while roots strengthen.
🥘 Step 4: Gradually Acclimate
- After 2 weeks, slowly reintroduce sun (1 hour/day, increasing weekly).
- Hardening off: If transplanted from a pot, leave it in the shade for a full week before moving.
🌡️ Prevention:
- Plant in spring or early fall (avoid extreme heat/cold).
- Keep soil moist but not soggy during the first month.
- Choose the right pot size if container-grown—hydrangeas need 1–2 gallons of soil per year of growth.
Signs: Scorched leaves, stunted growth, or leaves turning crispy/brown (too much sun) or pale, leggy stems (too little sun).
How to Fix It: 🔥 Step 1: Assess Sunlight Needs
- Most hydrangeas thrive in morning sun + afternoon shade (especially in hot climates).
- Varieties like ‘Endless Summer’ can handle partial sun, while oakleaf hydrangeas prefer dappled shade.
🍳 Step 2: Relocate (If Possible)
- If planted in full sun, move to a shadier spot (e.g., near a tree or fence).
- If in deep shade, prune nearby trees to allow 4–6 hours of filtered light.
👨🍳 Step 3: Adjust Soil pH
- Blue flowers? Soil is acidic (pH 5.0–5.5)—add sulfur or peat moss.
- Pink flowers? Soil is alkaline (pH 6.0–7.0)—add lime or wood ash (sparingly).
- Test first: Use a soil pH kit or send a sample to a local extension office.
🥘 Step 4: Mulch for Stability
- Apply 2–3 inches of organic mulch (pine bark or shredded leaves) to regulate temperature and moisture.
🌡️ Prevention:
- Research your hydrangea variety before planting—some (like panicle hydrangeas) tolerate full sun!
- Avoid planting near large trees that compete for nutrients/water.
- Use a shade cloth (30–50%) if relocating isn’t an option.
Signs: Holes in leaves, chewed stems, white powdery residue, or sticky sap (aphids).
How to Fix It: 🔥 Step 1: Identify the Culprit
- Slugs/snails? Look for silver trails at night.
- Aphids/spider mites? Check for tiny webs or clusters on undersides of leaves.
- Fungal spots? See black/yellow patches on foliage.
🍳 Step 2: Remove Infestations
- Handpick pests (drop into soapy water).
- Spray with neem oil (1 tbsp per gallon of water) or insecticidal soap.
- For slugs: Set up beer traps (bury a cup filled with beer) or use copper barriers.
👨🍳 Step 3: Boost Plant Immunity
- Fertilize lightly with balanced fertilizer (10-10-10) to strengthen growth.
- Prune infected leaves and sterilize tools with rubbing alcohol.
🥘 Step 4: Prevent Future Outbreaks
- Water at the base (not overhead) to deter fungal spores.
- Encourage beneficial insects (ladybugs, lacewings) by planting marigolds or dill nearby.
🌡️ Prevention:
- Inspect new plants before bringing them home.
- Avoid over-fertilizing with nitrogen—it attracts pests.
- Rotate planting locations every few years to prevent soil-borne diseases.
💡 Hydrangeas hate "wet feet"—always plant in well-draining soil and avoid soggy spots. 🎯 Mulch correctly: Keep mulch 2–3 inches deep but 6 inches away from the stem to prevent rot. 🔥 Deadhead spent blooms in late summer to encourage next year’s flowers. 🌿 Divide overcrowded plants every 3–4 years to revitalize growth.
With these fixes, your hydrangeas should bounce back in 4–6 weeks. If they’re still struggling after a month, consider replanting in a container for better control over soil and water. Happy gardening! 🌸
Frequently asked questions
Why did my hydrangea die so quickly after planting?
Most likely from root rot caused by overwatering or poor drainage. Hydrangeas need moist but never soggy soil—water only when the top 2 inches feel dry. Check for mushy brown roots or a foul smell at the base.
Can I save a hydrangea that's already showing signs of rot?
Yes! Trim all black/mushy roots with sterilized scissors, replant in fresh well-draining soil with perlite, and reduce watering. Use a copper fungicide to prevent spread while it recovers.
What's the best time of year to plant hydrangeas?
Early spring (after last frost) or early fall (6–8 weeks before first frost). Avoid summer heat—soil temps above 85°F stress roots. If planting now, water deeply 2–3 times weekly for the first month.
How do I know if my hydrangea has too much or too little sun?
Too much sun causes brown, crispy leaves; too little causes pale, leggy growth. Most varieties thrive in morning sun + afternoon shade. Move gradually if relocating to avoid shock.
Will mulch help my struggling hydrangea?
Yes, but correctly! Use 2–3 inches of organic mulch (like pine bark) and keep it 6 inches away from the stem to prevent rot. Mulch regulates moisture and temperature—just don't pile it against the trunk.