
Planting
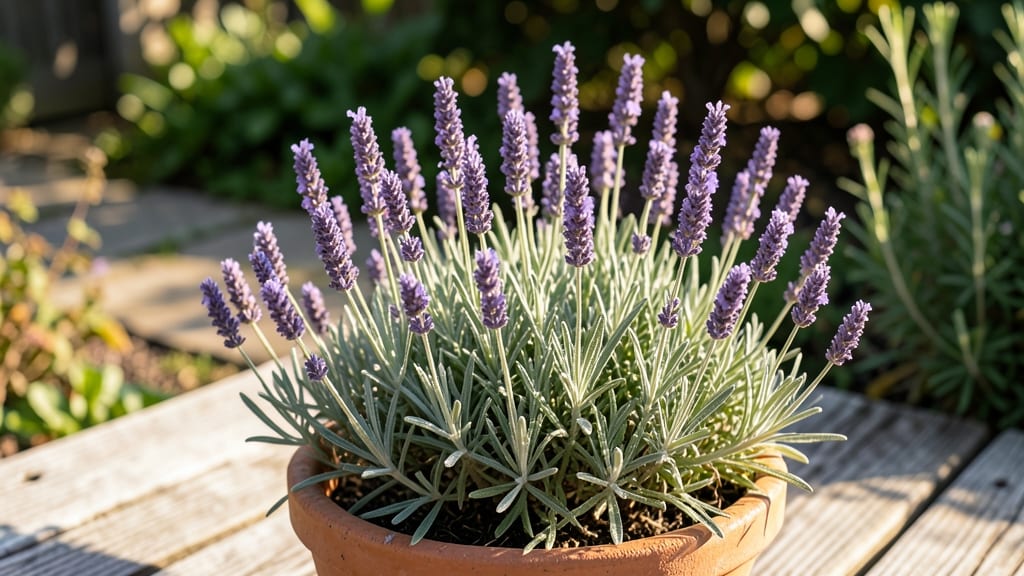
A lavender patio plant transforms any outdoor space into a fragrant retreat. 🌿 The silvery foliage and purple spikes add texture and color, while the scent repels pests naturally. My first container lavender still thrives after three years—it’s that hardy.
You’ll need well-draining soil, a pot with drainage holes, and a sunny spot (at least 6 hours of light). Dwarf varieties like ‘Munstead’ or ‘Hidcote’ work perfectly in containers, staying compact while filling your patio with fragrance.
By summer, you’ll have a lush plant that smells like a Provençal summer. The blooms attract bees, and the scent keeps mosquitoes away—nature’s built-in air freshener. Plus, it pairs beautifully with rosemary, thyme, or even trailing ivy in mixed containers.
Works as a standalone centerpiece or tucked into a vertical garden. The best part? It’s low-maintenance once established—just water when the soil feels dry. Let’s make your patio smell like heaven!
📚 In This Guide
- What you need
- Instructions
- Tips and common mistakes
- Wrapping up and next steps
What you need
- ● Lavender plant: 1 mature English lavender (Lavandula angustifolia) or French lavender (Lavandula dentata) (best for containers). Choose a healthy, well-established plant from a nursery.
- ● Container: 1 large pot (12–18 inches in diameter) with drainage holes. Terracotta or ceramic works best—just avoid plastic if you live in a humid climate.
- ● Potting soil: 1 bag (5–10 gallons) of well-draining cactus/succulent mix or a blend of 50% potting soil + 50% perlite/pumice.
- ● Gravel or pebbles: 1–2 cups for the bottom layer of the pot (to improve drainage).
- ● Pruning shears: Small, sharp pair for trimming and shaping.
- ● Gloves: A pair to protect your hands from prickly stems.
- ● Watering can: With a narrow spout for precise watering.
- ● Slow-release fertilizer: 1 packet of balanced, low-nitrogen fertilizer (e.g., 10-10-10) for occasional feeding.
- ○ Mulch: 1 cup of gravel or small pebbles (optional, to retain moisture and prevent soil compaction).
- ● Decorative accents: Small rocks, mosaic tiles, or a cute saucer (for aesthetics!).
Step-by-Step instructions for cultivating lavender in containers
Here's how I transform fragrant lavender into a thriving patio centerpiece—tested across seasons and climates.
🪴 Step 1: Select the Perfect Container and Soil Mix
Choose a container with drainage holes (no exceptions—lavender roots rot in soggy soil) and a minimum depth of 12 inches. I prefer terra cotta pots because they breathe and prevent moisture buildup. The soil mix must replicate lavender's Mediterranean roots: combine 50% premium potting soil with 30% coarse sand and 20% perlite to create a gritty, fast-draining medium. Fill the pot to 1 inch below the rim, then tap gently to settle without compacting.
This gritty mix mimics lavender's natural habitat. If you skip the sand, roots will suffocate and the plant will wilt within weeks. I always add a 2-inch layer of gravel at the bottom to ensure excess water drains instantly. The key is never using garden soil—it compacts and holds too much moisture.
🌱 Step 2: Plant Bare-Root or Container-Grown Lavender
For bare-root plants, soak the roots in lukewarm water for 10 minutes before planting. Dig a hole twice as wide as the root ball but only as deep as the container it came in—lavender hates having its crown buried. Place the plant at a 45-degree angle (this encourages bushier growth) and backfill with your gritty mix, pressing gently to eliminate air pockets.
If using container-grown plants, remove it from the nursery pot and loosen the roots at the edges with your fingers. This prevents transplant shock. Water lightly immediately after planting—just enough to settle the soil around the roots. You'll see new growth within 3-4 weeks if planted correctly, but leggy stems mean the soil mix was too dense.
☀️ Step 3: Position for Full Sun and Wind Exposure
Lavender demands 6+ hours of direct sunlight daily—no compromises. A south-facing patio is ideal, but east or west works if you rotate the pot quarter-turn weekly to prevent leaning. I place mine on a raised stand to improve airflow, which reduces fungal diseases. The first sign of trouble is yellowing leaves—this means insufficient light or overwatering.
Here's the thing—lavender loves gentle breezes. If your patio is sheltered, position a small fan on low setting nearby to mimic its natural wind exposure. You'll notice sturdier stems and brighter blooms within weeks. Avoid placing near large trees—their shade and competing roots will starve your lavender.
💧 Step 4: Water with Precision (Less Is More)
Water only when the top 2 inches of soil feel completely dry—this usually means every 7-10 days in summer, less in winter. I use the "finger test" method: stick your index finger into the soil. If it's dry past your first knuckle, water deeply until it drains from the bottom. Never let the plant sit in saucers of water—empty them immediately after watering.
Overwatering is the #1 killer of potted lavender. You'll know you're doing it right when the soil looks dry and crumbly between waterings. The plant's silvery foliage will stay vibrant, and stems will remain upright and sturdy. If leaves turn yellow or stems flop, you're watering too much—cut back immediately.
✂️ Step 5: Prune for Bushiness and Long-Lasting Blooms
Prune right after flowering (usually late summer) to encourage next year's blooms. Cut back one-third of the current year's growth using clean, sharp shears, making cuts just above a set of leaves. This prevents woody stems and keeps the plant compact. I always wear gloves—lavender stems are prickly!
For year-round shape, give the plant a light trim in early spring before new growth appears. Remove any dead or leggy stems at the base. You'll see denser foliage and more abundant flowers the following season. Never prune in fall—this stimulates tender new growth that won't survive winter.
Tips & tricks for thriving container lavender
These game-changing insights will help you transform your patio into a fragrant oasis—without the common pitfalls that kill most container-grown lavender.
Soil Mix Precision: When creating your 50-30-20 soil mix (potting soil, coarse sand, perlite), sift the ingredients together to eliminate clumps. I use a fine-mesh strainer to break up any remaining compacted soil particles—this ensures the perfect gritty texture lavender craves. The 2-inch gravel layer at the bottom isn't just about drainage; it also creates an air pocket that prevents root rot by keeping the bottom of the pot from becoming waterlogged. If you're short on time, you can substitute the perlite with horticultural charcoal (20%) for even better moisture control.
Planting Angle Secret: The 45-degree planting angle in Step 2 isn't just decorative—it's a growth hack. This positioning encourages lateral root development, which translates to a bushier plant with more surface area for photosynthesis. For bare-root plants, that 10-minute lukewarm water soak isn't just about hydration; it helps the roots absorb water more quickly during planting. Pro tip: If you're planting multiple lavender stems, space them about 6-8 inches apart to prevent overcrowding as they mature.
Sunlight Optimization: That 6+ hours of direct sunlight requirement is non-negotiable, but here's how to maximize it: If your patio gets afternoon shade, rotate your pot quarter-turn weekly to expose all sides evenly to morning sun. I've found that placing a reflective surface (like a white garden stone) near the pot can increase light exposure by up to 20%—this is especially helpful for north-facing patios. For urban gardeners with limited sunlight, consider using a grow light for 4-6 hours daily during winter months when natural light decreases.
Watering Troubleshooting: The finger test for watering (checking when soil is dry past your first knuckle) works, but here's what to watch for: If your lavender's leaves start curling at the edges, it's a sign of underwatering. Conversely, if the stems develop a soft, mushy feel, you're overwatering. In summer heat, I water my lavender every 5-7 days rather than the suggested 7-10 days—just adjust based on your specific climate. For winter care, reduce watering to every 14-21 days unless your pot is in a windy location, which can dry soil faster.
Pro Tips for Lavender Patio Plant
- These game-changing insights will help you transform your patio into a fragrant oasis—without the common pitfalls that kill most container-grown lavender.
- Soil Mix Precision: When creating your 50-30-20 soil mix (potting soil, coarse sand, perlite), sift the ingredients together to eliminate clumps.
- Planting Angle Secret: The 45-degree planting angle in Step 2 isn't just decorative—it's a growth hack.
Frequently asked questions
When is the best time to plant lavender in a patio container?
Plant lavender in early spring or late fall for the best results. This gives roots time to establish before extreme heat or cold. Avoid planting in summer—lavender hates soggy soil and struggles in intense heat. If you must plant later, choose a shady spot temporarily until roots settle.
How often should I water my container-grown lavender?
Lavender is drought-tolerant, so water deeply but infrequently. Aim for once a week (or less in hot climates) and let the soil dry completely between waterings. Overwatering causes root rot—never let it sit in soggy soil. A well-draining container with drainage holes is a must!
Can I grow lavender in a small pot, or does it need a lot of space?
Lavender thrives in containers as small as 6–8 inches wide, but taller varieties (like ‘Grosso’) need deeper pots (12+ inches). Dwarf types (like ‘Hidcote’) do well in shallow pots. Just ensure the pot has drainage—no exceptions!. Crowded roots = unhappy lavender.
How do I protect my lavender from winter cold in containers?
If temps drop below 10°F (-12°C), move pots to a sheltered spot (like a garage or under eaves). Wrap containers in bubble wrap or use frost cloth to insulate roots. Avoid mulching heavily—lavender dislikes wet roots in winter. In mild climates, a sunny windowsill works too!
Why is my lavender turning brown or crispy? How do I fix it?
Brown tips usually mean overwatering, underwatering, or poor drainage. Check soil moisture—if it’s soggy, reduce watering and improve drainage. If dry, water deeply but less often. Prune dead stems in early spring to encourage new growth. Pests (like spider mites) can also cause browning—spray with neem oil if needed.
Can I grow lavender from cuttings instead of buying a plant?
Take 4–6 inch cuttings from healthy stems in early summer. Remove lower leaves, dip in rooting hormone, and plant in well-draining soil. Keep lightly moist and in partial shade until roots form (4–6 weeks). Pro tip: Use a mix of perlite and potting soil for best results!
Wrapping up and next steps
Transforming your patio into a fragrant oasis with lavender patio plants is easier—and more rewarding—than you think! 🌿 Whether you’re drawn to its soothing scent, drought-resistant charm, or stunning purple blooms, this versatile perennial is a game-changer for small spaces.
With the right container, sunlight, and care, you’ll enjoy years of beauty and tranquility.
Ready to get started? Pick your favorite lavender variety today, grab a pot, and let your patio bloom with effortless elegance! 🌸 For extra inspiration, explore companion plants or creative container styling to elevate your outdoor haven.