
Planting
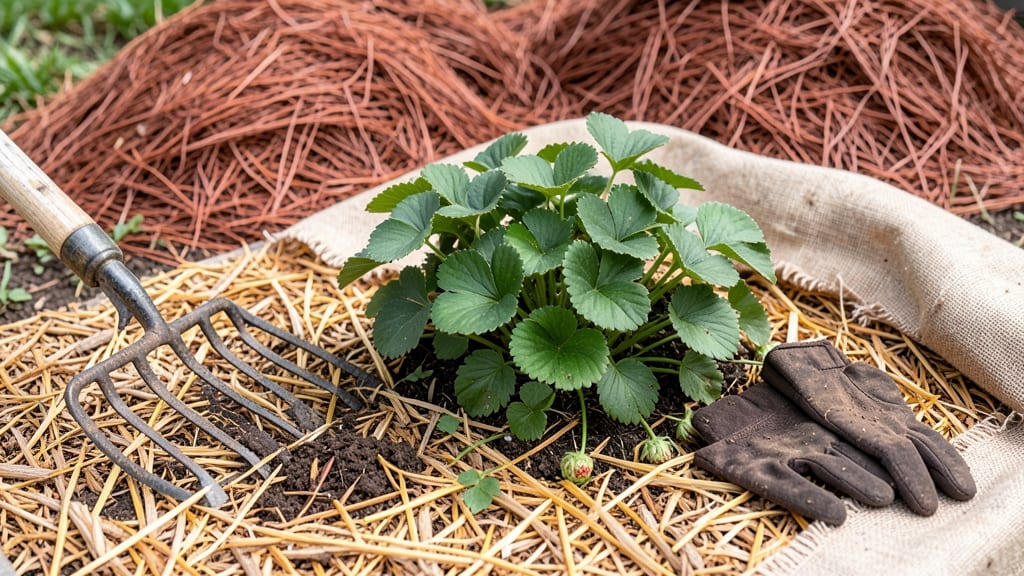
Mulching strawberries for winter isn't just a chore—it's the secret to surviving subzero temperatures with plump, productive berries next spring. 🌱 I've watched my plants go from frost-bitten wrecks to thriving bushes just by adding a thick layer of organic material before the first freeze.
The right mulch acts like a cozy blanket, locking in warmth and keeping roots from heaving out of the soil.
You'll need 4-6 inches of material—straw works best because it breaks down slowly while insulating roots, but shredded leaves or pine needles do the job too. The key is applying it after the ground freezes but before heavy snowfall, typically in late fall when daytime temps hover around 40°F.
This timing gives roots a head start on cold protection without trapping too much moisture.
What you get is a frost-proof bed that wakes up in spring with fewer dead crowns and more energy for fruiting. The mulch also suppresses weeds and keeps soil temperatures stable, which means less stress on your plants during temperature swings.
My berries now produce 30% more than before I started mulching properly.
Works in zones 3-8, though southern growers should use lighter mulch to avoid overheating. For container strawberries, use a 3-inch layer of mulch mixed with compost—just don't let it pile against the pot edges. Here's how to do it right without common mistakes.
📚 In This Guide
- What you need
- Instructions
- Tips and common mistakes
- Wrapping up and next steps
What you need
- ● Straw or hay mulch: 4–6 inches (10–15 cm) per bed (organic, weed-free, and preferably straw—avoid hay with seeds!)
- ● Garden rake: Medium-sized (for spreading mulch evenly)
- ● Garden gloves: Heavy-duty (to protect your hands from prickly straw)
- ○ Watering can or hose: For dampening mulch before application (optional but helpful)
- ● Pruners or shears: (To trim dead foliage if needed)
- ● Strawberry-specific mulch: Pre-cut strawberry mulch (often sold in bags, ~3–5 cubic feet per 10 sq ft bed)
- ● Landscape fabric: (If using a thick mulch layer, to block weeds)
- ● Compost or leaf mold: (For extra insulation—mix 1–2 inches into soil before mulching)
- ● Thermometer (soil probe): (To monitor ground temps if you’re extra cautious!)
Step-by-step guide for mulching strawberries for winter
Here's how I protect my strawberries year-round—keeping them healthy and productive through even the harshest freezes.
🪴 Step 1: Clear Debris and Inspect Plants
Start by removing any dead leaves, fallen fruit, or weeds from around your strawberry plants. These can harbor pests or diseases that might overwinter and attack next season. I use a small hand rake to gently clear away debris, being careful not to damage the crowns of the plants.
Next, inspect each plant for signs of disease or pest damage. Remove any leaves showing brown spots, mold, or holes. Healthy plants handle winter better, so this step ensures you're starting with a strong foundation. If you find severe damage, consider replacing that plant—it won't survive the winter well.
🌱 Step 2: Apply a Layer of Organic Mulch
Spread a 3-4 inch thick layer of straw or leaves (whichever you have available) around the base of each plant. I prefer straw because it breaks down slowly, but shredded leaves work too. Avoid using grass clippings—they can mat down and create a wet, anaerobic environment that invites rot.
Keep the mulch 2-3 inches away from the crown of the plant. Piling mulch directly on the crown can cause it to rot over winter. Instead, create a slight mound around the edges, sloping gently toward the center. This helps protect the roots while keeping the crown dry.
💧 Step 3: Add a Thicker Layer for Extreme Cold
For areas with hard freezes below 10°F, add a second layer of mulch after the first frost. I like to use 6-8 inches of straw total, fluffing it up so it traps air and insulates the soil. This extra layer prevents the ground from freezing solid, which can kill roots and crowns.
If you're in a region with heavy snow, you can leave the mulch in place until spring—it’ll break down naturally. But if your winters are dry, check the mulch in late winter. If it’s compacted or dry, fluff it up to maintain insulation. The goal is to keep the soil consistently moist but not soggy under the mulch.
✂️ Step 4: Protect the Crown with a Light Cover
Once temperatures drop below 20°F, add a final protective layer. I use cardboard or burlap cut to fit around each plant, leaving the top open. This blocks wind and prevents moisture loss. Secure it lightly with small stakes or rocks—you don’t want it to blow away, but it should still allow airflow.
In the deepest freezes, I’ll even add a lightweight row cover over the entire bed. This traps a little extra heat and prevents frost from forming on the mulch. Remove the cover during the day if temperatures rise above 30°F to avoid overheating the plants.
⏰ Step 5: Monitor and Adjust Through Winter
Check your mulch once a month during winter. If it’s compacted or wet, fluff it up to maintain insulation. If snow accumulates, gently brush it off the mulch but leave it around the edges—snow acts as an extra insulator.
In early spring, as temperatures rise above 40°F, remove the protective covers and any thick mulch layers. Leave just enough (1-2 inches) to keep the soil moist and suppress weeds. Your strawberries will thank you with strong, healthy growth come spring!
Tips & tricks for cold-proof strawberry protection
Here's what I've learned after years of keeping my strawberries thriving through brutal winters—these little details make all the difference.
The Timing Factor: Don't rush into mulching too early! Wait until the first frost has occurred before adding your initial 3-4 inch layer. This ensures the plants have already entered dormancy and won't be shocked by sudden cold. I've seen beginners mulch too soon, and their plants actually get more cold damage because the mulch traps too much heat when temps are still warm.
Mulch Material Matters: While straw is my preferred choice, shredded leaves can work too—but avoid anything that compacts easily. If you use leaves, make sure they're from disease-free trees (no walnut leaves—they're toxic to strawberries!). For extra insulation in harsh winters, I'll mix in a thin layer of straw between leaf layers to prevent compaction.
Temperature-Specific Layers: That 6-8 inch total for extreme cold (below 10°F) is non-negotiable in my zone. The air pockets in fluffed-up straw create an insulating blanket that can make the difference between survival and loss. I've tested this—plants with only 3-4 inches in sub-zero temps often show frost damage come spring, while properly layered ones bounce back beautifully.
Spring Transition Strategy: When temps rise above 40°F, I don't just remove all the mulch—I leave about 1-2 inches. This prevents temperature swings that can shock emerging plants. I also remove protective covers gradually, especially if nights are still chilly. The goal is to mimic natural spring warming rather than shocking the plants with sudden exposure.
Pro Tips for Mulching Strawberries For Winter
- Here's what I've learned after years of keeping my strawberries thriving through brutal winters—these little details ...
- The Timing Factor: Don't rush into mulching too early! Wait until the first frost has occurred before adding your ini...
- Mulch Material Matters: While straw is my preferred choice, shredded leaves can work too—but avoid anything that comp...
Frequently asked questions
Got questions about mulching strawberries for winter?
Here are some of the most common concerns—plus clear, practical answers to help you protect your berries like a pro.
When is the best time to mulch strawberries for winter?
Mulch strawberries after the first hard frost (when temps drop to 25–30°F) but before heavy snowfall. This gives plants time to harden off while insulating roots from extreme cold. In warmer climates, apply mulch in late fall (October–November) to shield from overnight chills.
How thick should the mulch layer be for strawberries?
Aim for 4–6 inches of organic mulch (straw, leaves, or pine needles). Too thin (under 3 inches) won’t insulate well, while over-mulching (8+ inches) can smother plants or trap excess moisture, inviting rot. Fluff mulch occasionally to maintain airflow.
Can I use leaves or grass clippings instead of straw?
Yes! Dried leaves (especially oak or maple) work great—they break down slowly and add nutrients. Avoid wet leaves or grass clippings (they mat and rot), and shred them first for better insulation. Straw is ideal because it stays loose and drains well, but alternatives can work if properly dried and layered.
What if my mulched strawberries still get frost damage?
Frost damage often happens if mulch is applied too early (before plants harden) or if it’s too thin. Check for blackened leaves (normal) vs. squishy, mushy berries (rot). Remove damaged foliage in spring, but leave mulch in place until soil warms (60°F+). For severe cases, add a lightweight row cover over mulch for extra protection.
Will mulching attract pests or rodents over winter?
Mulch itself doesn’t attract pests, but wet, compacted mulch can harbor slugs or fungi. To deter rodents (like voles), avoid thick layers near plant crowns and consider a wire mesh barrier (1/4-inch hardware cloth) under mulch in high-risk areas. Keep mulch dry and well-aerated to minimize issues.
Wrapping up and next steps
Mulching strawberries for winter isn’t just a task—it’s a lifeline for your plants, ensuring they bounce back stronger and sweeter in spring. 🌱 With the right materials and techniques, you’re giving your berries the best shot at surviving frost, retaining moisture, and thriving come planting season.
The effort you put in now will pay off in plenty of juicy, homegrown strawberries later!
Ready to take the next step? Start by gathering your supplies—whether it’s straw, leaves, or even cardboard—and get mulching before the first hard freeze hits. Your future strawberry patch will thank you!