
Planting
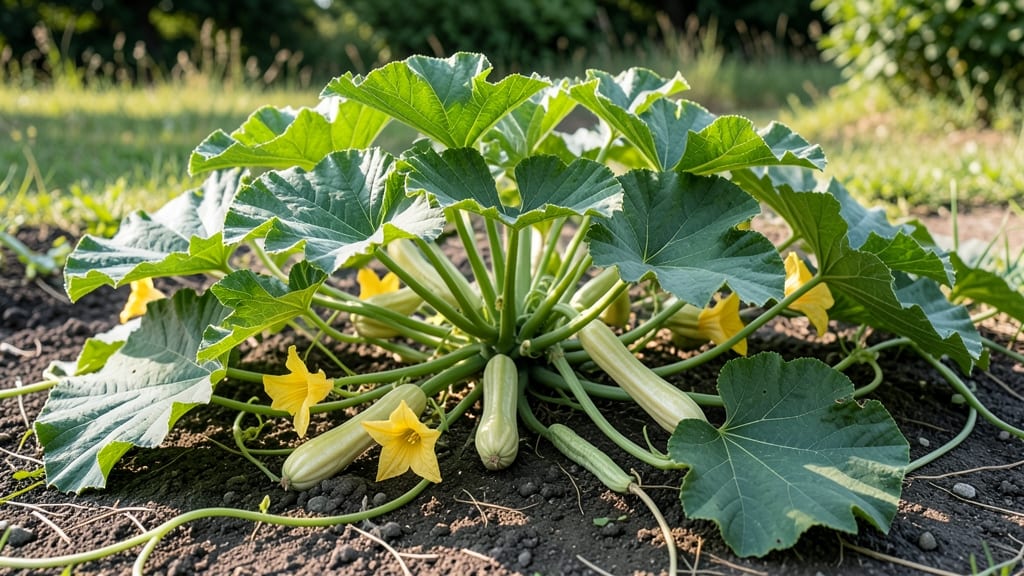
Growing spaghetti squash means sunny spot secrets that turn vines into goldmines of stringy goodness. 🌞 I learned the hard way—my first plants flopped because I ignored their love for heat and space. Now, I get 10+ squash per plant by treating them like the sun-worshippers they are.
The secret starts with soil: rich, well-draining, and warmed to 60°F before planting. Mix in compost and avoid heavy clay—roots need room to spread. Plant seeds 1 inch deep, 3 feet apart, and watch them race toward the sun. Thin to the strongest plants, because competition means fewer squash.
By midsummer, you’ll see foot-long fruits with golden skin. Water consistently but avoid soggy soil—blossom-end rot is the enemy. The real magic happens when you slice one open and find silky, spaghetti-like strands ready for your plate. This works best in zones 3-10 with 6+ hours of sun daily.
Even beginners get results—just give them space, patience, and plenty of sunlight. Here’s how to nail every step!
📚 In This Guide
- What you need
- Instructions
- Tips and common mistakes
- Wrapping up and next steps
What you need
- ● Seeds or Seedlings: 3–5 spaghetti squash seeds (or 1–2 healthy seedlings if transplanting). Opt for heirloom or hybrid varieties like 'Casaba' or 'Vegetable Spaghetti' for best results.
- ● Containers or Garden Bed: For containers: 5-gallon pots or larger (at least 12–18 inches deep) with drainage holes. Use 3–5 containers if growing multiple plants.
- ● For in-ground planting: A sunny spot with well-draining soil (6+ feet between plants for optimal growth).
- ● High-Quality Soil: 50% potting mix (for containers) or amend garden soil with 3–4 inches of compost.
- ○ Optional: Perlite or vermiculite (1 part per 4 parts soil) to improve drainage.
- ● Basic Gardening Tools: Trowel or hand shovel
- ● Gloves (to protect your hands from prickly vines!)
- ● Watering can or hose with a gentle spray nozzle
- ○ Optional (But Helpful!): Trellis or sturdy stakes (for vining varieties—spaghetti squash can grow 3–6 feet tall!)
- ● Organic mulch (straw or shredded leaves) to retain moisture
- ● Fertilizer: Balanced 10-10-10 or compost tea (apply at planting and mid-season)
- ● Row cover or shade cloth (if in a hot, dry climate)
- ● Sunlight: A spot with 6–8+ hours of direct sunlight daily (spaghetti squash is a sun-worshipper!).
- ● Warmth: Soil temperature should be at least 60°F (15°C) for seeds to germinate.
- ● Patience: Spaghetti squash takes 90–120 days to mature—plan ahead for a late-summer harvest!
- ● Watering Routine: Keep soil consistently moist (not soggy) during flowering and fruiting.
Step-by-step guide to growing speghetti squash in your garden
Here's how to cultivate this unique summer squash for tender, stringy flesh that cooks like pasta.
🌱 Step 1: Choose the Right Location and Prepare the Soil
Speghetti squash thrives in full sun—select a spot that receives at least 6-8 hours of direct sunlight daily. The vines spread 3-5 feet, so space plants 4-5 feet apart to allow room for sprawling growth. I like to plant near a trellis or fence to contain the vines and save garden space.
Before planting, enrich the soil with 2-3 inches of compost mixed into the top 12 inches. Speghetti squash prefers well-draining, slightly acidic soil with a pH between 6.0-6.8. Work in a balanced 10-10-10 fertilizer at planting time to provide essential nutrients for vigorous growth. The goal is loose, fertile soil that encourages deep root development.
☀️ Step 2: Plant Seeds or Transplants at the Right Time
Start seeds indoors 2-3 weeks before your last frost date or sow directly in the garden after soil temperatures reach 60°F. I prefer direct sowing for speghetti squash because the plants establish quickly and tolerate transplant shock poorly. Plant seeds 1 inch deep and 4-5 feet apart, with 5-6 feet between rows.
If using transplants, choose healthy 3-4 week old seedlings with 2-3 true leaves. Harden them off for 7-10 days before transplanting to prevent shock. Plant in the late afternoon to reduce stress on the roots. Water deeply immediately after planting to settle the soil and encourage root contact with moisture.
💧 Step 3: Water and Mulch for Consistent Growth
Speghetti squash needs 1-2 inches of water weekly, especially during flowering and fruiting. Water at the base of the plant in the morning to allow foliage to dry quickly and prevent fungal diseases. I use a soaker hose to deliver water slowly and evenly, avoiding wetting the leaves.
Apply 2-3 inches of organic mulch around the base of the plant to retain moisture, suppress weeds, and regulate soil temperature. Straw or shredded leaves work well. Keep mulch 2-3 inches away from the stem to prevent rot. You'll notice healthier vines and more abundant flowering when moisture is consistent.
✂️ Step 4: Fertilize and Prune for Maximum Yield
Side-dress plants with compost or balanced fertilizer when vines begin to run and again when flowers appear. Speghetti squash is a heavy feeder, so regular feeding encourages larger fruit production. I also use a liquid seaweed fertilizer every 2-3 weeks to boost plant resilience and fruit quality.
Remove any suckers that form in the leaf axils to direct the plant's energy toward fruit production. Prune yellow or diseased leaves immediately to prevent the spread of pathogens. If vines become too aggressive, you can trim them back by one-third to control their spread without sacrificing yield.
🌿 Step 5: Harvest and Store for Long-Term Enjoyment
Speghetti squash is ready to harvest when the rind turns a dull yellow and feels hard when pressed. The fruit should weigh 3-5 pounds at maturity. Use a sharp knife or pruners to cut the stem, leaving 1-2 inches of stem attached to preserve the fruit's integrity.
Cure harvested squash in a warm, dry place for 3-5 days to develop a hard skin that improves storage life. Store in a cool, dark place with 50-60°F temperatures and 60-70% humidity. Properly stored squash keeps for 2-3 months. When ready to use, cook whole or cut in half and roast until tender for that signature stringy texture.
Tips & tricks for perfect speghetti squash plant growth
Here's what nobody tells you about growing speghetti squash that'll make all the difference in your harvest.
Sunlight Strategy: Those 6-8 hours of sunlight are non-negotiable—partial shade will result in smaller, less flavorful squash. I've found that morning sun paired with afternoon shade works best in hot climates, but even then, aim for at least 5 hours of direct sun. Place your trellis on the north side of your garden to maximize sunlight exposure while keeping vines contained.
Soil Preparation Secret: The 2-3 inches of compost mixed into the top 12 inches of soil should feel like a rich, crumbly loam—not compacted. I like to add a handful of perlite to improve drainage, especially if your garden soil tends to stay damp. Test your soil pH before planting; if it's outside the 6.0-6.8 range, amend with sulfur (to lower pH) or lime (to raise pH) 2-3 weeks before planting.
Transplant Timing: That 7-10 day hardening-off period is crucial for transplants—don't skip it! I start hardening off my seedlings by placing them outside in a sheltered spot for 2 hours on day 1, gradually increasing to full sun exposure by day 7. Planting in the late afternoon helps reduce transplant shock by giving roots time to settle before nightfall temperatures drop.
Watering Wisdom: The 1-2 inches of water weekly guideline assumes consistent rainfall patterns. In my experience, speghetti squash actually prefers slightly drier conditions during the early growth stages to prevent fungal diseases. Once flowering begins, maintain that 1-2 inch weekly measurement, but always water at the base—never overhead—to prevent powdery mildew, which is particularly problematic for squash plants.
Pro Tips for Speghetti Squash Plant
- Here's what nobody tells you about growing speghetti squash that'll make all the difference in your harvest.
- Sunlight Strategy: Those 6-8 hours of sunlight are non-negotiable—partial shade will result in smaller, less flavorful squash.
- Soil Preparation Secret: The 2-3 inches of compost mixed into the top 12 inches of soil should feel like a rich, crumbly loam—not compacted.
Frequently asked questions
Got questions about growing your own spaghetti squash plant? You’re not alone! Here are some of the most common queries—plus quick, practical answers to help you grow like a pro.
How long does it take for spaghetti squash to grow from seed?
A spaghetti squash plant typically takes 85–100 days to mature from seed to harvest, depending on your climate and variety. Start seeds indoors 3–4 weeks before the last frost, then transplant seedlings outdoors after all danger of frost has passed. Patience pays off—those long, pale green fruits are worth the wait!
Can spaghetti squash grow in containers, or does it need a garden bed?
Yes! Spaghetti squash can thrive in large containers (at least 5 gallons) if you provide enough space for vines to spread (3–5 feet). Use well-draining soil, a trellis for support, and keep the container in full sun. Just ensure the pot has drainage holes to prevent root rot. Container gardening is a great option for small spaces!
Why are my spaghetti squash flowers falling off before fruiting?
This usually happens due to pollination issues or environmental stress. Spaghetti squash relies on bees for pollination—plant companion flowers (like marigolds or sunflowers) nearby to attract them. Avoid overwatering or sudden temperature swings, which can also cause flowers to drop. Hand-pollination with a small brush can help if bees are scarce.
What’s the best way to store harvested spaghetti squash?
Store whole, uncut squash in a cool (50–55°F), dry, and dark place (like a basement or pantry) for up to 2–3 months. Avoid refrigeration—cold speeds up spoilage. Once cut, store the flesh in an airtight container in the fridge for 3–5 days. For longer storage, roast and freeze the strands!
Are there any easy alternatives if spaghetti squash is hard to grow?
If spaghetti squash proves tricky, try these low-maintenance alternatives:
- Butternut squash: Cold-hardy, prolific, and great for roasting.
- Acorn squash: Compact vines, sweet flavor, and stores well.
- Zucchini: Fast-growing, versatile, and beginner-friendly.
- Pumpkin: Similar care but often more resilient in cooler climates.
Wrapping up and next steps
Growing a spaghetti squash plant is a rewarding journey that brings sunshine, flavor, and a bountiful harvest to your table! With the right soil, sunlight, and care, you’ll soon be enjoying that magical, stringy flesh that tastes like nature’s pasta. 🌱
Ready to dive in? Start by gathering your supplies, then follow the steps to plant and nurture your squash. Once your plants are thriving, share your progress with fellow gardeners or experiment with new recipes—your spaghetti squash will thank you! Happy planting! 🌞