
Planting
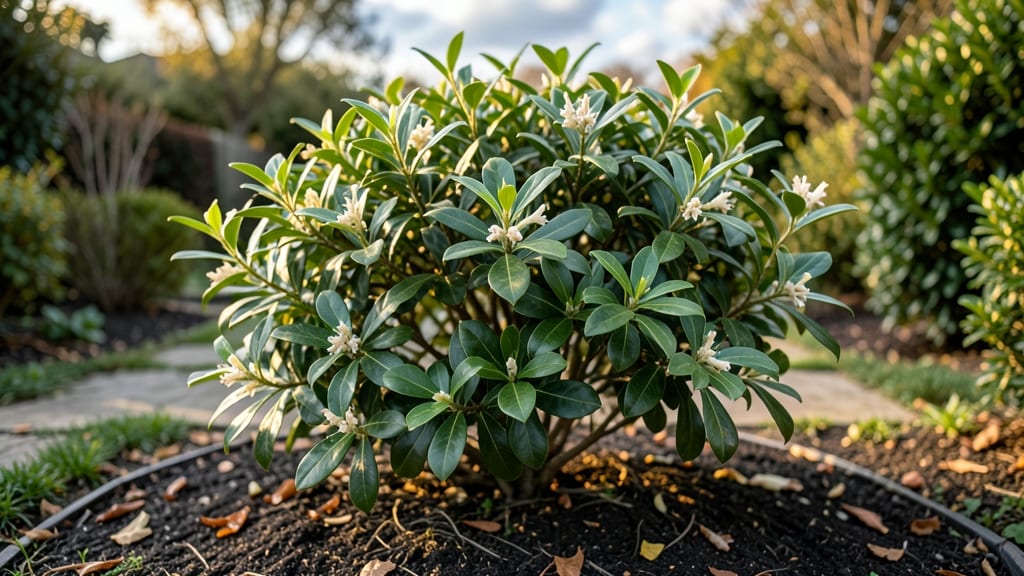
The care of a tea olive plant thrives with the right balance of light and pruning—fragrant blooms and glossy leaves are your reward for getting it right. 🌿 I learned the hard way that neglecting pruning leads to leggy, sparse growth, but once I mastered the timing and technique, my plant transformed into a lush, blooming shrub that fills the air with sweet perfume.
These plants crave bright, indirect light—think morning sun with afternoon shade, especially in hot climates. Too much direct sun scorches the leaves, while too little light stunts growth.
The key is observing how your plant responds: if the leaves yellow, it’s getting too much sun; if growth slows, it needs more light. Pruning isn’t just about shaping—it’s about encouraging new growth and blooms. Cut back leggy stems in early spring, and thin crowded branches to improve airflow.
Avoid heavy pruning in fall, as this can stress the plant before winter. With the right approach, you’ll see fresh, vibrant foliage and clusters of tiny white flowers by late spring. Seasonal adjustments make all the difference. In winter, reduce watering but keep the soil slightly moist.
In summer, mulch to retain moisture and protect roots from heat. The payoff? A tea olive that stays compact, healthy, and bursting with fragrance for years to come.
📚 In This Guide
- What you need
- Instructions
- Tips and common mistakes
- Wrapping up and next steps
What you need
- ● Tea olive plant: A healthy, nursery-grown Osmanthus fragrans (choose either dwarf or standard varieties based on space).
- ● Well-draining potting mix: 2–3 gallons of a blend like cactus/succulent mix (60%) + perlite or pumice (30%) + compost (10%).
- ● Pot or container: For dwarf varieties: 10–15 gallon pot with drainage holes.
- ● For standard varieties: 20+ gallon container or in-ground planting.
- ● Pruning tools: Sharp bypass pruners (for clean cuts).
- ● Sterilized shears or loppers (for thicker branches).
- ● Mulch: 1–2 inches of pine bark or shredded leaves (to retain moisture and regulate soil temp).
- ● Grow lights: LED full-spectrum bulb (for indoor plants needing supplemental light).
- ● Soil moisture meter: To check drainage and avoid overwatering.
- ● Organic fertilizer: Balanced 10-10-10 or fish emulsion (diluted to half-strength).
- ● Plant supports: Stakes or cages (for young plants to encourage upright growth).
- ● Neem oil or copper fungicide: For pest/disease prevention (especially in humid climates).
Step-by-Step guide to pruning and light management for tea olive plants
Here's how to keep your tea olive thriving with simple pruning and light tricks I've perfected over years.
☀️ Step 1: Position for Maximum Light Exposure
Tea olives need bright, indirect light—at least 6 hours daily—to maintain their glossy leaves and compact shape. Place yours near an east-facing window where morning sun warms the leaves without harsh afternoon glare. If you notice leaves stretching toward the light or turning pale, it's time to move the plant closer.
South-facing windows work too, but watch for leaf scorch—you'll see crispy brown edges as a warning sign. Rotate the pot a quarter turn weekly so all sides get even light exposure. This prevents the plant from growing lopsided, which I've seen happen when people forget to rotate their plants.
✂️ Step 2: Prune for Shape and Airflow
Prune in early spring before new growth begins, using clean, sharp pruning shears. Cut just above a leaf node where new shoots will emerge—this ensures the plant grows back fuller. Start by removing any dead or yellowing leaves first; they drain energy from healthy growth. I like to shape the plant into a rounded form by trimming back leggy stems to encourage bushier growth.
Never remove more than one-third of the plant's foliage—this can stress the tea olive and stunt its growth. After pruning, wipe down the shears with rubbing alcohol to prevent spreading any potential diseases between cuts. You'll notice new growth within 2-3 weeks—that's your reward for proper pruning.
🌱 Step 3: Encourage New Growth with Strategic Trimming
Focus on trimming the tips of new shoots to promote branching. When you see a shoot growing longer than others, pinch it back just above a set of leaves. This signals the plant to grow more side branches, creating that lush, full look. I do this every 4-6 weeks—it keeps the tea olive compact and prevents it from becoming too leggy.
Watch for water sprouts—those are the fast-growing, weak stems that shoot up from the base or leaf nodes. Remove these immediately; they drain energy from the plant and don't contribute to a fuller shape. You'll know you're doing it right when you see dense, healthy foliage filling out the plant's structure.
💧 Step 4: Adjust Care After Pruning
After a major pruning session, water the plant more frequently for the first 2 weeks—new growth needs extra moisture to establish roots. Check the soil daily during this time; it should stay lightly moist but never soggy. Overwatering now can lead to root rot, especially if the plant is still adjusting to its new shape.
Reduce fertilizer use by half for the first month after pruning. The plant is focusing its energy on regrowing leaves, not producing flowers or fruit. Once you see steady new growth, resume your regular feeding schedule. This is where many gardeners make mistakes—rushing to fertilize too soon and burning tender new leaves.
Tips & tricks for perfect tea olive plant care
A few simple tricks can transform your tea olive from struggling to stunning—here's what I've learned after years of trial and error.
Light Exposure Secret: That 6-hour daily light requirement is non-negotiable, but here's the thing: morning light (east-facing) is gentler than afternoon sun. If you notice leaves curling or turning yellow, it's not just about quantity—it's about quality. I've seen tea olives thrive in north-facing windows with supplemental grow lights during winter months when natural light dips below 6 hours. For best results, position your plant where it gets consistent light throughout the day, even if you need to rotate it between windows.
Pruning Precision: When you're shaping your tea olive in Step 2, focus on creating an open center that allows air to circulate. The one-third foliage rule is crucial—this prevents over-stressing the plant. I like to make my cuts at a 45-degree angle just above a leaf node, which helps water run off and reduces disease risk. And here's a pro move: after pruning, give your plant a light misting with water to help it recover faster from the shock of trimming.
New Growth Strategy: Those 4-6 week trimming intervals in Step 3 are your secret weapon for bushier growth. When you pinch back new shoots, you're essentially telling the plant to "branch out" instead of growing tall. Watch for those water sprouts—they're the fast-growing stems that appear at the base. Remove them immediately, as they compete with your desired growth. I've found that plants trimmed this way develop fuller shapes within just 8-10 weeks.
Post-Pruning Recovery: The 2-week watering adjustment is where many gardeners go wrong. Instead of just watering more frequently, I recommend checking soil moisture daily by sticking your finger about an inch into the soil. If it feels dry at that depth, water thoroughly until it drains from the bottom. The key is keeping the soil consistently moist but never soggy—this balance is what helps new growth establish properly.
Pro Tips for Tea Olive Plant Care
- A few simple tricks can transform your tea olive from struggling to stunning—here's what I've learned after years of trial and error.
- Light Exposure Secret: That 6-hour daily light requirement is non-negotiable, but here's the thing: morning light (east-facing) is gentler than afternoon sun.
- Pruning Precision: When you're shaping your tea olive in Step 2, focus on creating an open center that allows air to circulate.
Frequently asked questions
Got questions about keeping your tea olive plant thriving?
Here are answers to the most common queries—from pruning puzzles to light dilemmas—so you can grow a lush, healthy plant with ease!
How often should I prune my tea olive plant?
Prune your tea olive 2-3 times a year, focusing on shaping in early spring (before new growth) and light trimming after flowering. Avoid heavy pruning in winter, as it stresses the plant. Use clean, sharp shears to make cuts just above leaf nodes for a tidy, bushy shape!
Can tea olive plants grow in low-light conditions?
While tea olives tolerate partial shade, they thrive best in bright, indirect light (4-6 hours daily). If leaves yellow or growth slows, move it closer to a window or supplement with a grow light. South- or west-facing spots are ideal for optimal health and blooms!
Why are my tea olive leaves turning yellow?
Yellow leaves often signal overwatering, underwatering, or root rot. Check soil moisture—it should stay lightly damp but never soggy. Ensure the pot has drainage holes and repot if roots are crowded. Brown edges? It’s likely underwatering; mushy stems? Time to reduce water and improve airflow!
Is tea olive toxic to pets or humans?
Great news! Tea olives (Osmanthus fragrans) are non-toxic to cats, dogs, and humans. You can safely grow them indoors or outdoors without worrying about accidental ingestion. However, always monitor pets for unusual behavior after chewing plants!
How do I protect my tea olive plant in winter?
Tea olives are semi-evergreen and handle light frost, but young plants or cold snaps (<20°F) need protection. Move potted plants indoors or wrap them in burlap. For outdoor plants, mulch the base and group them with other plants to share warmth. Avoid pruning until spring!
Wrapping up and next steps
Caring for your tea olive plant is all about patience and consistency—just like nurturing a thriving friendship! 🌱 With the right pruning techniques and light exposure, you’ll soon be rewarded with lush, vibrant growth. Remember, well-timed trims and bright, indirect light are your secret weapons for a happy, healthy plant.
Ready to see your tea olive thrive? Start small—try one adjustment at a time, observe how your plant responds, and enjoy the journey! Whether you’re a beginner or a seasoned gardener, every little effort makes a difference. Happy planting! 🌿